Todo Tasks Deployment Single EC2

Today we will be deploying the Todo Tasks API to a single AWS EC2.

You can find the source code to the todo-tasks-api solution on gitlab. Or you can use your personal Todo Tasks API, however it needs to be in a stable state.

Our goal is to take this completed API and to deploy it, making it accessible to anyone via the internet.

Recall from our lecture the major deployment categories:

  • Build artifacts
  • Deliver artifacts
  • Create server
  • Configure server

Each of these categories may have multiple sub steps.

Build Artifacts

After changing into your project directory you will need to engage the Gradle bootJar command.

./gradlew bootJar

You will see that this generated a new JAR file: build/libs/todo-0.0.1-SNAPSHOT.jar.

It includes all of our source code, and the library code we depend on.

Deliver Artifacts

We will need to move this JAR file that was just created to a location that our server can access. In this case we will be moving it to S3, Amazon’s Simple Storage Service. Our Virtual Machine will be granted access to the files in this S3 bucket.

We will need to:

  • create a suitable bucket
  • copy our JAR file to the bucket

Create Bucket for Artifacts

From your terminal we will need to access the AWS CLI to create a bucket.

aws s3 mb s3://lc-gisdevops-c7-<your-name>-artifacts

You can check that it created successfully by listing all the buckets and checking for your new bucket name:

aws s3 ls

Now we need to move our JAR file and our docker-compose.yml.

Deliver Artifacts to bucket

Change into your project directory.

Then copy the docker-compose.yml and JAR file to your new bucket.

aws s3 cp docker-compose.yml s3://lc-gisdevops-c7-<your-name>-artifacts
aws s3 cp build/libs/todo-0.0.1-SNAPSHOT.jar s3://lc-gisdevops-c7-<your-name>-artifacts/todo-app.jar

You can verify that both of these files were uploaded by listing the contents of your bucket:

aws s3 ls s3://lc-gisdevops-c7-<your-name>-artifacts

You should see two files docker-compose.yml and todo-app.jar.

note

Take note that the second aws s3 cp command changes the name of the copied file. It was originally named todo-0.0.1-SNAPSHOT.jar and it is renamed to ``todo-app.jar as it is written to the S3 bucket.

Create Server

Our next step is to create our server. However, a server cannot live in isolation. It must be attached to a Virtual Network so internet access can be granted to the server.

Before we can create our server, we will need to create a Virtual Network.

Create a Virtual Network (VPC)

We will need to create a new Virtual Public Cloud, which is our virtual network.

From the AWS Web console navigate to the VPC homepage. The easiest way to do this is to use the search bar.

aws search

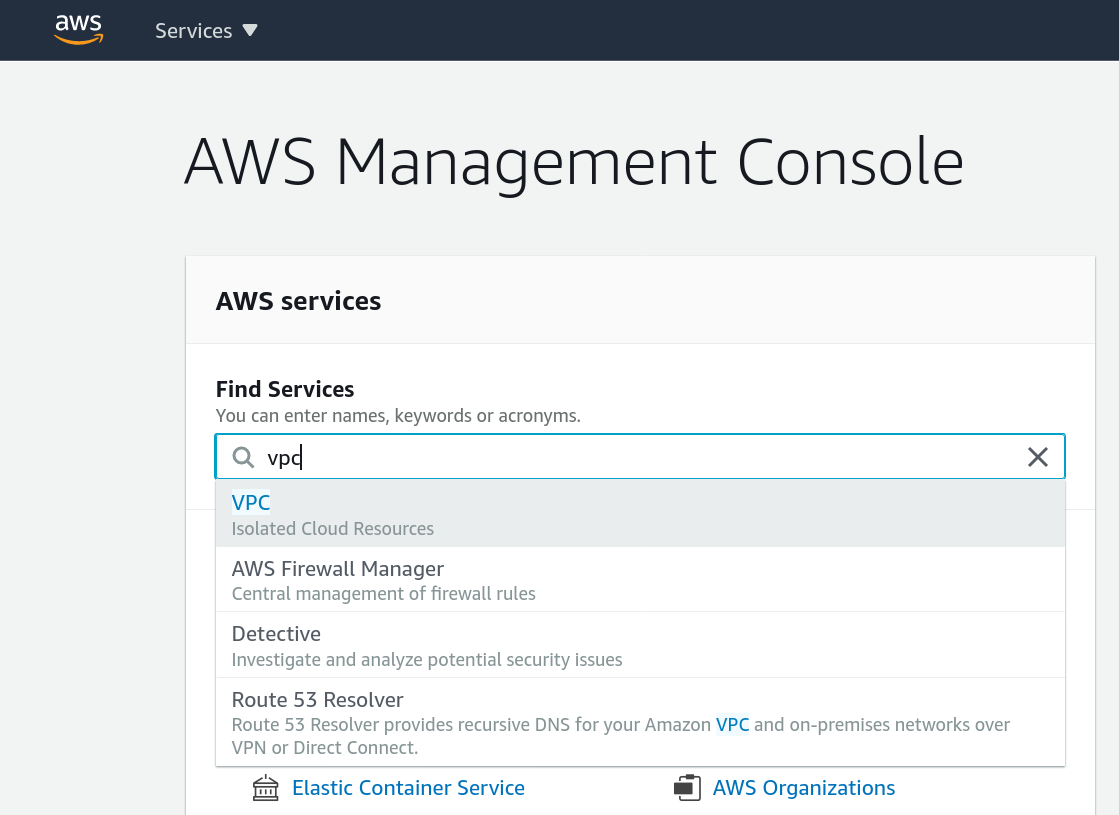
This will bring you to the VPC home page:

vpc home

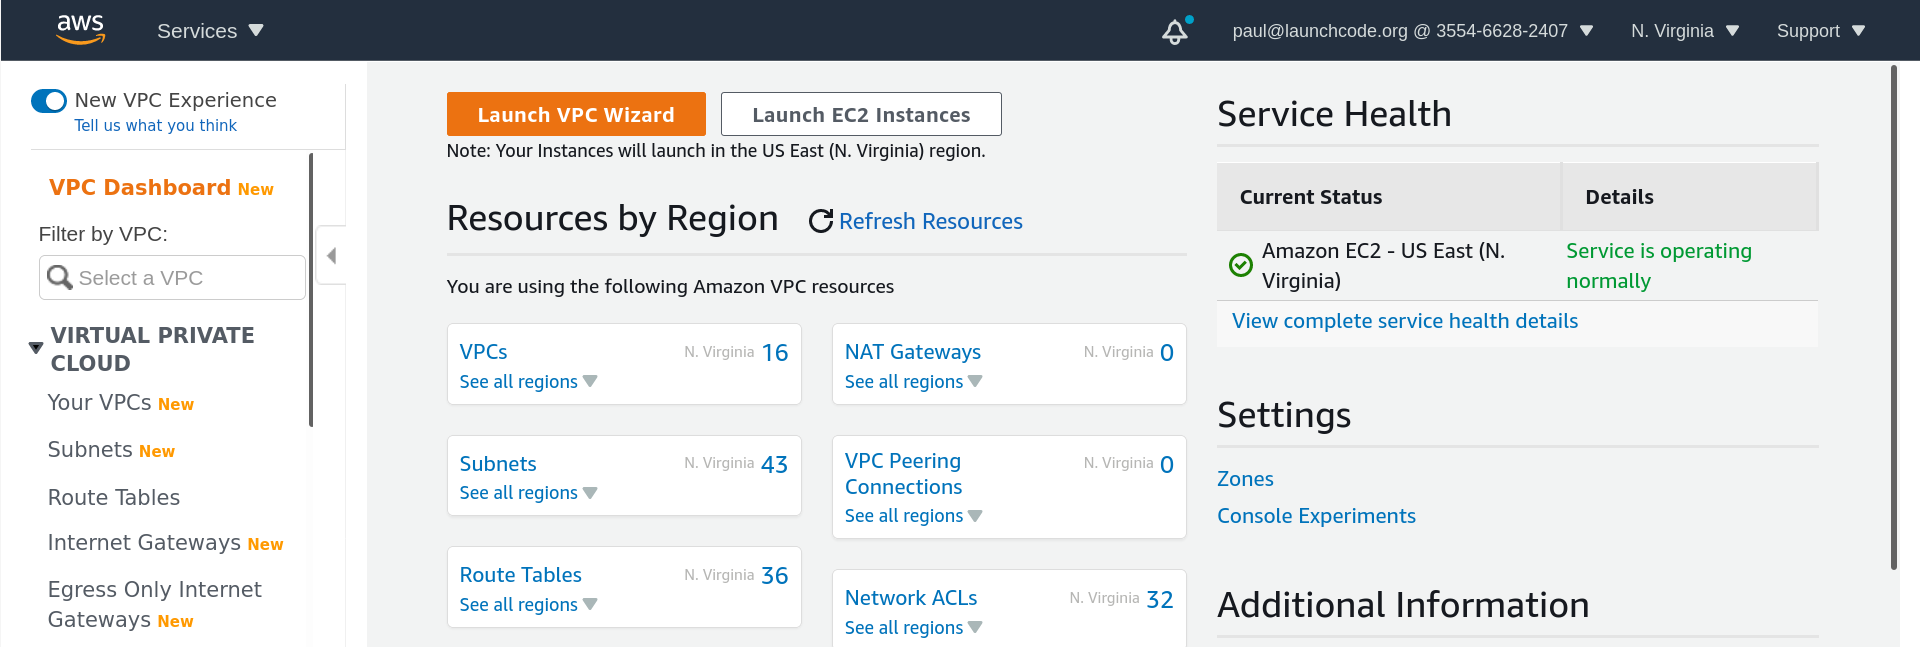
From here click the orange button Launch VPC Wizard at the top of the page. This takes you to the VPC Wizard, which is one of the fastest ways to create a new VPC. We will be selecting the default option which is VPC with a Single Public Subnet.

vpc wizard

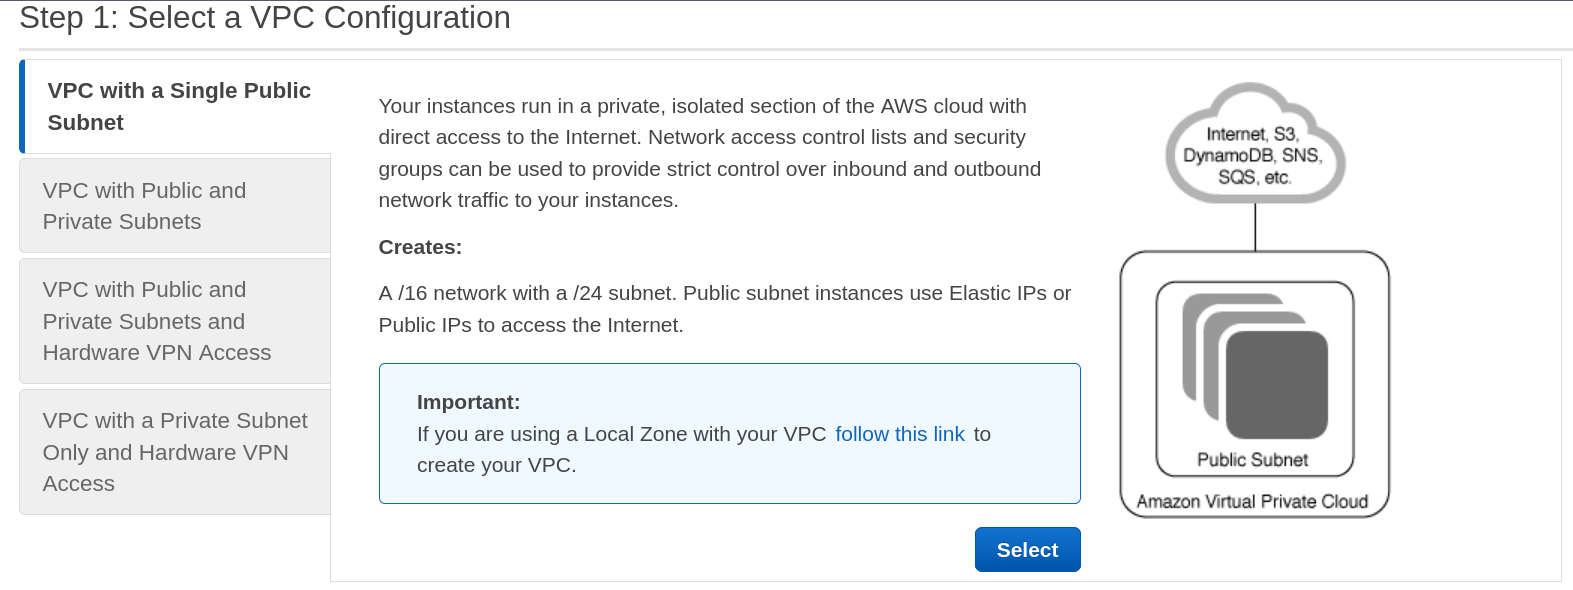
After selecting VPC with a Single Public Subnet click Select.

This takes us to the VPC creation screen, which we will mainly leave as defaults:
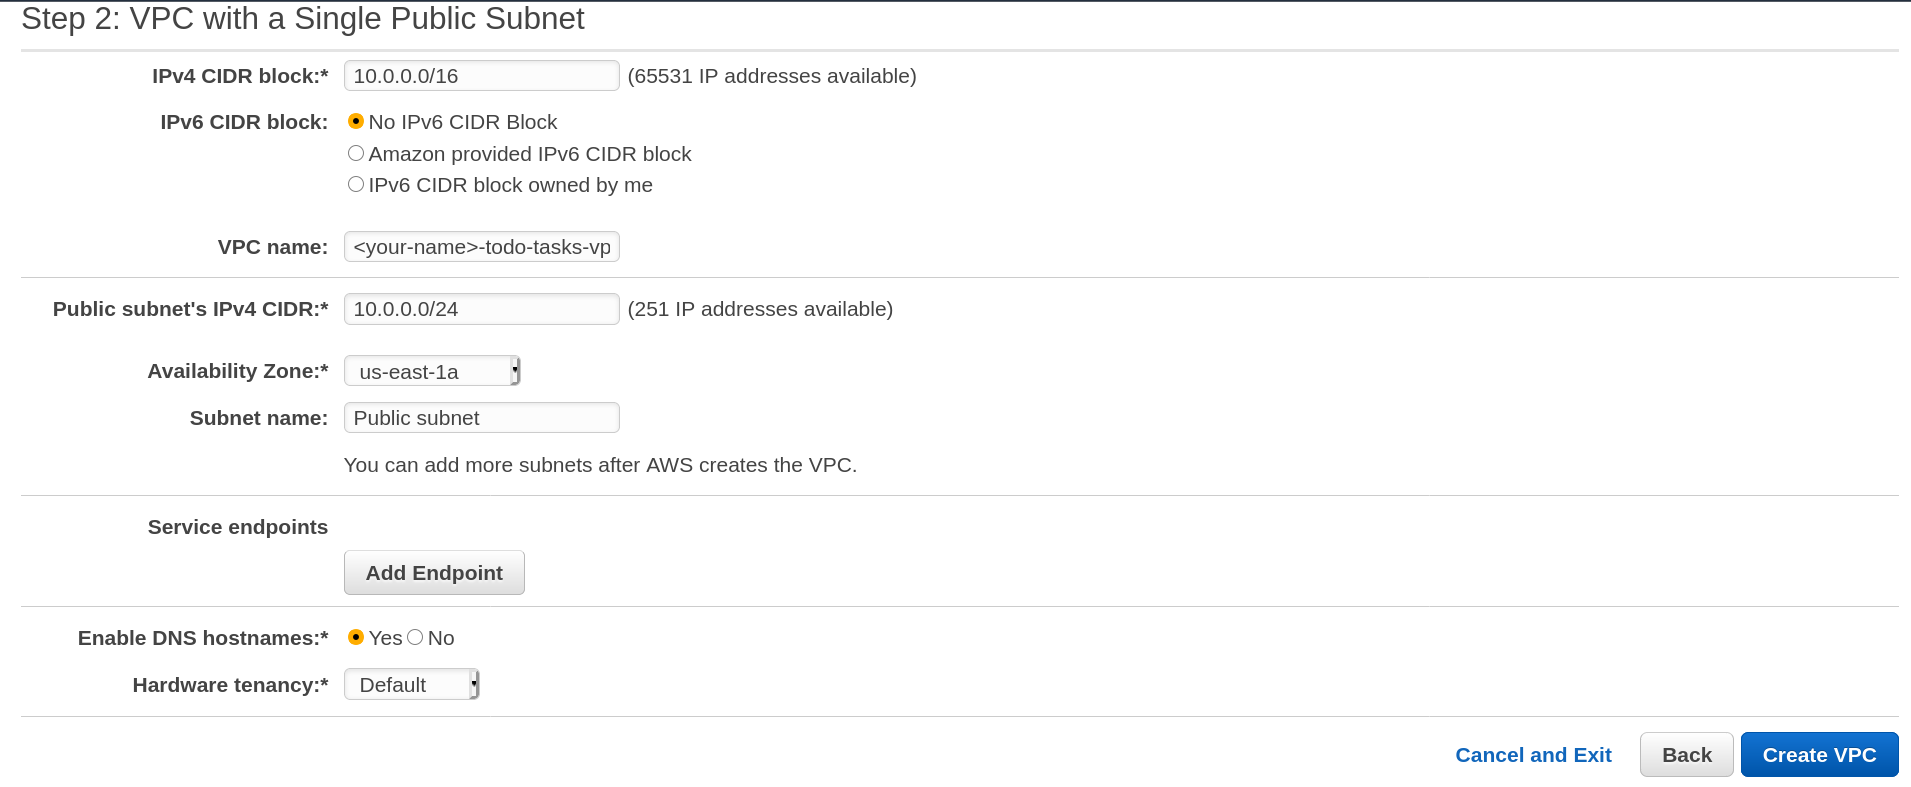
vpc form

We need to set:

  • VPC name: <your-name>-todo-tasks-vpc
  • Availability zone: us-east-1a

After filling in this information we will click Create VPC. After a few seconds your new VPC will be ready for action. Save the VPC name for the next step.

Create a Virtual Machine (EC2)

Navigate to the EC2 page. From the menu at the top of your screen click Services and select EC2 or use the search bar. This will take you to the EC2 home page:

ec2 home

We want to create a new EC2 instance so click the Instances option on the left hand menu:

instance option

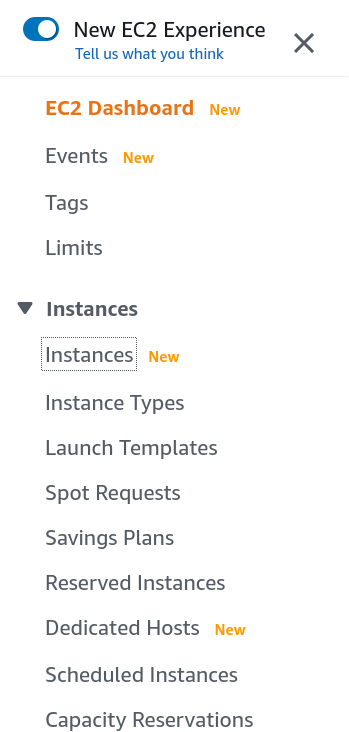
This will show you the list of all the instances in the us-east-1 region that are associated with this account.

note

All of our accounts are under the LaunchCode Devops account so you will be able to see all of the instances created by the instructors and your fellow students. We thank you for not touching any instances that are not yours.

all instances

From the screen with all the instances click the orange Launch instances button in the top right hand corner of the screen.

This takes you to a wizard with lots of options for configuring this EC2 instance:

ec2 wizard 1

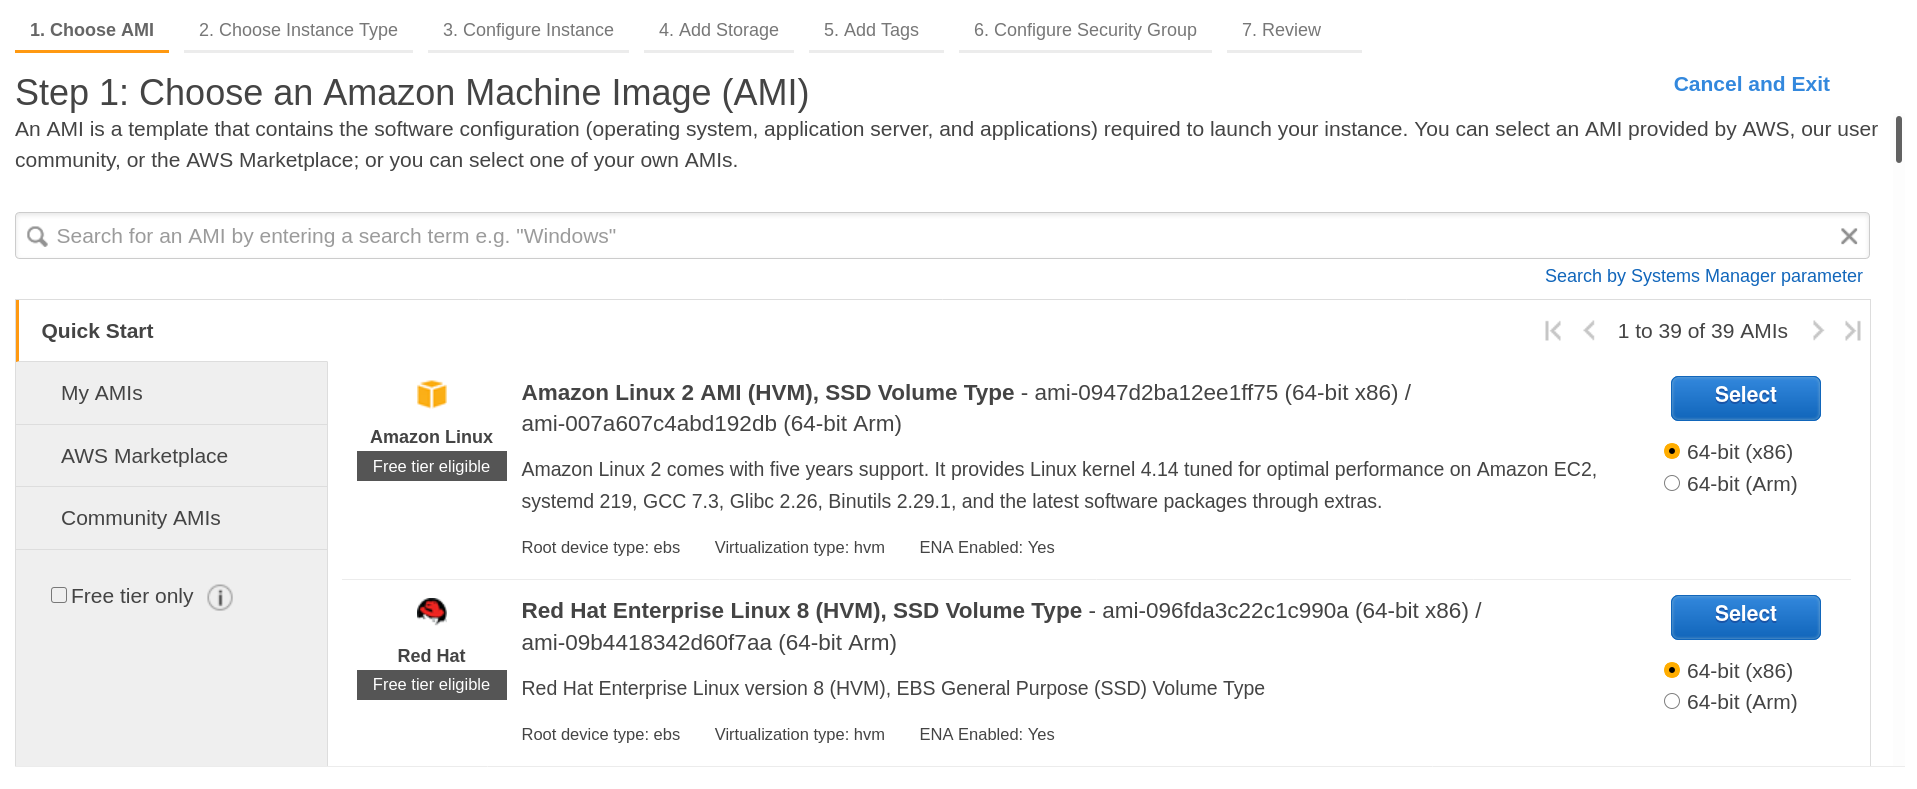
For now we will be using the AWS provided Ubuntu 18.04 image. Search for ubuntu in the search bar to bring it up:

ubuntu search

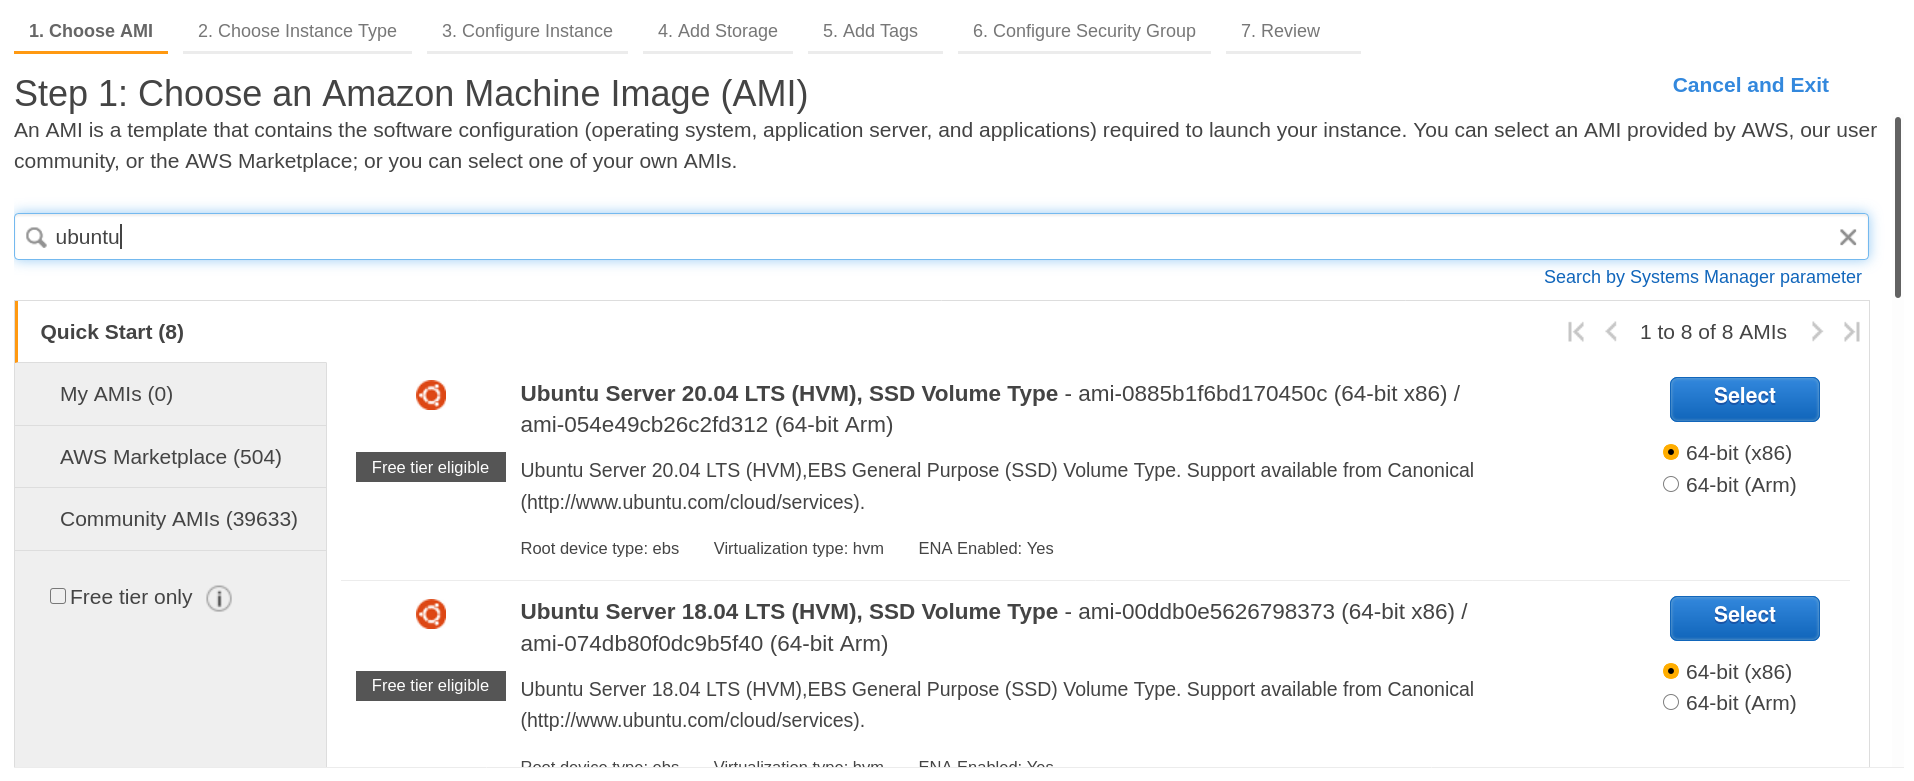
Select the option that matches Ubuntu Server 18.04 LTS (HVM), SSD Volume Type make sure it is the free tier eligible image.

After selecting the image you will be taken to the second screen of the EC2 wizard:

ec2 wizard 2

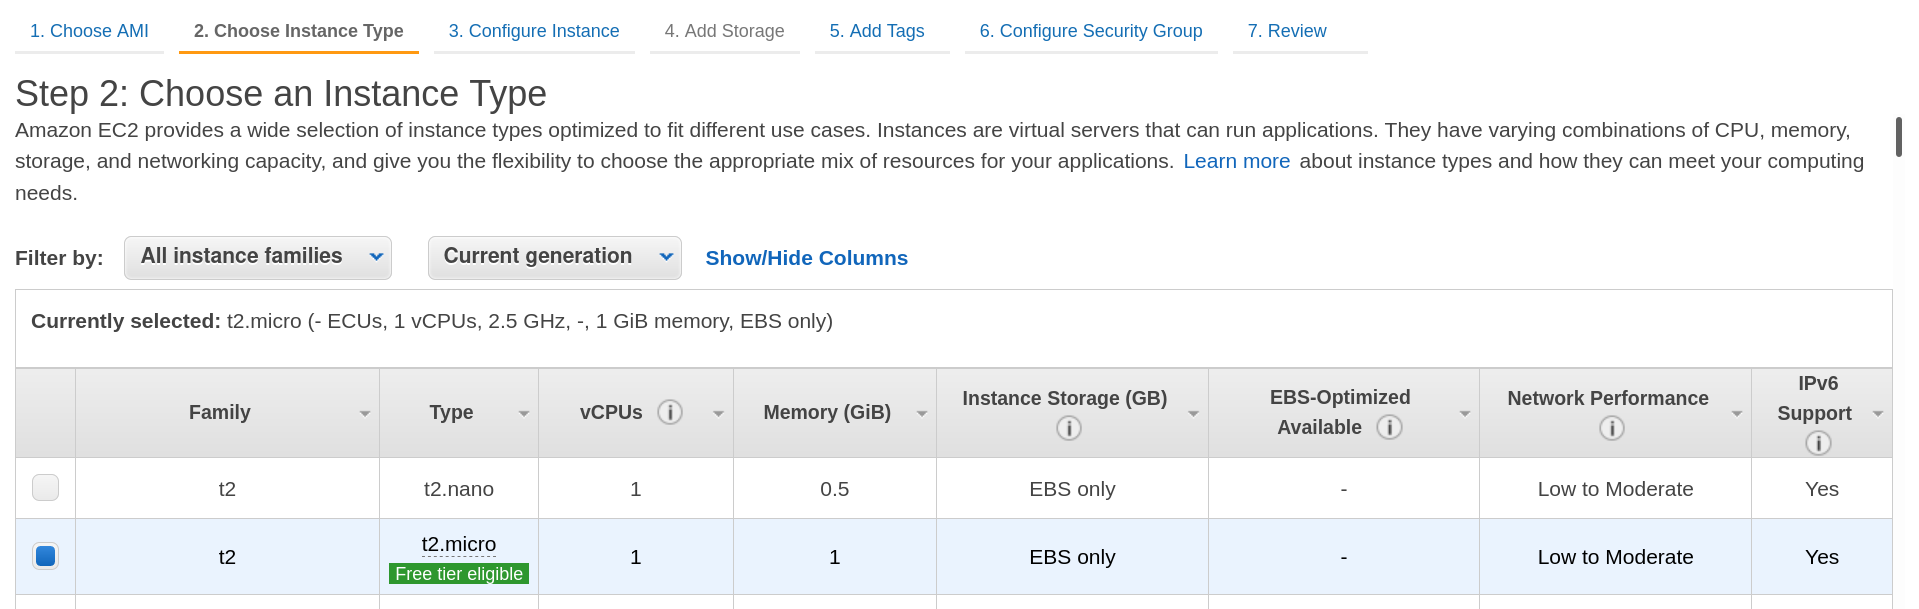
We will be selecting the default EC2 type: t2.micro this should be a powerful enough machine to run our API and database. Take note that this is where the CPU and RAM is configured. Click Next Configure Instance Details.

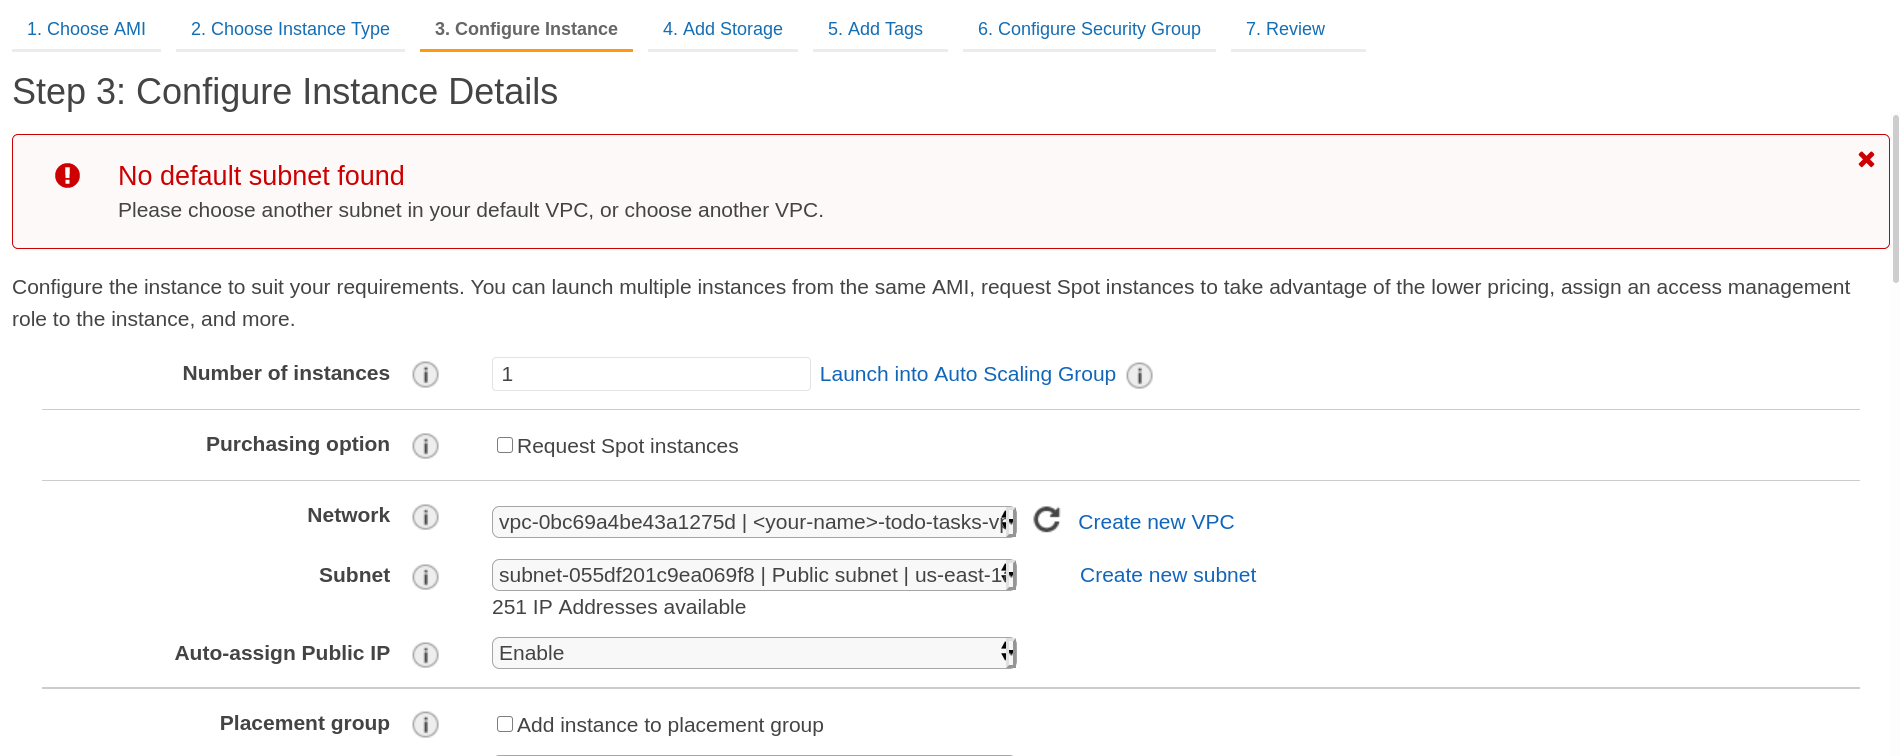
This third section of the wizard is where we will set the most aspects of our VM.

We will leave everything default with the exception of:

  • Network: <your-name>-todo-tasks-vpc
  • Subnet: Public subnet
  • Auto-assign Public IP: enable
  • IAM Role: EC2_to_S3_readonly
ec2 wizard 3 ec2 wizard 3.2

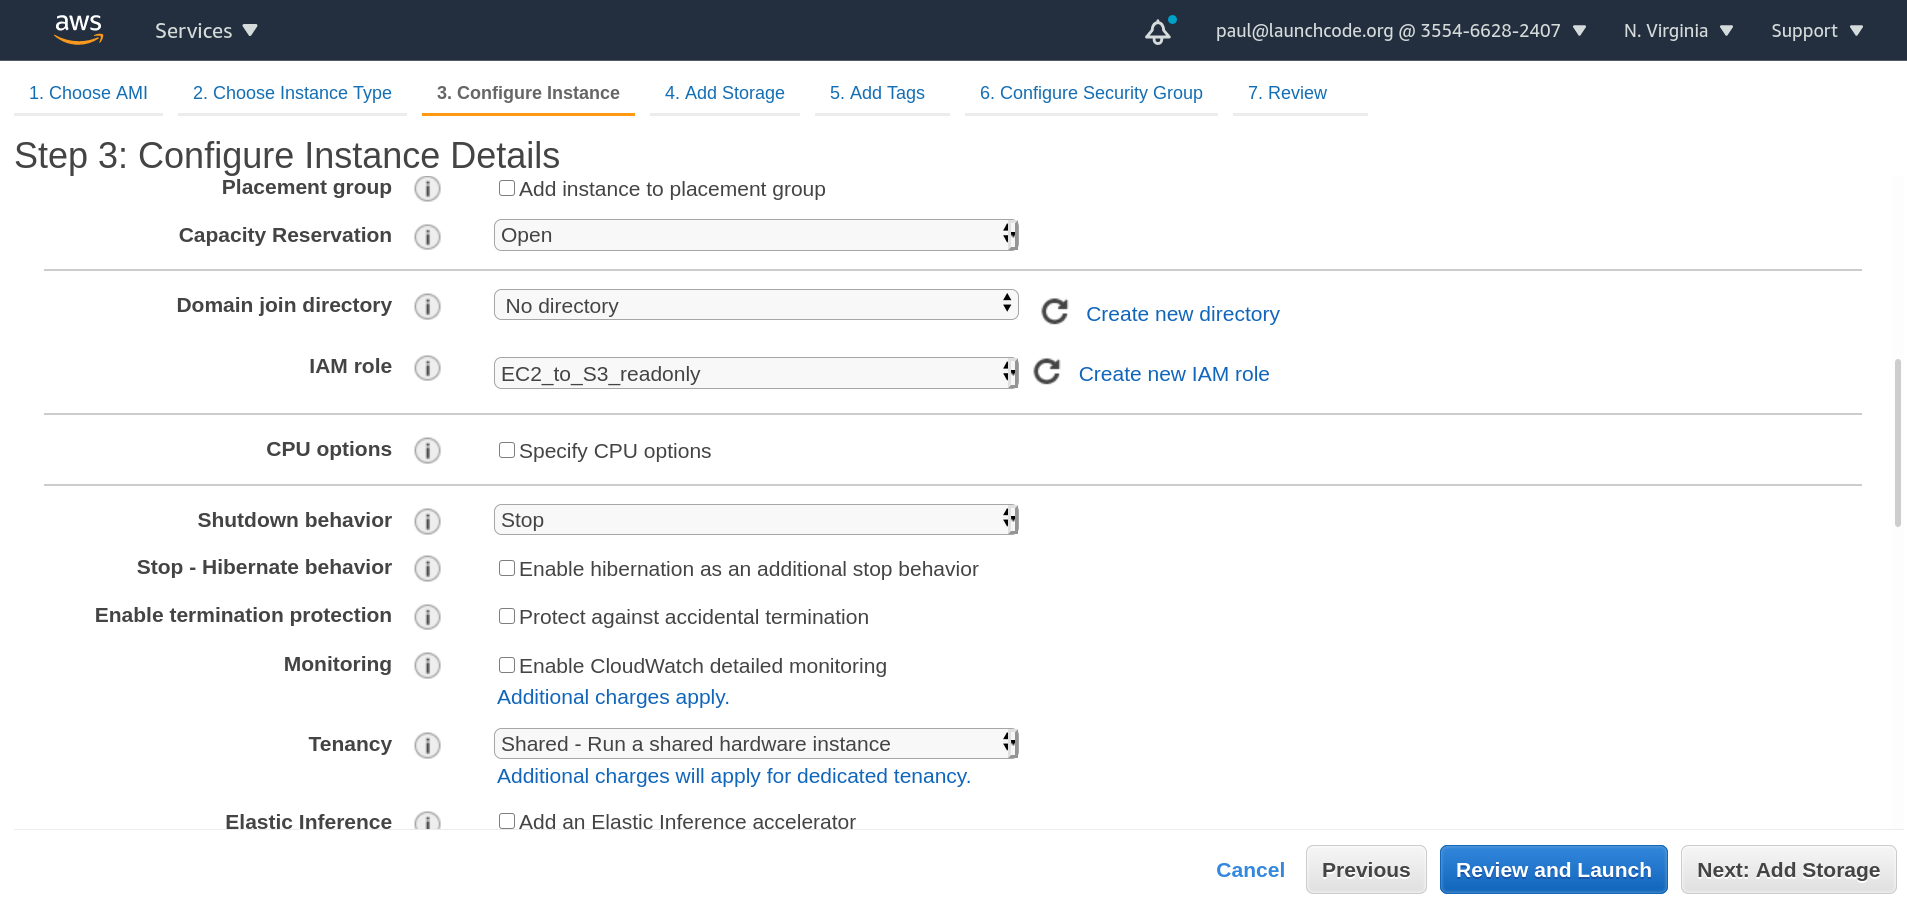
After filling out the necessary information navigate to the 5th wizard screen Add Tags:

ec2 wizard 5

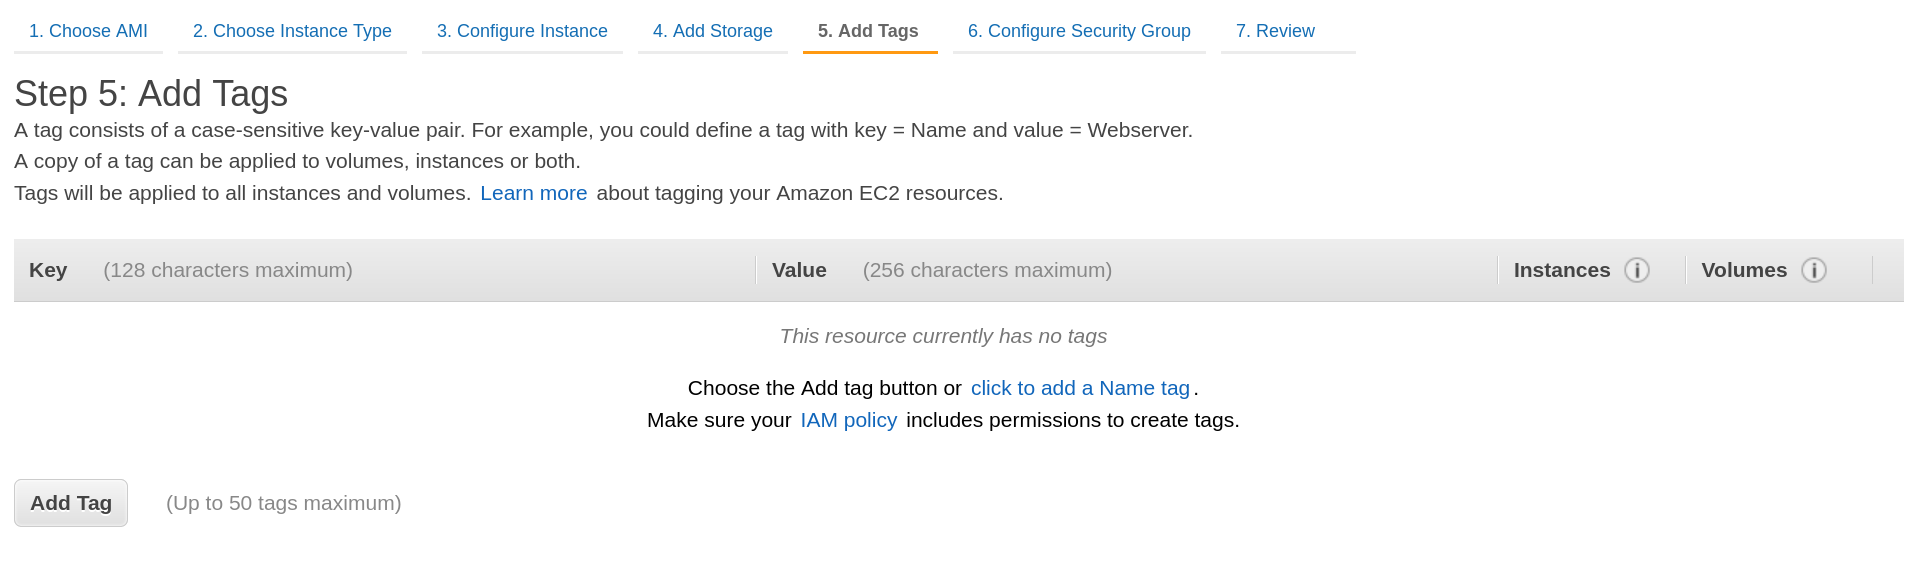
Click the Add Tag button and add a Key Value pair matching:

  • Key: <your-name>-todo-tasks-ec2
  • Value: <your-name> Todo Tasks API EC2
ec2 wizard 5.2

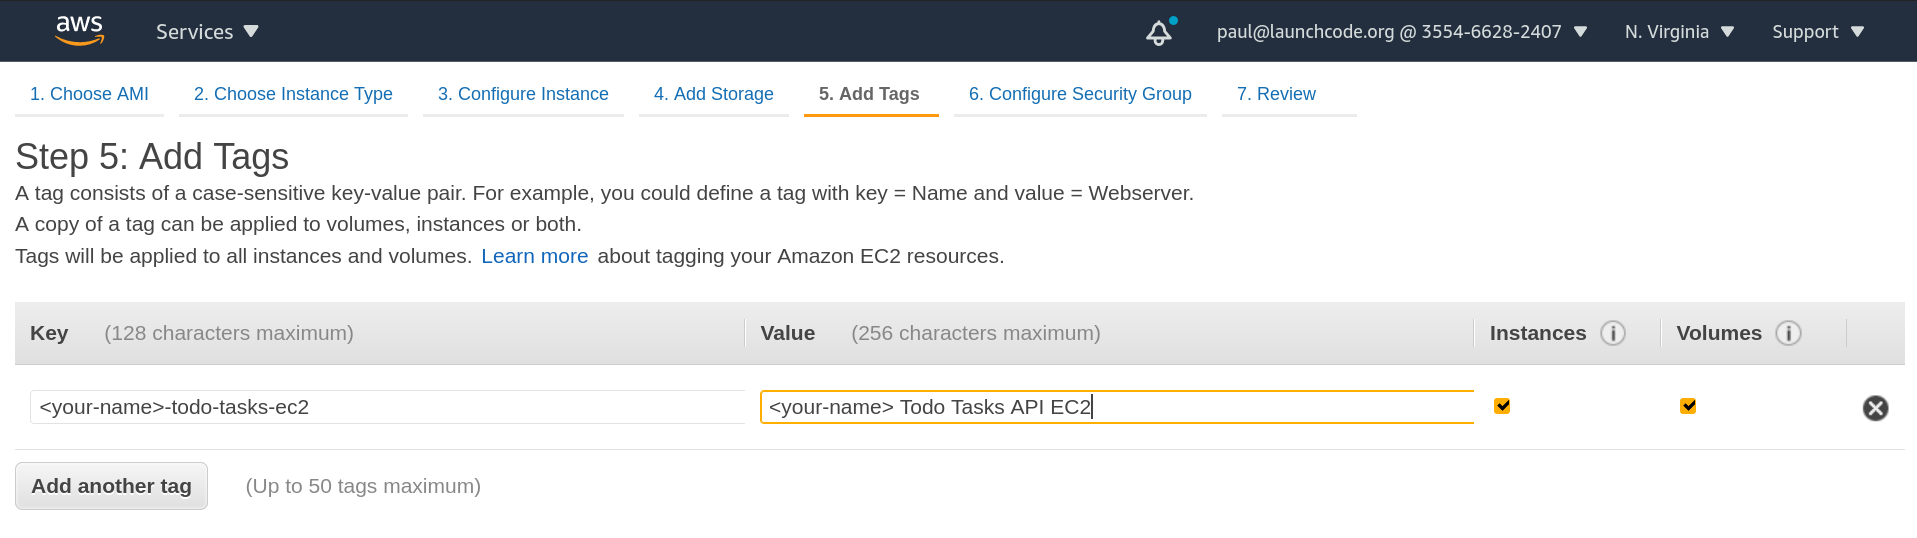
After adding this new tag, move to the next section Configure Security Group.

Name the security group, make sure port 22 is only open to your IP address, and open up port 80 to anywhere. Look at the following picture for guidance:

ec2 wizard 6

Finally click Review and Launch. This will take you to the review screen. Take a second to make sure you filled everything out properly and then click Launch.

Before your EC2 will launch you will need to create an SSH key pair if you haven’t already. If you have already created a key associated with your AWS account simply use that one. If not follow the on screen prompt to create one and move it to your ~/.ssh/ directory.

Finally after reviewing, and choosing a valid key pair click Launch it will provision your EC2 instance.

Click the View Instance button to be taken to the EC2 instances home page. From here search for the tag you created earlier and your EC2 should pop up.

ec2 tag search

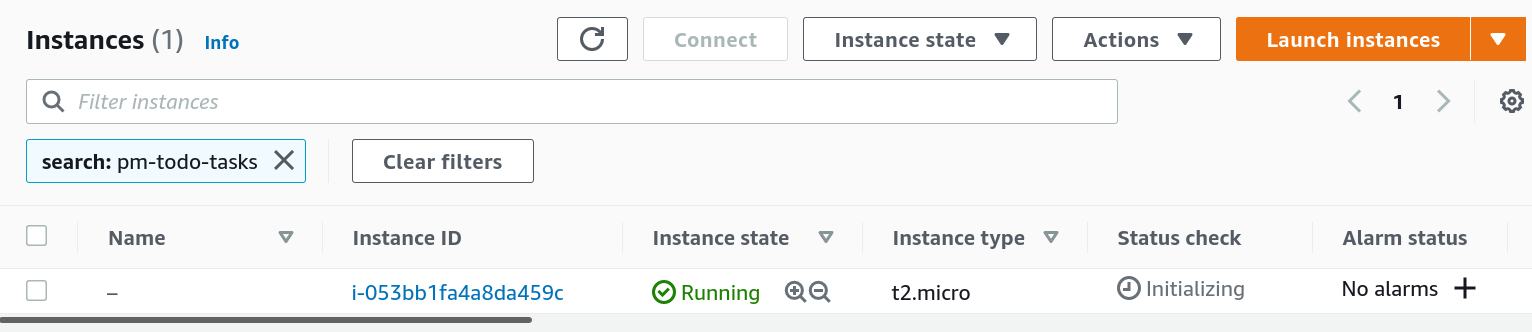
Click the instance ID hyperlink to be taken to your EC2’s homepage.

ec2 instance homepage

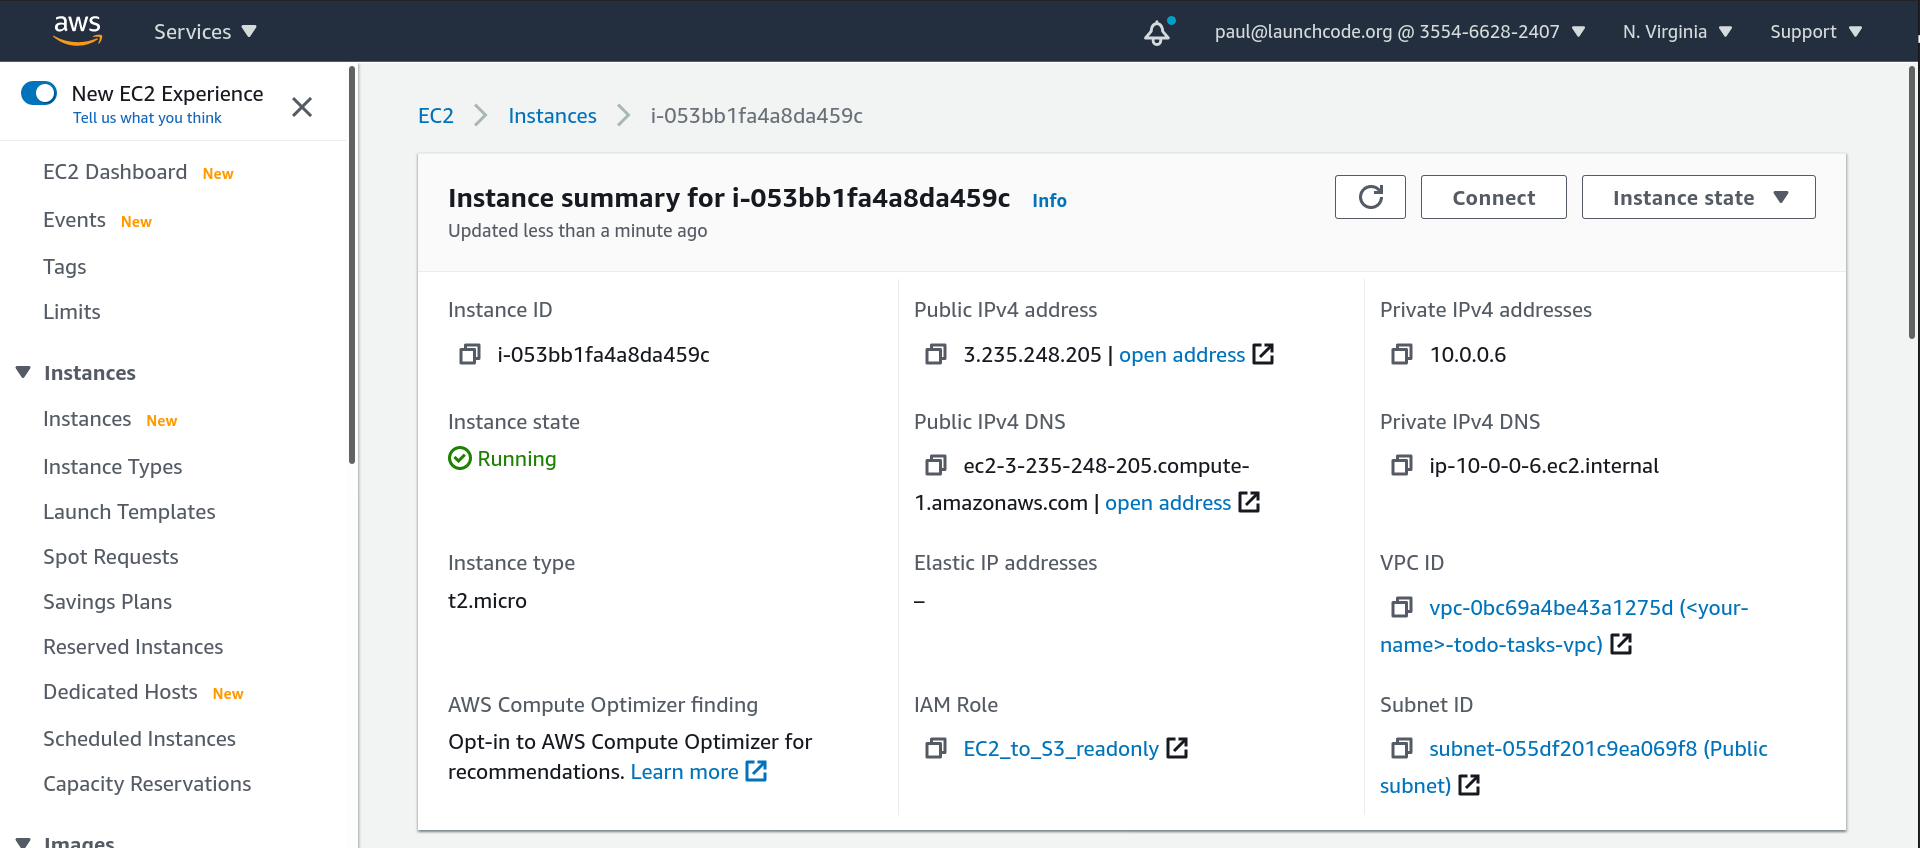
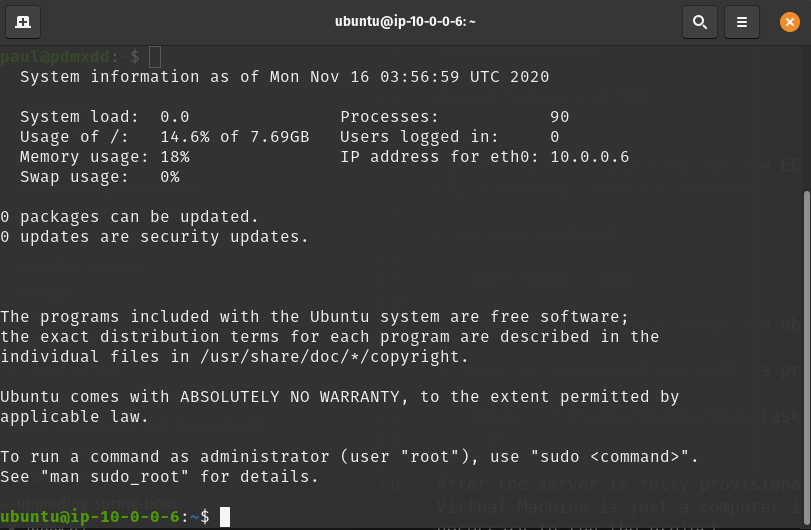
Take note of the public IPv4 address as we will be using it to gain access to our EC2.

Configure Server

Access Server via SSH

First step is to SSH into our new EC2 instance. Using the public IP address from the last step we will be accessing the EC2’s terminal from our machine.

From your terminal:

ssh -i ~/.ssh/<your-name>.pem ubuntu@<ec2-public-ip>

If this is successful you will be prompted with a warning since you are connecting to a remote machine for the first time:

ec2 ssh

Type in yes and hit enter. This will add the remote server to your laptop’s list of trusted servers and you will be let into the EC2:

ec2 ssh success

From this machine we will:

  • install our dependencies
  • access build artifacts via S3
  • setup docker database
  • run application

Install Dependencies

We will be using the Ubuntu Aptitude Package Manager to install our dependencies.

We have a lot to install so let’s get started.

AWS CLI

sudo apt install awscli -y

Verify it worked with:

aws --version

Docker

sudo apt install apt-transport-https ca-certificates curl software-properties-common -y
curl -fsSL https://download.docker.com/linux/ubuntu/gpg | sudo apt-key add -
sudo add-apt-repository "deb [arch=amd64] https://download.docker.com/linux/ubuntu focal stable"
sudo apt update -y
apt-cache policy docker-ce
sudo apt install docker-ce -y

Verify it worked with:

docker --version

Docker-Compose

sudo curl -L "https://github.com/docker/compose/releases/download/1.26.0/docker-compose-$(uname -s)-$(uname -m)" -o /usr/local/bin/docker-compose
sudo chmod +x /usr/local/bin/docker-compose

Verify it worked with:

docker-compose --version

Java Run time 11

sudo apt install default-jre -y

Verify it worked with:

java --version

Now that everything is installed, let’s access our S3 bucket to grab the todo-app.jar and docker-compose.yml files.

Get Artifacts

aws s3 cp s3://lc-gisdevops-c7-paul-artifacts/todo-app.jar .
aws s3 cp s3://lc-gisdevops-c7-paul-artifacts/docker-compose.yml .

Setup Database

sudo docker-compose up -d

Run Application

sudo java -jar todo-app.jar --DB_HOST=localhost --DB_PORT=5444 --DB_NAME=todo --DB_USER=todo_user --DB_PASS=todopass --APP_PORT=80

After your application starts up (you should see the familiar tom cat logs) your application will be available on port 80 at your public ip address.

To try it out from your local machine:

curl <public-ip-address>/todos

Try out all the endpoints with curl:

curl -X POST <public-ip-address>/todos -H 'Content-Type: application/json' -d '{"text": "clean the kitchen"}'
curl <public-ip-address>/todos
curl <public-ip-address>/todos/1
curl <public-ip-address>/todos/1/tasks
curl -X POST <public-ip-address>/todos/1/tasks -H 'Content-Type: application/json' -d '{"title": "unload dishwasher"}'
curl <public-ip-address>/todos/1/tasks

Congrats on deploying your first API! We will continue to build on this throughout the remaining AWS lessons. We took some short cuts, and aren’t following some best practices, but we will get to that later. For now revel at your newfound operation powers!

Review

We covered a lot of ground in this walkthrough, but they can be defined in the following categories:

  • Build artifacts
  • Deliver artifacts
  • Create server
  • Configure server

These steps are the same across CSPs, different tech stacks and different applications. The steps within the categories almost always changed based on the needs of your specific deployment.