20.9. Styling Forms
The forms we created in this chapter look pretty bland, since we stuck with plain HTML. For example:
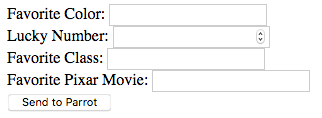
Visually, the form needs some work. First, the input fields don’t line up evenly. They don’t have to, but aligning them makes our form look more professional. Next, it would be nice to put some space between the boxes to keep them from pushing right up against each other. Finally, the text is pretty plain, and the button blends into the background.
Vanilla is a great ice cream flavor, but vanilla HTML makes a pretty weak web form. We want visitors to our site to have a good experience, and presenting an attractive page is a key part of this. Here are a few tips to keep in mind when coding a form. None of these items are required, but each one improves a user’s experience with our work.
Include a short heading that identifies the purpose of the form.
Place only one input element on each line of the form. Vertically stacked fields are easier to navigate than side-by-side ones.
For text inputs, try to keep the width of the boxes the same. Also, have the fields line up with each other.
The part of the page that belongs to the form should be clear. Use shading or a border to separate the form from the other content on the page.
Break longer forms into multiple sections. Each section should deal with related information. For example, name and email would go in one section, while options for a lunch order would go in another.
The user shouldn’t need to zoom in. Keep the font size large enough to easily read. (Hint: If your parent or teacher needs to squint and lean closer to the screen, bump up your font size).
Fortunately, we can meet these guidelines by applying some CSS style rules!
20.9.1. Add CSS
Note
One thing to keep in mind as we style our forms is that label,
input, select, textarea, and button are all
inline elements. Even if we put them on
separate lines in our HTML code, they will appear in the same line of our
webpage.
Return to the main branch of your forms_chapter repository. Save and
commit any work, then use git checkout -b to make a new branch called
form-style.
Paste in this starter code for the form element:
10 11 12 13 14 15 16 17 | <form method="POST">
<h2>A Few Of My Favorite Things</h2>
<label>Favorite Color: <input type="text" name="color"/></label><br>
<label>Lucky Number: <input type="number" name="luck-num"/></label><br>
<label>Favorite Class: <input type="text" name="fav-class"/></label><br>
<label>Favorite Pixar Movie: <input type="text" name="best-pix"/></label><br>
<button>Submit</button>
</form>
|
Save your work, then open the index.html file in your browser.
20.9.1.1. Margins
Let’s start by putting some space between the inputs in our form. We do this with the margin property. Margin sets the amount of whitespace that surrounds an element. The larger its value, the more spaced out two neighboring elements will be.
Open the
style.csstab in the editor below. Note how themarginproperty is assigned inside the element selector. Experiment with changing the number of pixels (px) assigned.What happens to the form if you add a
labelselector that also includes amarginvalue?
Once you finish exploring margin, open Visual Studio Code and paste the CSS
code into your local style.css file. Be sure to refresh the page in your
browser to see how it looks.
20.9.1.2. Field Size
We can change the size of an input field with the width property. The value
assigned can be in pixels or a percentage. Using a percentage is recommended,
since this changes the field size to always fit within a given space.
Example
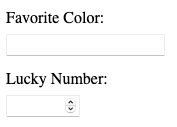
Resize your browser window to see how these two fields respond:
Note that the input field set at 50% always stretches halfway across
this Example box, no matter how small we make the window. The 600px box
remains the same size.
In the editor above, add a
widthproperty to theinputselector. Experiment by assigning differentpxand%values to the property.What about the
type="number"input? That field doesn’t need to be as large as the others. With CSS we can either add a class to set the width, or we can try out a new technique. Add this to the CSS code in the editor:input[type=number] { width: 10%; }
input[type=number]sets the style rules forinputelements that have thetype="number"attribute. Since we don’t include amarginproperty, the number type uses the value set in the otherinputselector.
Once you finish exploring width, paste the CSS code into your local
style.css file. Save and commit your work.
20.9.1.3. Button Style
Note that the HTML form uses <button> tags for Send to Parrot instead of
<input>. This lets us separate the styles for the submit button vs. the
other input fields.
In the editor below, open the style.css tab and play around with the
properties in the button selector. What does each property do? In
particular, how is padding different from margin?
Once you’ve designed a button you like, paste the CSS code into your local
style.css file. Save and commit your work.
20.9.1.4. Alignment
Right now, the edges of the input fields do not line up because their labels are different lengths. There are lots of ways to address this, but one simple fix is to put the labels and input fields on different lines.
It’s not fancy, but it’s quick and easy.
By default, label and input elements start out aligned on the left
side of the screen. As long as they have the same margin value, they should
line up nicely.
In VS Code, update your HTML code to align the input fields how you like. For
an added amount of control, you can add section elements inside the form to
help align the content.
Finally, include a form element inside styles.css to add a few final
touches, like a background color or border.
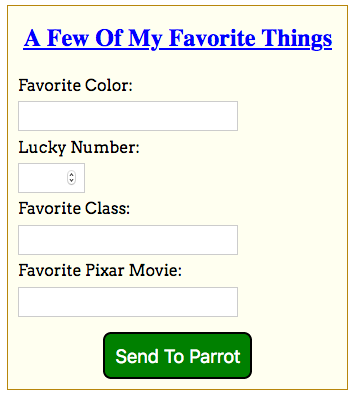
One option for a styled form.
Refresh your index.html page in your browser to make sure it looks the way
you want. When you are happy with the result, save and commit your work.
20.9.2. Wrap-Up
Return to the main branch in your repo. Use git merge form-style to
combine the two branches. Resolve any merge conflicts.
20.9.3. Resources
The following websites provide more detailed information about styling forms with CSS:
Dive deep with the MDN documentation.
Bootstrap Form Styles (Review the Bootstrap section in the CSS chapter if necessary).