15.5. Bootstrap
CSS allows us to make our webpages attractive. For larger sites or more complex pages, the CSS code can get long and quite detailed. Fortunately, we don’t have to reinvent the wheel every time we create a page.
If we save some of our favorite style rules in a single .css file, we can
reuse that code over multiple pages. Similarly, many developers are willing to
share their CSS rules with others. With their permission, we can import their
work to decorate our own HTML.
15.5.1. What is Bootstrap?
Bootstrap provides a library of ready-made CSS that we can use to quickly make our web pages look great.
Example
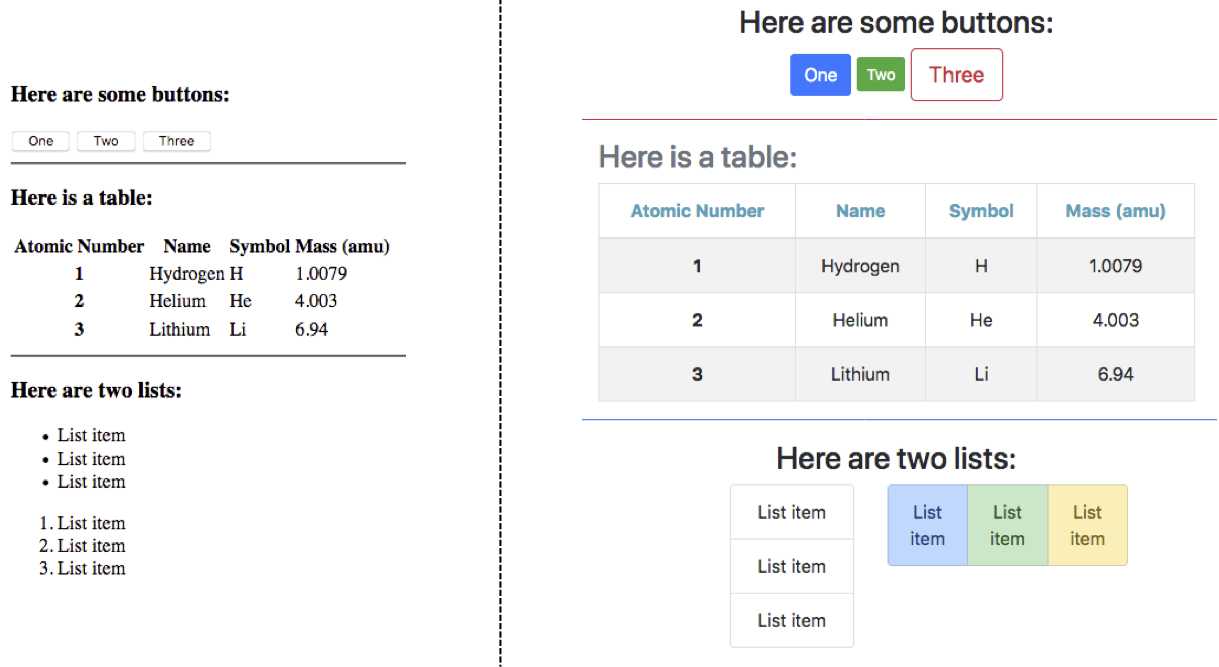
The content on the left was created with plain HTML code. The right side shows the same code with a few Bootstrap styles added.

Bootstrap classes make our page look slick!
Instead of defining our own style rules with selectors and declaration blocks, Bootstrap provides attractive options that we can drop into our code.
15.5.2. Link to the Bootstrap Library
To use Bootstrap styles, we must update the link element in our HTML file.
Visit the Bootstrap website
and copy a line of code from the Introduction section.

Copy the <link> element from the Bootstrap website.
Once we do that, we simply paste the code into the head element of our HTML
file. The Bootstrap CSS rules are web-based, so the href attribute in the
<link> tag is a web address instead of a simple file name.
Tip
The Bootstrap link can either replace the one to our style.css file, or
we can keep both links. Keeping both allows us to access the Bootstrap
style rules and the ones we personally create.
For beginners, it’s best to stick with a single source of CSS code in order to avoid accidental conflicts.
15.5.3. Using Bootstrap Styles
Most Bootstrap style rules are defined with class selectors. To add a
particular rule to an element, we must place the class attribute inside the
starting tag. The general syntax for this is:
<tag_name class="Bootstrap style name(s)">
The developers gave each class a specific name, and we can assign multiple
class styles at the same time. For example, the code
<section class="text-center border border-dark"> tells the browser: Create
a section element, center the text inside that space, then add a border and
make it dark.
15.5.3.1. Bootstrap Documentation
The Bootstrap developers created TONS of options, and learning the class names for every one would be difficult. Fortunately, their website includes instructions, pictures, and copy buttons to make using the content easier.
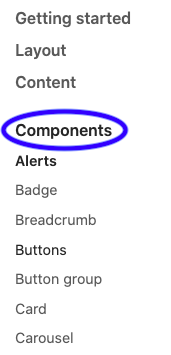
A good place to start is by expanding the Components option in the left menu.

Take a moment to explore any components that sound interesting.
Note
Many examples on the Bootstrap website show <div> tags. Never fear! All
of the class names apply equally well to the sematic tags
we learned about in the last chapter.
The next step is to play!

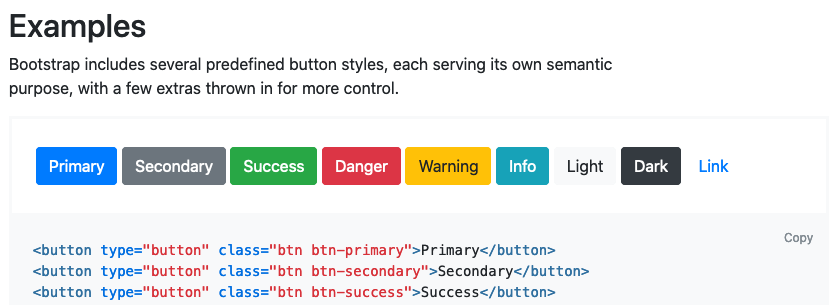
Information found in the Buttons sub-menu.
15.5.4. Try It!
The editor below contains some plain HTML. It also includes the link to the Bootstrap style rules. Explore the Bootstrap website and add class attributes to the HTML tags. Make the page look more interesting!
Tip
Click the Open in repl.it and the Open in a new tab buttons to expand the views.
Possible ideas:
Change the appearance or arrangement of the buttons.
Change the alignment of items within a section.
Update the look of the table.
Explore different list group options.
Add spinners!
15.5.5. Check Your Understanding
Question
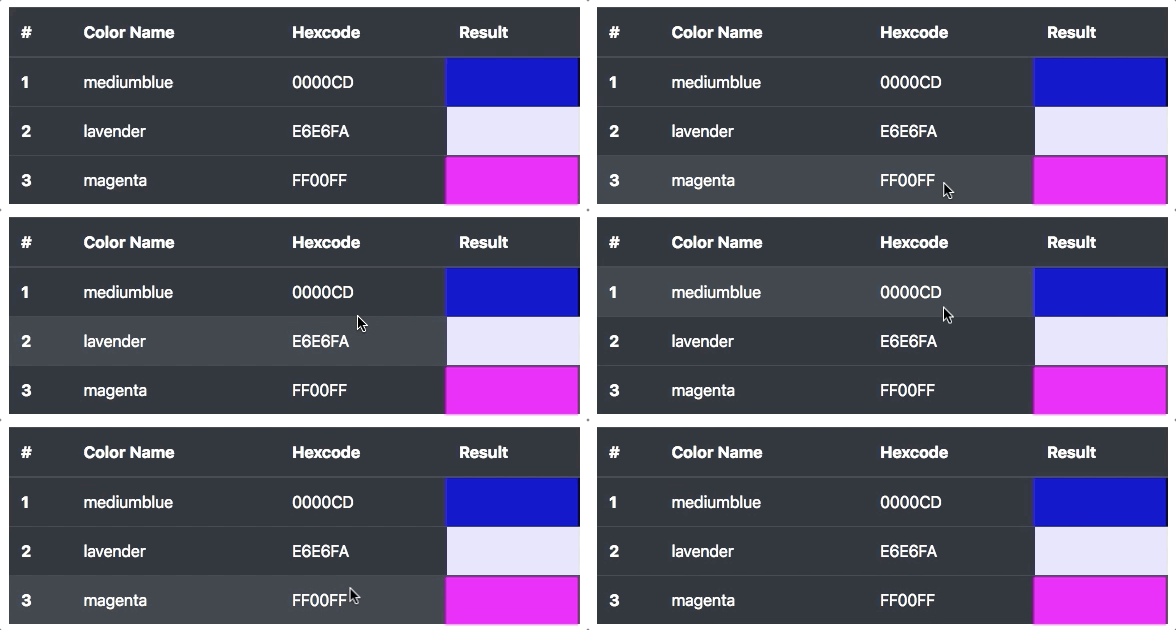
Which of the following Bootstrap class attributes produces the following table?

- class="table table-dark"
- class="table table-hover"
- class="table table-hover table-dark"
- class="table-hover table-dark"
