30.8. Studio: Angular, Part 2
At the end of the first mission planner studio, multiple components display data about the mission. Your job is to allow the user to update the mission plan by adding user interaction.
30.8.1. Getting Started
For this studio and the next, you will clone some starter code from GitHub.
Fork the Angular Mission Planner repository.
In the terminal, move into your root
angular_practicedirectory.Create a new subdirectory for the Mission Planner repository
cdinto the new subdirectory. Do NOTgit init.Clone your fork inside your new subdirectory.
Warning
Initializing a new Angular project inside of another one creates version control complications that are best avoided.
Before running the
git clonecommand in the terminal, make sure you are inside the subdirectory you just made! Cloning into a project that already has a repo of some kind will throw an error.Using the
lscommand in your terminal is a great way to verify your location.Use
git statusto verify that you are on branchstudio-2. If not, usegit checkout branch-nameto switch to it.Warning
When you fork your repo over,
studio-2may have been renamedmainby GitHub. To verify you have the correct code, compare yourcrew.component.htmlto LaunchCode'screw.component.htmlon thestudio-2branch.You can rename your branches to match the LaunchCode's branch names, or keep it as
main.How to rename a branch (Scroll down to 15.4.5)
Run
npm installto download dependencies.Run
ng serveto build and serve the project.
30.8.2. Review the Starter Code
The starter code for this studio is similar to the solution for the first mission planner studio, but with a few notable changes.
30.8.2.1. Editable Mission Name
The mission name can now be edited by clicking on the text, changing the text
in the input box, and then updated by clicking save or pressing the enter key.
Review the code in src/app/header/header.component.html and
src/app/header/header.component.ts to see how this feature was implemented.
Example of mission name being edited.
30.8.2.2. Crew Array of Objects
Open src/app/crew/crew.component.ts in VSCode. Notice on line 10 that a
crew array is defined. This array of objects will be used to display the crew.
Each crew member has a name and firstMission property. If
firstMission is true, it means this is the first mission for that
person.
1 2 3 4 5 6 7 8 9 10 11 12 13 14 15 16 17 18 19 20 21 | import { Component, OnInit } from '@angular/core';
@Component({
selector: 'app-crew',
templateUrl: './crew.component.html',
styleUrls: ['./crew.component.css']
})
export class CrewComponent implements OnInit {
crew: object[] = [
{name: "Eileen Collins", firstMission: false},
{name: "Mae Jemison", firstMission: false},
{name: "Ellen Ochoa", firstMission: true}
];
constructor() { }
ngOnInit() {
}
}
|
30.8.3. Requirements
Note
All of these features only temporarily alter the data. If you refresh the page, the original data will reappear.
30.8.3.1. Edit Rocket Name
The rocket name should be clickable and editable like the mission name. Alter
src/app/header/header.component.html and
src/app/header/header.component.ts to allow the user to edit the rocket
name.
30.8.3.2. Use *ngFor to Display Crew
Replace the static list of <li> tags in
src/app/crew/crew.component.html with an *ngFor that loops over the
crew array.
Add this code to src/app/crew/crew.component.html.
1 | <li *ngFor="let member of crew">{{member.name}}</li>
|
30.8.3.3. Display 1st Mission Status
If a crew member's firstMission property is true, then display the text
"- 1st" next to their name.
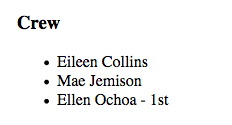
Example of first mission status being shown.
Add this code right after the member name in
src/app/crew/crew.component.html.
1 | <span *ngIf="member.firstMission">- 1st</span>
|
30.8.3.4. Add Crew Members
Allow crew members to be added to the list. To create a new crew member, two pieces of information are required:
crew member's name
the first mission status
We will use an input box and a checkbox to collect the data.

Example of crew member being added.
Add this code to the bottom of src/app/crew/crew.component.html.
1 2 3 | <input #name type="text"/>
<label>First mission<input #firstMission type="checkbox"/></label>
<button (click)="add(name.value, firstMission.checked)">Add</button>
|
Line 1 creates an input that declares the local variable name. Line 2
defines a checkbox that declares the firstMission variable. Line 3 creates
a button that, when clicked, sends the new name and checkbox value to
the add function. This function adds the new crew member to the roster!
In the src/app/crew/crew.component.ts file, include this code for the
add function:
1 2 3 | add(memberName: string, isFirst: boolean) {
this.crew.push({name: memberName, firstMission: isFirst});
}
|
30.8.3.5. Remove Crew Members
Allow removing of crew members by adding a button next to each person in the
crew list. When the remove button is clicked, the remove function in the
crew component will be called, which deletes that person from the crew array.
Example of crew member being removed.
Add line 4 to file src/app/crew/crew.component.html. Be sure to put it
before the closing </li>, so that the button appears next to each item in
the crew list.
1 2 3 4 5 | <li *ngFor="let member of crew">
{{member.name}}
<span *ngIf="member.firstMission">- 1st</span>
<button (click)="remove(member)">remove</button>
</li>
|
Add the remove function shown below to the crew component in the
src/app/crew/crew.component.ts file.
1 2 3 4 | remove(member: object) {
let index = this.crew.indexOf(member);
this.crew.splice(index, 1);
}
|
30.8.3.6. Edit Crew Members
Finally we are going to allow the user to edit crew members who have already been added.
If the crew member name is clicked, then their name should be replaced with a text input and a save button.
When save is clicked, the input and save button are replaced by the text-only version of the name.
Only one crew member can be edited at a time.
Example of crew member name being edited.
We need to add a click event to the member name.
Put
{{member.name}}inside of a<span>that has a(click)handler.Make the
<li>insrc/app/crew/crew.component.htmllook like the code below.1 2 3 4 5
<li *ngFor="let member of crew">
   <span (click)="edit(member)" class="editable-text">{{member.name}}</span>
   <span *ngIf="member.firstMission">- 1st</span>
   <button (click)="remove(member)">remove</button>
</li>
We need a way of knowing which crew is being edited.
Add this property to the crew component in file
src/app/crew/crew.component.ts. The propertymemberBeingEditedrepresents the crew member who is currently being edited.memberBeingEdited: object = null;
Next add a
editfunction to the crew component filesrc/app/crew/crew.component.ts. This function will set amemberBeingEditedvariable to be equal to the crew member who was clicked.edit(member: object) { this.memberBeingEdited = member; }
Now we need to add an *ngIf that will show the two versions of the member,
the display state or the edit state.
In the edit state, an input box with a save button will appear, but for now the input and save won't have any functionality. Make your
src/app/crew/crew.component.htmlfile look like the below code.1 2 3 4 5 6 7 8 9 10 11 12 13 14 15 16 17 18 19 20 21 22 23 24
<h3>Crew</h3>
<ul>
   <li *ngFor="let member of crew">

      <span *ngIf="memberBeingEdited !== member; else elseBlock">
         <!-- display state of member -->
         <span (click)="edit(member)" class="editable-text">{{member.name}}</span>
         <span *ngIf="member.firstMission">
            - 1st
         </span>
         <button (click)="remove(member)">remove</button>
      </span>

      <ng-template #elseBlock>
         <!-- edit state of member -->
         <input />
         <button>save</button>
      </ng-template>

   </li>
</ul>
<input #name type="text"/>
<label>First mission<input #firstMission type="checkbox"/></label>
<button (click)="add(name.value, firstMission.checked)">Add</button>
Finally, we are going to make the edit state update the member name when save is clicked.
Update the
<input>and<button>tags to look like:1 2 3 4 5
<ng-template #elseBlock>
   <!-- edit state of member -->
   <input #updatedName (keyup.enter)="save(updatedName.value, member)" value="{{member.name}}"/>
   <button (click)="save(updatedName.value, member)">save</button>
</ng-template>
The last step is to add the save function to the crew component. This
function will be called when the <button> is clicked or when the enter key
is pressed and the <input> has focus.
Add the below
savefunction to the crew component.1 2 3 4
save(name: string, member: object) {
member['name'] = name;
this.memberBeingEdited = null;
}
Commit and push up your work.
30.8.4. Bonus Missions
Before starting on any of these bonus features, be sure to commit and push your work.
Don't allow duplicate names to be added to the crew.
Allow user to add equipment.
Allow the user to edit equipment.
Allow the user to remove equipment.
Allow user to add experiments.
Allow the user to edit experiments.
Allow the user to remove experiments.
30.8.5. Sanity Check
Complete code for this studio (without the bonus content) can be found in the
studio-2-solution branch of the repository.