30.7. Exercises: Angular, Lesson 2
Let's build an interactive web page that allows us to review data for our astronaut candidates and select crew members for a space mission.
30.7.1. Starter Code
The starter code for the exercises is in the same repository that you cloned for the chapter examples.
Note
Remember that the repository contains a master branch with all the
starter code as well as a solutions branch showing the completed
exercises.
The solutions provide a resource for you to check if you get stuck. However, for best results you should make a valiant attempt at solving the tasks before looking at "the answers".
Also, if your code works but is different from the solutions, that is OK. There are usually multiple ways of solving the same problem.
From the lesson2 folder in VSCode, navigate into the
exercises/src/app/candidates folder. Open the
candidates.component.html and candidates.component.ts files.
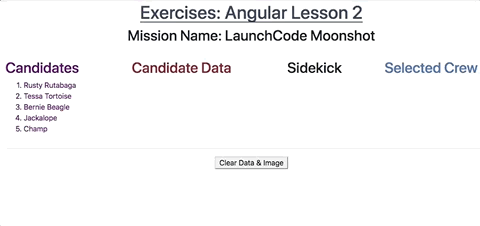
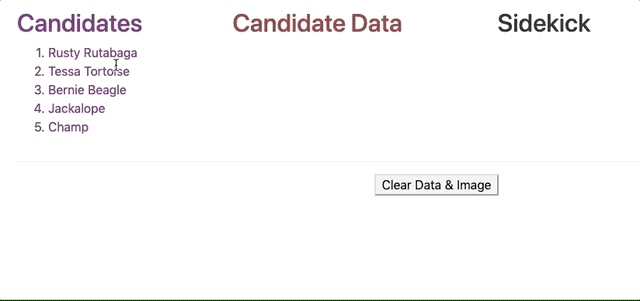
In the terminal, navigate into the lesson 2 exercises folder. Enter
npm install to add the Angular modules, then run ng serve. When you
open the web page in your browser, it should look like this:
30.7.2. Candidates Column
Examine the candidates array in candidates.component.ts. It contains
one object for each animal astronaut. We want to start by listing the names of
the animals in the "Candidates" column of the web page.
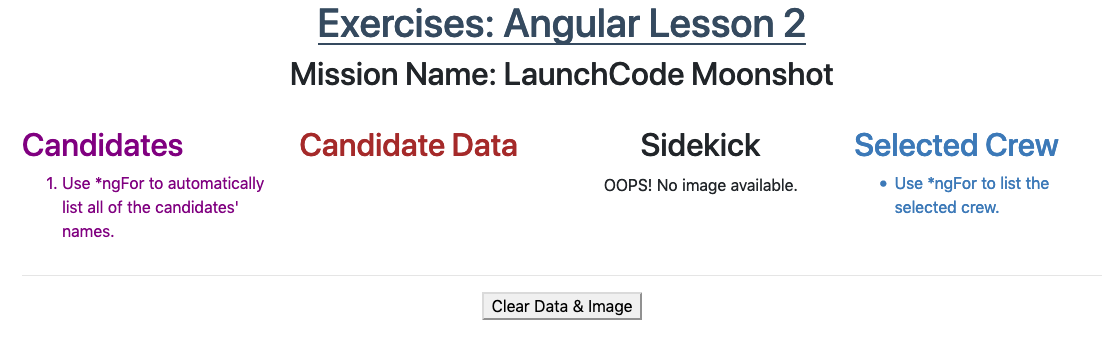
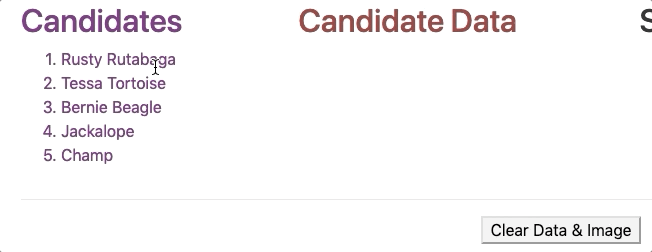
Find the "Candidates" section in
candidates.component.html. Use*ngForin the<li>tag to loop over thecandidatesarray and display each name in an ordered list.We want each name to be interactive. Add a
clickevent to the<li>tag. When a user clicks on a name, set the variableselectedto be equal to the chosen candidate.
Properly done, your output should behave something like this:

30.7.3. Candidate Data Column
When we click on a candidate's name, we want their information to appear in the "Candidate Data" column. If no candidate is selected, we want the space under the heading to remain blank.
In the
<p></p>element underneath the "Candidate Data" heading, add labels for a candidate'sName,Age,Mass, andSidekick.Add placeholders to display the candidate's data next to each label.
Use
*ngIfinside the<p>tag to check if a candidate has been selected. If so, display the labels and the data.Next, create a way to clear the data. In the
<button>tag for "Clear Data & Image", add aclickevent that setsselectedtofalse.
Properly done, your output should behave something like this:
30.7.4. Sidekick Image Column
Every good hero needs a loyal sidekick, and our candidates are no exception!
When we click on a candidate's name, we want an image of their sidekick to appear under the "Sidekick" column. If no candidate is selected, we want this area to remain blank.
In the
<img>tag, use*ngIfto check if a candidate has been selected.Replace the generic
{{placeholder}}with theimageproperty of the candidate.
Properly done, your output should behave something like this:
30.7.5. Selected Crew Column
Once we select a candidate, we want an option to add them to the crew of the next space mission.
In
candidates.component.ts, code anaddToCrewfunction that takes an object as a parameter.If the candidate is NOT part of the crew, the function should push them into the
crewarray. Candidates who are already part of the crew should be ignored.In
candidates.component.html, add a "Send on Mission" button next to the "Clear Data & Image" button.Add a
clickevent to the button to call theaddToCrewfunction. When clicked, pass the selected candidate as the argument.Under the "Selected Crew" section, use
*ngForto loop over thecrewarray and display each name.
30.7.5.1. Clear Crew List
Add a "Clear Crew List" button under the "Selected Crew" list.
This button should only appear when the
crewarray contains data. Use*ngIfto make this happen.Add a
clickevent that clears thecrewarray.
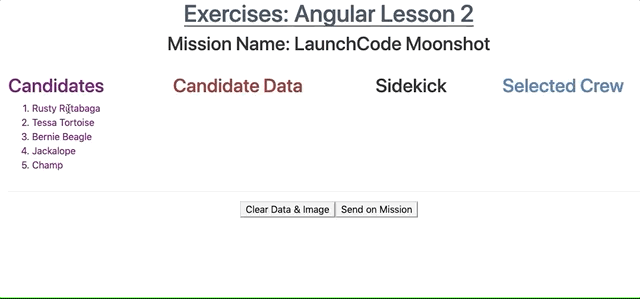
Properly done, your output should behave something like this:
30.7.6. Bonus Missions
30.7.6.1. Fine Tune the Buttons
Update the
Send on Missionbutton to appear only if a candidate has been selected.Make the
Send on Missionbutton disappear if the selected candidate is already part of the crew.Make the
Send on Missionbutton disappear once three crew members have been assigned to the mission.
30.7.6.2. Change the Mission Name
We can make the Mission Name heading interactive. When clicked, we want to
present the user with an input box to enter a new name.
For this exercise, the ng-template code you need is at the bottom of candidates.component.html.
Replace line 2 in
candidates.component.htmlwith<h2 class="centered" *ngIf = "!editMissionName; else editMission" (click)="editMissionName = true">Mission Name: {{missionName}}</h2>.When clicked, the
ng-templatecode executes. Update theinputtag with akeyup.enterevent. The event should call thechangeMissionNamefunction and pass the new name as an argument.In
candidates.component.ts, code achangeMissionNamefunction to update the name of the mission.After changing the mission name, set
editMissionNametofalse.
30.7.7. Bonus Results
After finishing the bonus missions, your output should behave something like this: