Assignment: Web Caesar
In this assignment you'll implement a web-based version of the Caesar cipher that you wrote in Unit 1. It consists of the following sections:
- Git Repository Setup
- Creating a Virtual Environment
- Setting up a basic Flask app
- Rendering a form
- Importing caesar code
- Processing the form
- Rendering the form after encryption
- Committing Your Work
Your final application will function just like our demo app.
Project and Repository Setup
For this assignment, you will build the entire project from scratch. It is essential that you follow each of these steps in order and make sure that you are executing every command in the order shown below!
Git repository setup
From ~/lc101/, create a new directory and initialize it as a Git repository.
$ mkdir web-caesar
$ cd web-caesar
$ git init
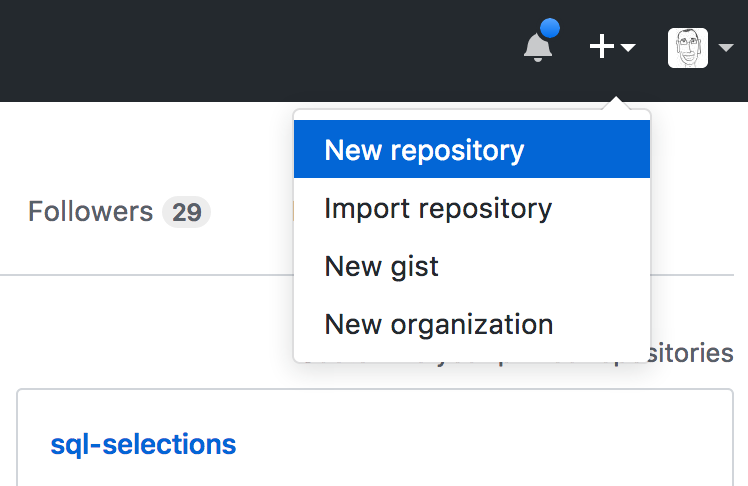
Initialized empty Git repository in /Users/chris/lc101/web-caesar/.git/Now let's connect our local Git repository to a remote repository at GitHub. Visit github.com and create a new repository from the menu at top-right.
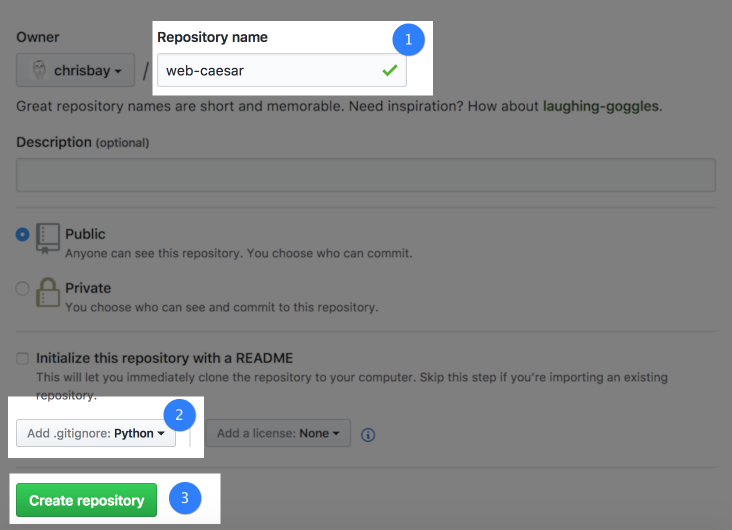
Name the repository web-caesar and add a Python-specific .gitignore file.
After creating the repository, you'll be on the repository's home page. From there, copy the Clone or Download URL.
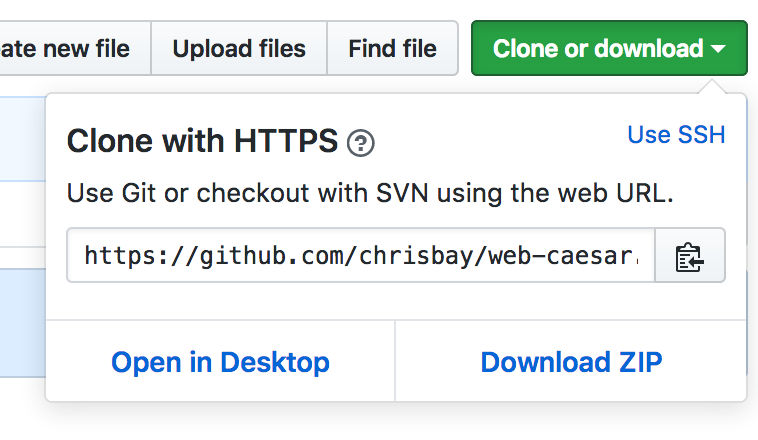
Back in your terminal--be sure you're in the directory ~/lc101/web-caesar/--connect your local repository to the new remote repository. Use your repository's url from GitHub, which should look like the one below (but obviously not with the username chrisbay).
$ git remote add origin https://github.com/chrisbay/web-caesar.gitYou can verify the status of remote repository connections at any time by running git remote -v.
$ git remote -v
origin  https://github.com/chrisbay/web-caesar.git (fetch)
origin  https://github.com/chrisbay/web-caesar.git (push)
Next, pull the remote to your local so that you'll have the .gitignore file on your computer:
$ git pull origin masterCreating a virtual environment
Next, let's create a new virtual environment. We'll use this same environment for all future Unit 2 assignments, so we will give it the generic name flask-env.
$ conda create -n flask-env
Fetching package metadata .........
Solving package specifications:
Package plan for installation in environment /Users/chris/miniconda3/envs/flask-env:

Proceed ([y]/n)? y

#
# To activate this environment, use:
# > source activate flask-env
#
# To deactivate this environment, use:
# > source deactivate flask-env
#Now activate the environment and install Flask. If you don't activate the environment before installing Flask, when you go to run your program you will get the error: ModuleNotFoundError: No module named ‘flask’.
$ source activate flask-env
(flask-env) $ conda install flask
Fetching package metadata .........
Solving package specifications: .

Package plan for installation in environment /Users/chris/miniconda3/envs/flask-env:

The following NEW packages will be INSTALLED:

    click:        6.7-py36_0
    flask:        0.12.1-py36_0
    itsdangerous: 0.24-py36_0
    jinja2:       2.9.6-py36_0
    markupsafe:   0.23-py36_2
    openssl:      1.0.2k-2
    pip:          9.0.1-py36_1
    python:       3.6.1-2
    readline:     6.2-2
    setuptools:   27.2.0-py36_0
    sqlite:       3.13.0-0
    tk:           8.5.18-0
    werkzeug:     0.12.1-py36_0
    wheel:        0.29.0-py36_0
    xz:           5.2.2-1
    zlib:         1.2.8-3

Proceed ([y]/n)? y
(flask-env) $We'll have a single file in this project. Let's create it now.
(flask-env) $ touch main.pyYour Tasks
Open up the project in VS Code to get started: code ..
Setting up a basic Flask app
We can start with the basic outline of the Hello, World app that you created previously. Go ahead and grab the code from that tutorial. We recommend typing this code line-by-line until you're familiar with what each piece does. In fact, this is a good time to review the line-by-line explanation in the Hello, World tutorial!
Rendering a form
Rather than display the "Hello World" message, we want our main view to display a form that looks like this.
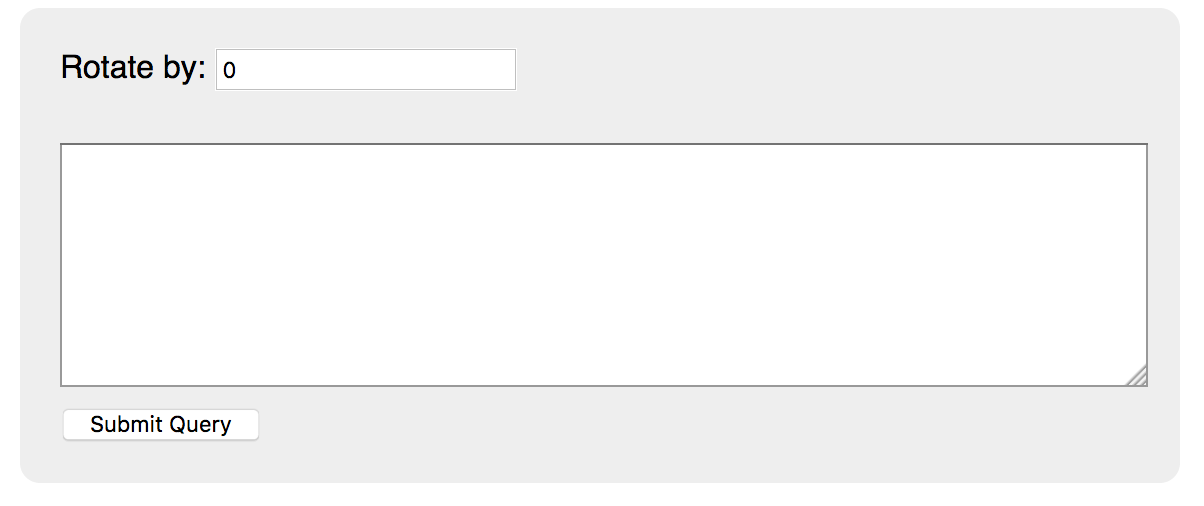
To do so, make a global variable named form above the @app.route("/")decorator preceding the index function, and set its value to be the HTML displayed here.
Now, fill out the body of the HTML string with a form that has these characteristics:
- The form uses the
POSTmethod. - There are two inputs: a regular
inputwithtype="text"and atextarea. - Set
name="rot"on theinputelement andname="text"on thetextarea. - Has a label on the
inputelement that looks something like the one in the screenshot above. - The
inputelement has the default value of 0. - Has a submit button.
In the index function, return the form variable.
Now, start up your app and test:
(flask-env) $ python main.py
 * Running on http://127.0.0.1:5000/ (Press CTRL+C to quit)
 * Restarting with stat
 * Debugger is active!
 * Debugger PIN: 955-679-937
You should see the form render, but submitting it will result in a "Method Not Allowed" error.
Importing caesar code
Create a file for your Caesar cipher code: touch caesar.py. Now, copy and paste our Caesar solution code into this file.
Then, in main.py, import the rotate_string function from caesar.py:
from caesar import rotate_stringWe'll use this function in the next step.
Processing the form
To process the form, define a new function encrypt in main.py. Add an @app.route decorator to configure the function to receive requests at the root path "/", and with methods=['POST'].
When the form is submitted, the request will contain the parameters rot and text. In order to access these, we need Flask's request object. To import it, modify the topmost import statement to include this object.
from flask import Flask, requestWithin encrypt, store the values of these request parameters in local variables, converting data types as necessary. Then, encrypt the value of the text parameter using rotate_string. Return the encrypted string wrapped in <h1> tags, to be rendered in the browser.
Before embarking on our final task, start up the application and test that everything you've done so far works. This is also a good time to commit your changes to your local Git repo.
Rendering the form after encryption
Our final task will be to modify the request handler functions so that the form is displayed again even after submission, with the encrypted string in our <textarea>, as in our demo app.
Look at your encrypt request handler function. Instead of returning the encrypted string, we want to insert it in the form. To do this, we need to specify within the global form string where the text should be inserted. We'll use Python's str.format method for this.
Let's make two modifications to the form variable:
- Add a placeholder
{0}between the opening and closing<textarea>tags. - Where the CSS rules are defined, "double up" the curly braces, which will prevent the
str.formatmethod from interpreting the curly braces as defining a text placeholder. For example, one rule will look like this:textarea {{ margin: 10px 0; width: 540px; height: 120px; }}
Within each of index and encrypt, rather than return the form string, return form.format(...). The argument to this method call should be the empty string in the case of index, and it should be the encrypted string in the case of encrypt.
Start up the application and test. Ensure that after submitting the form a first time, it is re-rendered with the encrypted string inside the text area.
Committing Your Work
Let's wrap up by putting our file in the local Git repository. If you run git status you'll see that we have a directory that was created by Visual Studio Code.
$ git status
On branch master

Initial commit

Untracked files:
  (use "git add <file>..." to include in what will be committed)

    .vscode/
    main.py
    caesar.py

nothing added to commit but untracked files present (use "git add" to track)
As before, we don't want to commit that .vscode/ directory. So back in VS Code, add this line to the bottom of .gitignore:
.vscode/Then run git status again to see what's changed.
$ git status
On branch master

Initial commit

Untracked files:
  (use "git add <file>..." to include in what will be committed)

    .gitignore
    main.py
    caesar.py

nothing added to commit but untracked files present (use "git add" to track)
Great! Now, add and commit the files.
(flask-env) $ git add .
(flask-env) $ git commit -m "Finish web caesar"
[master (root-commit) 05bc1ae] Finish web caesar
 2 files changed, 10 insertions(+)
 create mode 100644 .gitignore
 create mode 100644 main.py
Sanity Check
Before turning in your work, make sure your application does the following:
- After starting up the Flask application, a form with
inputandtextareaelements is rendered when visitinghttp://127.0.0.1:5000/. - Submitting the form with a rotation integer and message results in the encrypted text being displayed. For example, rotating "The crow flies at midnight!" by 13 gives "Gur pebj syvrf ng zvqavtug!".
- Rotation preserves spaces and punctuation.
- Successively rotating by complementary amounts--e.g. 13 and 13, 10 and 16, 4 and 22, etc.--gives the same message that you started with.
Submit
To turn in your assignment and get credit, follow the standard assignment instructions in How to Submit.