This guide is for mentors and students in Liftoff. Using this Git workflow will allow for easier and more productive collaboration.
A Git workflow is a strategy for using Git. Git is a powerful tool that can be used in many ways. Having a common strategy for using Git makes it easier and more efficient for teams to collaborate. There are many Git workflows that can be adopted by a team. For this course, we suggest the feature branch workflow. Read about other Git workflows.
The feature branch workflow is focused on keeping work on different features in separate feature branches. Those features branches are then merged into a master branch.
Before discussing how to create feature branches, let’s discuss the master branch. The master branch will be the branch that your feature branches will be created from.
Master branch facts
The master branch is the main branch for your repository and project.
The master branch should contain code that is working and ready to be released.
Don’t merge broken code into master!
Code should be tested and reviewed before being merged into master.
Avoid committing directly to the master branch.
Note
Avoid committing directly to master. Instead, create a feature branch and merge the branch into master using a pull request. Pull requests will be discussed soon.
A feature is a requirement or related set of requirements that add value to a project. Before you can start coding, your team will need to create a list of features. Sometimes these features are called stories or even cards if you are using a tool such as Trello. Each feature should be as small as possible, while still adding value to the project.
Example Features
Adding a login page
Fix change password bug
Make the user list sortable
When you go to work on a feature, you will need to create a branch specifically for that feature. Most of the time you will branch off of the master branch.
Example
In this example we want to create a feature branch for the “Fix change password bug” feature.
Make sure you are on the correct base branch before creating the new feature branch.
Pull to make sure that the base branch is up to date.
git checkout master
git pull
Create a new branch with a meaningful name.
git checkout -b branch-name creates and then switches to the new branch
git checkout -b fix-change-password-bug
Check your status to make sure you are on the right branch.
git status
Console Output
On branch fix-change-password-bug
nothing to commit, working tree clean
You will write code and make commits to implement the feature. Make a commit when you have made progress towards the feature. Don’t commit every time you add a line of code. Don’t wait too long to commit or you will forget what you have done.
After making commits to your feature branch, you will need to push them to origin. This will make sure they are backed up in case something bad happens to your computer and it will make the branch visible on origin.
A pull request (PR) represents the process of merging (or pulling) a feature branch into master. A pull request is created and managed on your repository page on GitHub. Pull requests provide a user interface for reviewing files that were changed, approving the changes, and finally merging those changes into the master branch.
Note
Pull requests can be created to merge a branch into any other branch. For the majority of this project, your pull requests will merge a feature branch into the master branch.
You can create a PR anytime after you have pushed your feature branch to origin. You can wait until you are done coding and you have verified that the feature works.
Example
This example creates a pull request for the add-login-page feature branch.
Your feature branch must exist on origin.
Go to the list of branches for your repository.
Click on the New pull request button for the feature branch.
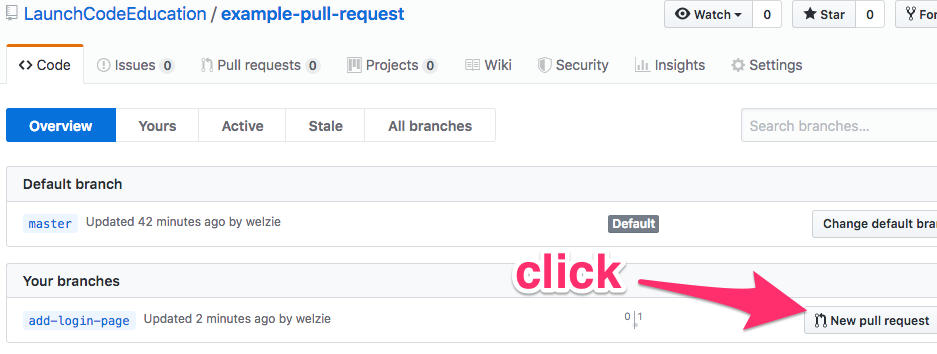
New pull request button showing for feature branch.
Change the pull request name to a meaningful name, usually the feature name works best.
You can also add notes in the description.
The notes section is a good place to tell people what to look out for when testing.
You can also give reviewers hints about new libraries or code you added.
Finally adding a link to the Trello card, or other documentation, can also help the reviewer know what the feature is supposed to do.
Notice that master is shown as the base branch and that the add-login-page branch will be merged into it.
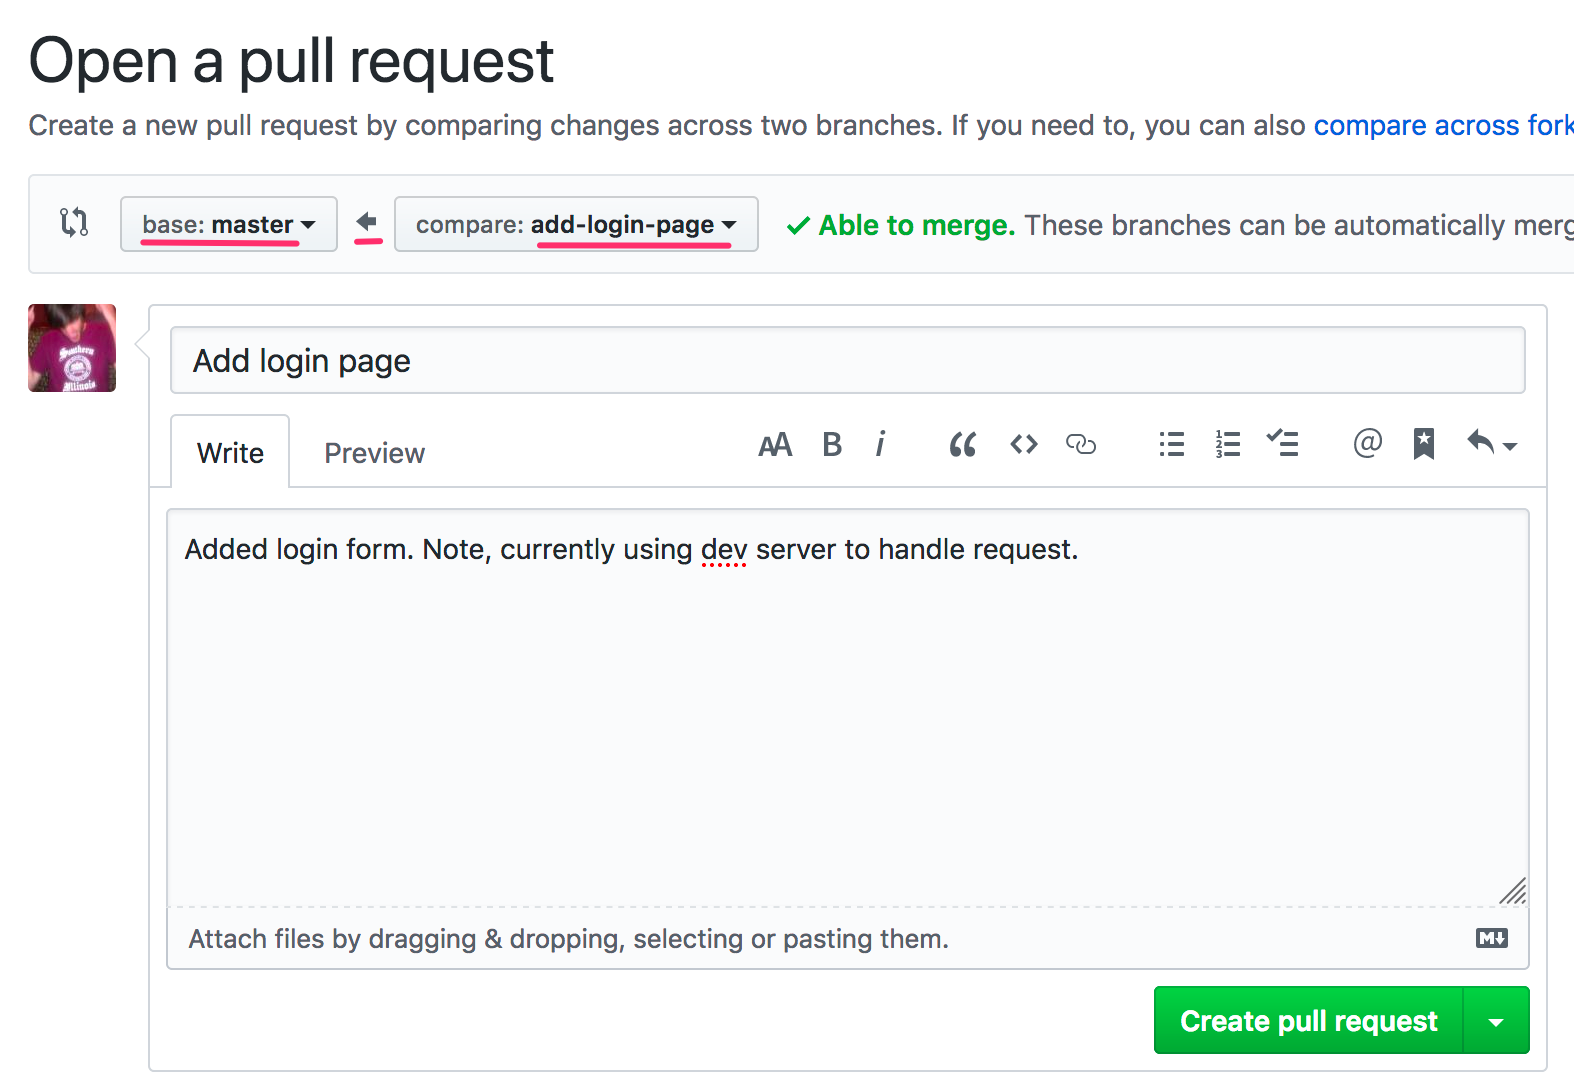
Create pull request form with branches highlighted.
Click the Create pull request button.
Your URL will be changed to a unique address for the new PR. https://github.com/LaunchCodeEducation/example-pull-request/pull/1
You can share this with teammates.
You can also see open PRs by going to the list of pull requests for your repository on GitHub.
After these steps, you will have an open pull request. An open pull request can be merged or closed. Closing will cancel the pull request. Merging will merge the feature branch into master. Before merging, the code needs to be reviewed.
After creating a pull request, you need to assign a reviewer. Pull requests provide an organized way to see what files were edited, added, and removed. You can even compare the changes to what was previously there. This allows a reviewer to see what was changed and if it meets team and language programming standards.
Example
Assign code reviewer for Add login page pull request.
Go to the pull request on GitHub
Click the gear in the Assignees section
There is also a Reviewer section. The main difference is that the Assignee has been officially assigned to review this PR.
Find and click on a team member that you want to assign to review the PR.
You can assign multiple people, but you only need one.
The assignee will be notified by GitHub, but it’s also a good idea to remind them directly that they need to review the PR.
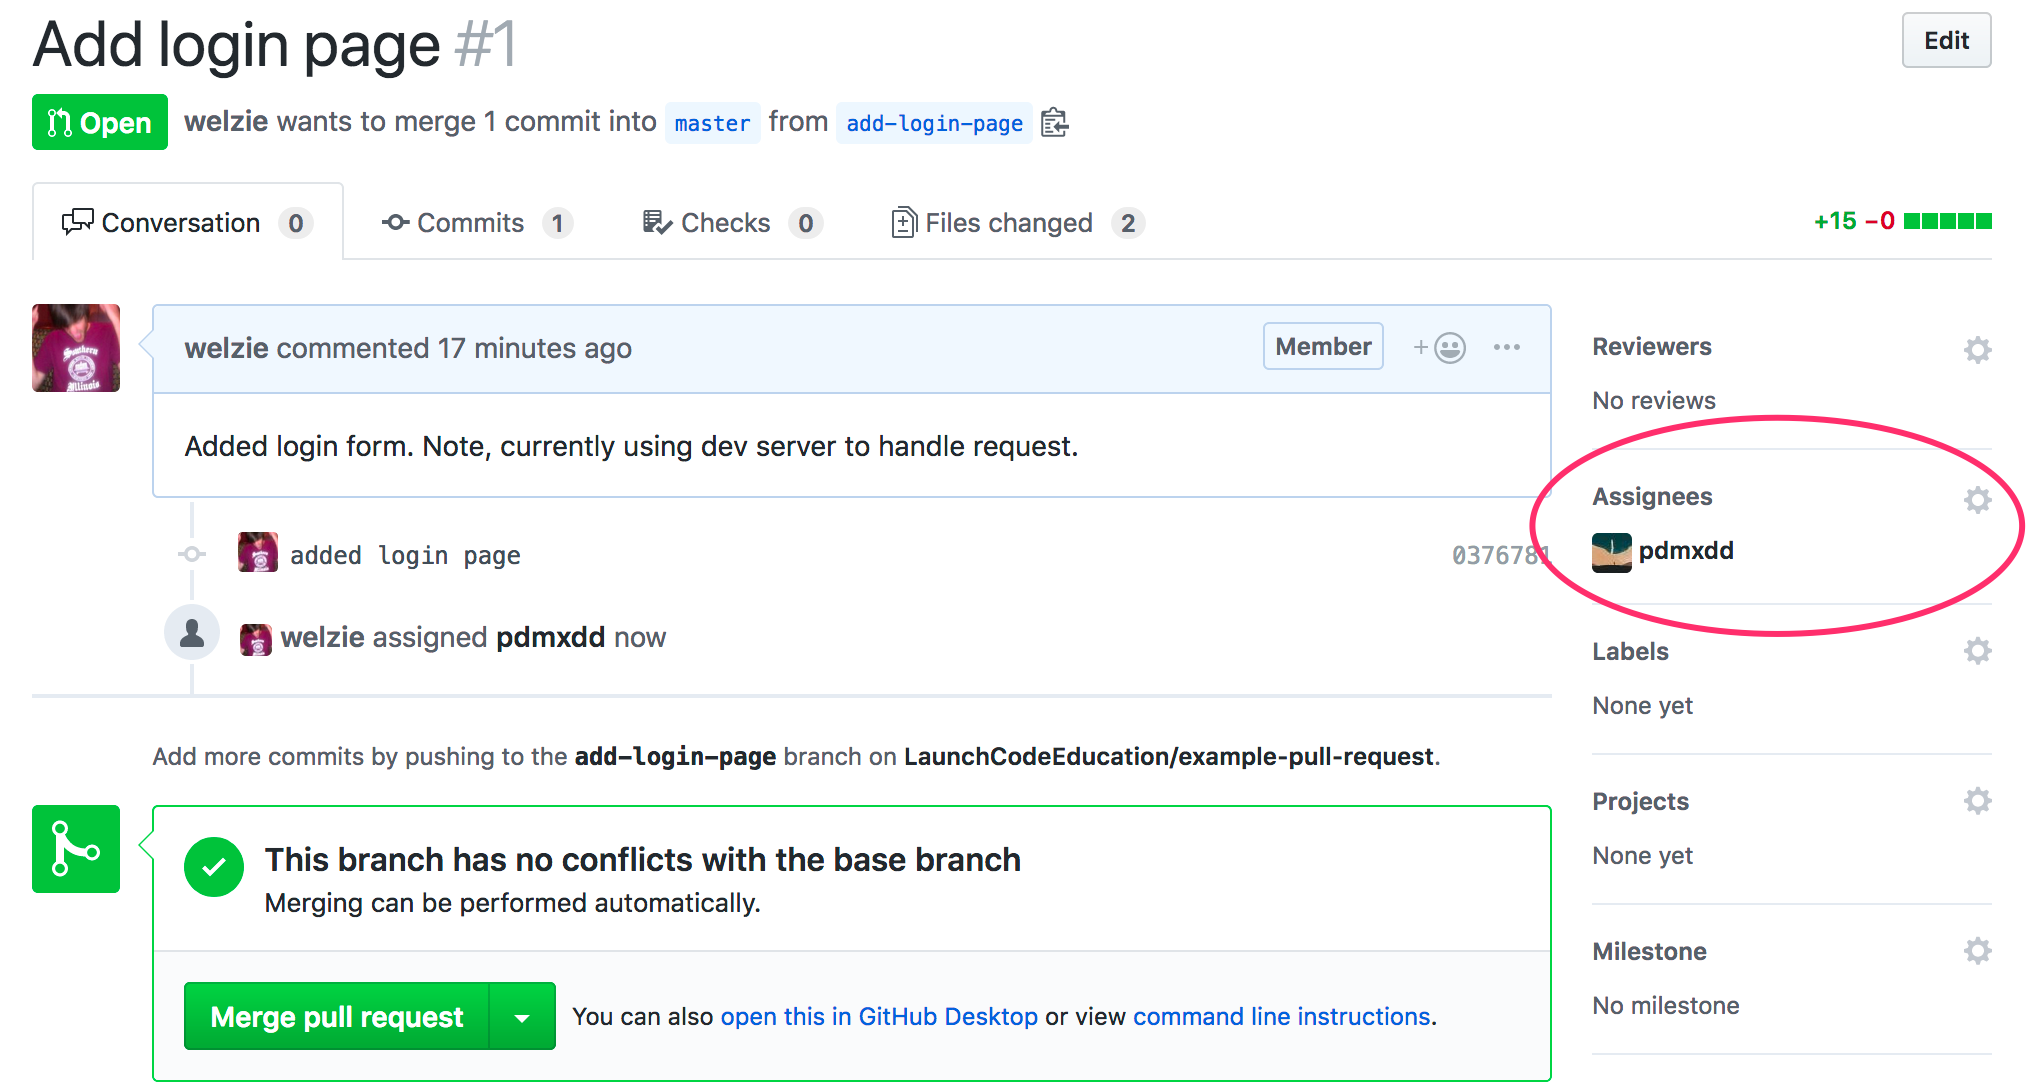
Pull request with assignee selected.
A pull request should not be merged unless it has been reviewed and approved by a teammate.
Benefits of code reviews:
Knowledge sharing between teammates
Technical knowledge and business knowledge is shared by having someone other than the original developer look at the code.
Best practices enforced
Team coding best practices are shared and reinforced.
Code confidence
The team has more confidence in the code, because more than one person has looked at it.
When reviewing code, don’t be picky just to be picky. Only provide feedback if you have a question, or you feel strongly that the there is an issue with the code. Code reviews can be a place to have a conversation about a requirement or the code itself. The comments will stay on the PR and could serve as documentation in the future.
Focus on these topics when reviewing code:
Language conventions
Variable, function, and class names meet the language standards.
Security concerns
Don’t commit passwords to GitHub!
Don’t use risky third party code that hasn’t been verified.
Look out for SQL injection attacks.
Non ideal code
Repeated code that could be turned into a function.
Unnecessary complexity, maybe a class was created that isn’t needed.
Does the code work?
Test out the feature to see if it works.
Are there unit tests? If so are they passing?
Example
In this example we will review and eventually approve the “Add login page” PR.
Go to the pull request on GitHub
Go to the “Files changed” tab
This tab lists all files that were edited, added, or removed.
Each file is listed and the changes have been color coded.
Red lines have been removed.
Green lines have been added or edited.
To add a comment, hover over a line of code and click the blue plus icon.
This will open a comment editor
Type in the note about the line of code
Then click the green button to add the comment
This button will say “Start a review” or “Add a review comment”
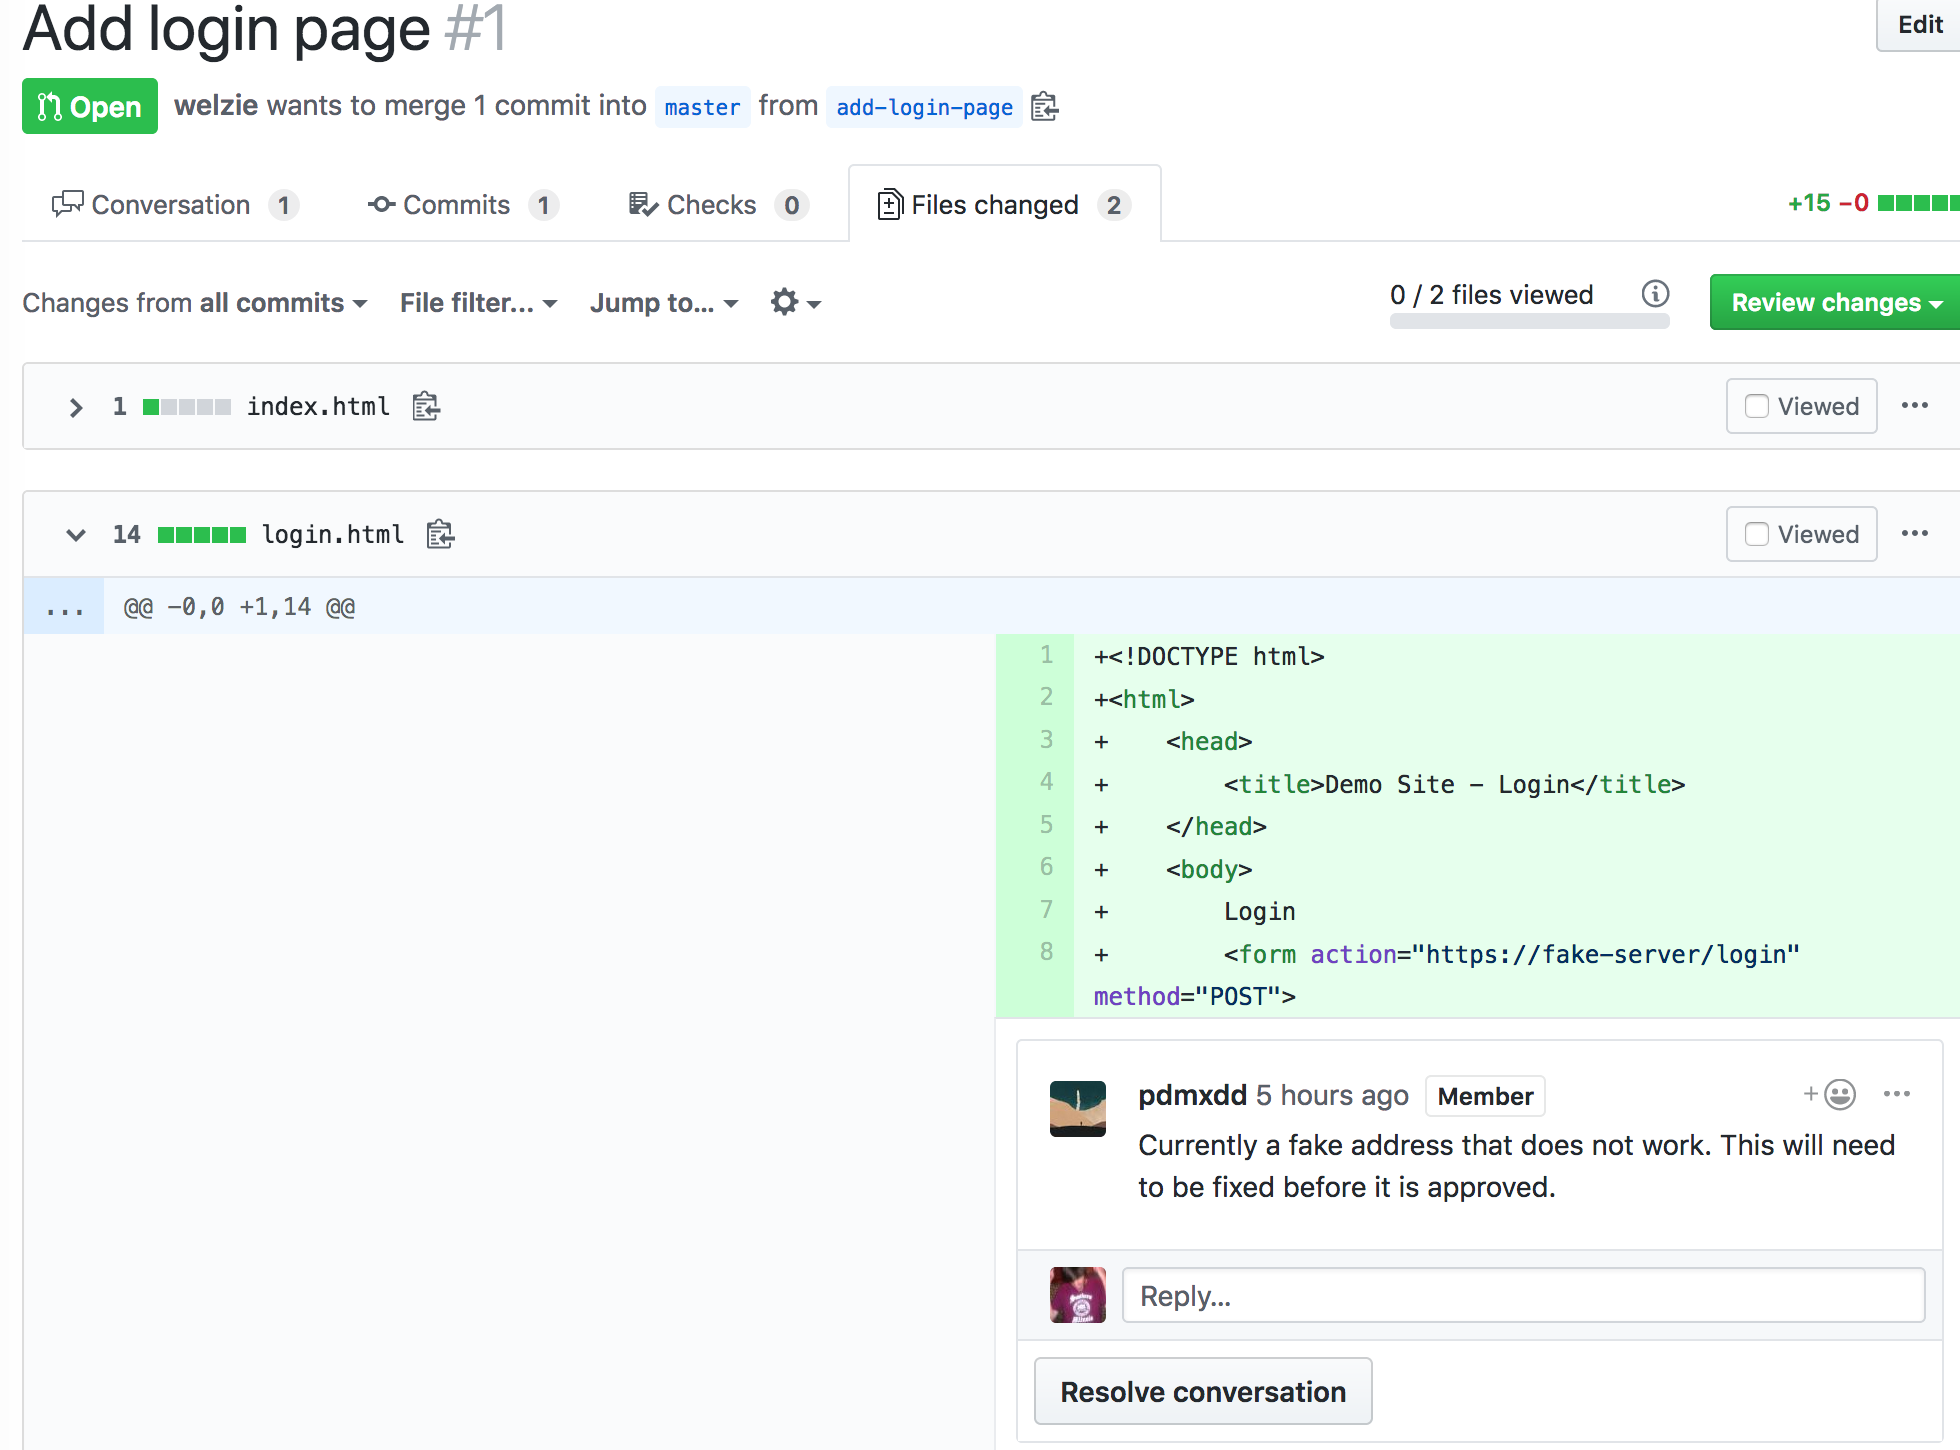
Comment added to pull request.
Next the programmer that created the PR needs to address the issue.
The programmer updates the code and pushes a new commit to the feature branch.
As soon as the push happens, the new commit appears on the pull request page.
The “Conversation Tab” is where you can reply to previous comments.
Notice the reply comment that says the issue has been fixed.
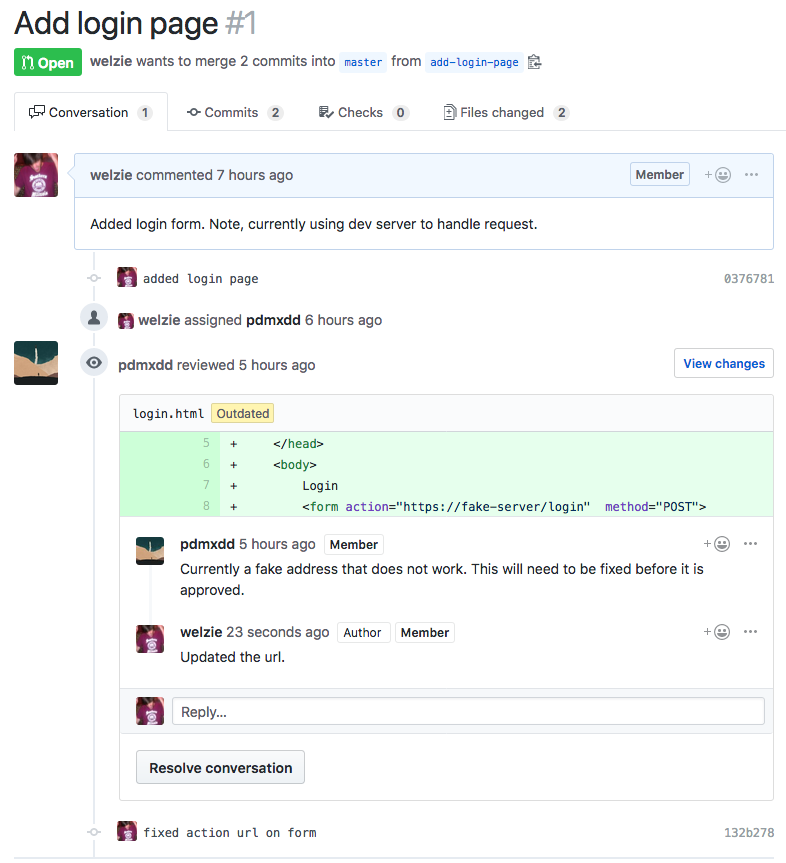
Conversation tab showing comment and reply.
Finally the pull request can be approved.
Since that is the only issue the reviewer found, the pull request can be approved.
This will mark the pull request as approved.
You can also mark a pull request as “Request Changes”
This is done when the reviewer wants to indicate that some issues need to be addressed before they are willing to give their approval.
Approving is done by clicking on “Review Changes” on the “Files Changed” tab.
You can provide a message when approving or requesting changes.
You can also simply add comments without changing the status of the pull request.
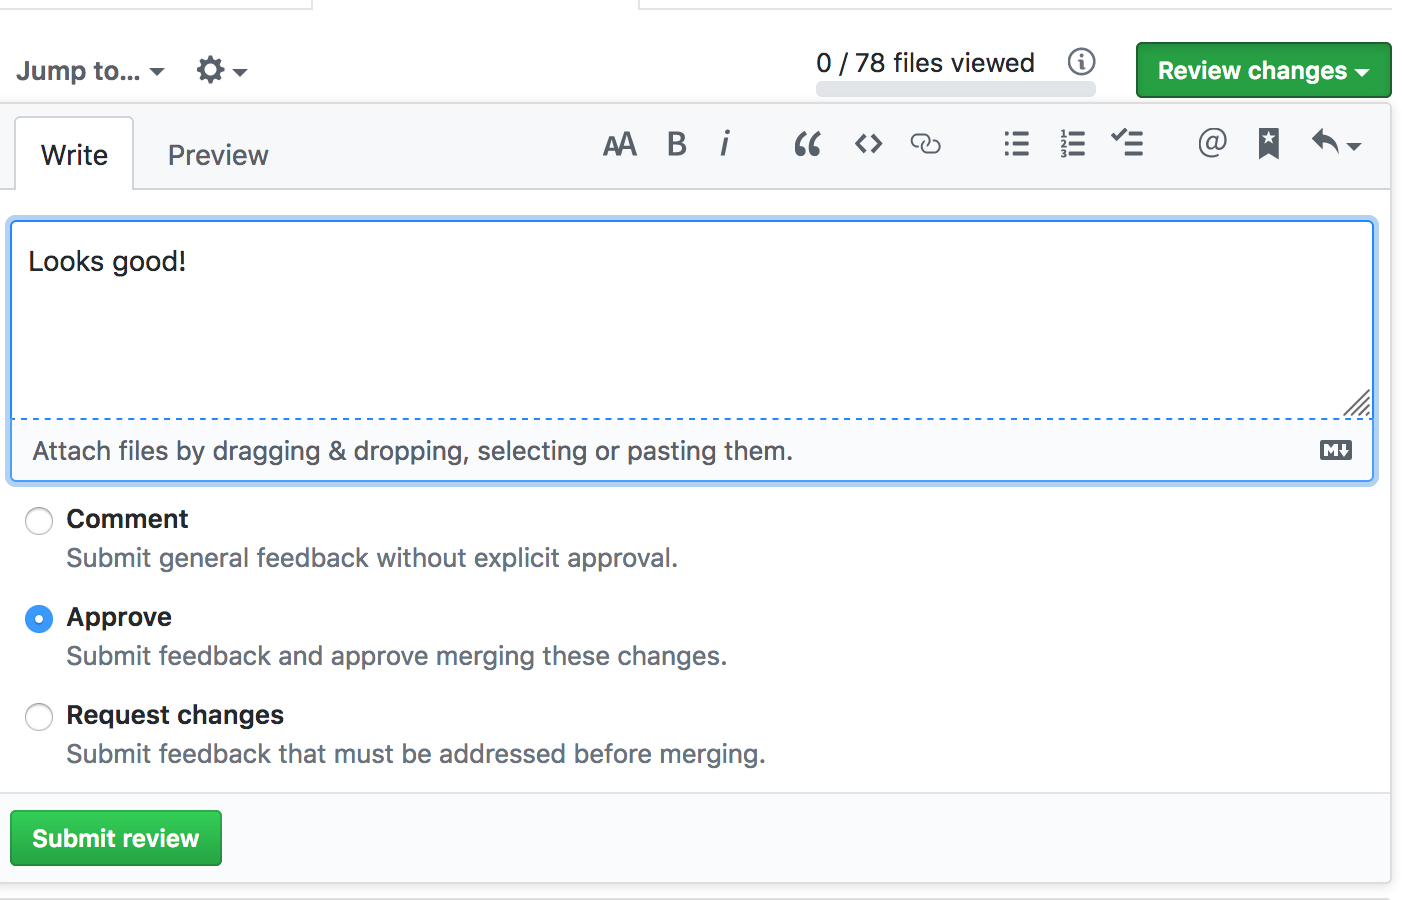
Review changes form.
After a pull request has been approved by a reviewer, it can be merged. Normally the developer or person that opened the PR should click the big green merge button. However, anyone on the project can click merge if needed.
Example
Let’s merge add-login-page into master by clicking the merge button.
Click the green merge button shown on the conversation tab.
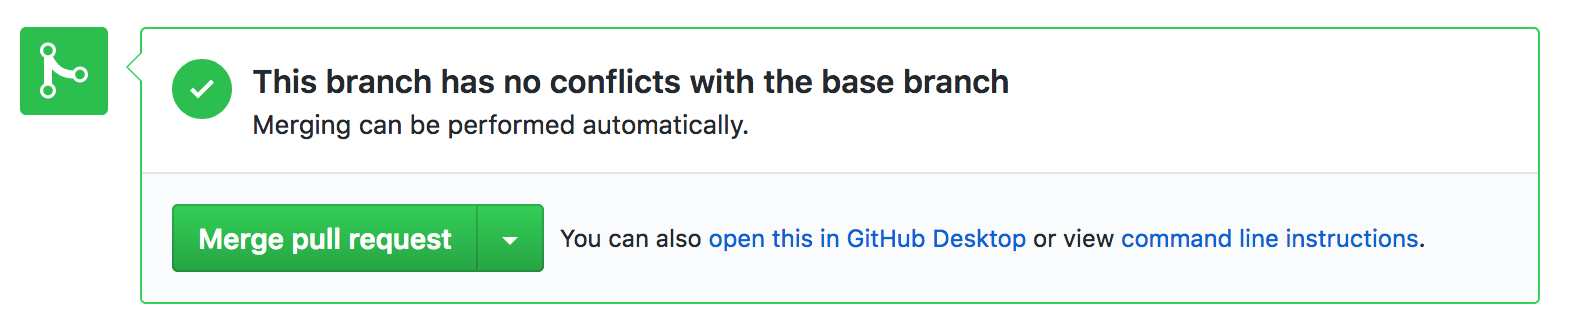
Merge button.
Click the green confirm button
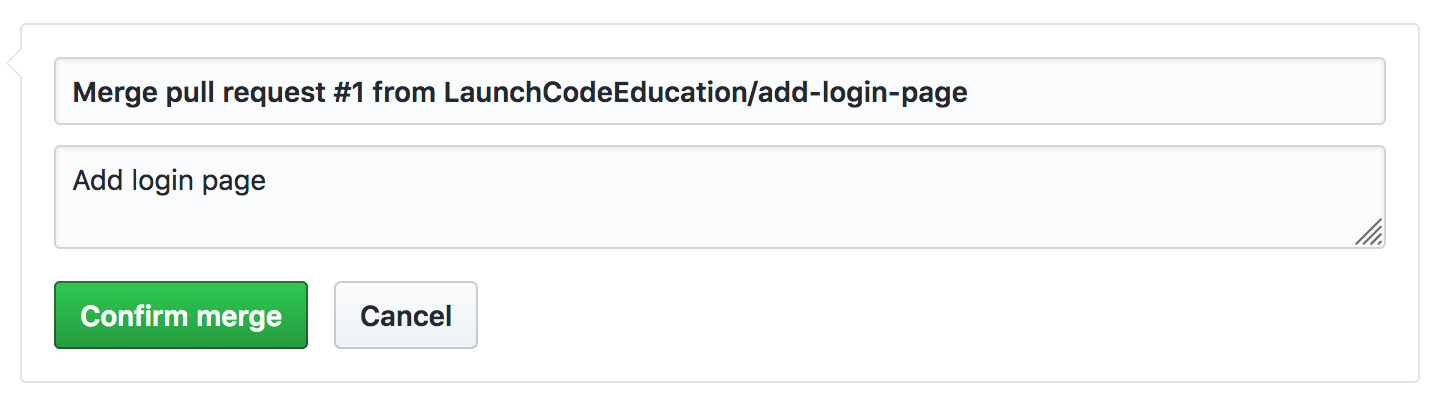
Confirm button.
Click the grey delete branch button
The branch is no longer needed because all of it’s commits are now merged into master.

Delete branch button.
Tell your teammates that master has been updated and that they should update their local master branches.
Now celebrate! You merged code into master!
Warning
Sometimes the merge button is NOT clickable because there are conflicts that can not be resolved automatically. This happens when you need to update the feature branch with commits that are in master. These are usually very basic conflicts to fix, so don’t be scared.
Checkout the master branch git checkout master.
Git pull to update master git pull.
Checkout the feature branch git checkout add-login-page.
Merge master into the feature branch git merge master.
Resolve conflicts.
Commit and push to origin.