24.10. Project: Movie SQLs
In this chapter, we assigned different string values to a sql_query
variable and used that to execute SQL commands. For the short practice
examples, this worked well. However, we need a better way to create and run
our queries, since we don’t want to rewrite our code every time we interact
with the database!
In this project, you will use input from a web form to build sql_query
strings. These queries will work on two tables stored in a database: movies
and directors.
The database and the HTML templates are ready to go, but the application is incomplete. Your job is to fill in the gaps to successfully collect and execute SQL queries. You will also get to review your HTML, CSS, and Flask skills!
24.10.1. Project Setup
Open your
local_practicedirectory in Visual Studio Code. Clone a copy of the starter code from this GitHub repository.Use the File menu to open the
LCHS_movie_sql_projectfolder you just downloaded.Follow the usual procedure to create a new virtual environment, activate it, and install Flask. If you need a reminder for how to do this, the
READMEfile contains a summary of the process.Add the name of your virtual environment to the
.gitignorefile.The project file tree should now look something like the figure below. If you gave a different name to your virtual environment, it will appear instead of
movie-env.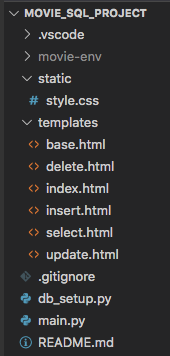
For this project, you will do most of your work in the
main.pyfile.
24.10.1.1. Create the Database
The file db_setup.py is a separate program. Its only job is to create the
database, add the movies and directors tables, and insert several rows
into each one.
Run
db_setup.py. A database file calledproject.dbshould appear in the file tree.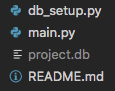
The database name appears gray because its name appears in the
.gitignorefile.¶Right-click on
project.dband select Open Database.Use the tools in the SQLite Explorer tab to confirm that the tables and data were successfully created.
Note
At any time during the project, you can rerun db_setup.py to reset the
database to its starting configuration.
Use git status/git add ./git commit -m to begin a version control record.
If you have your own GitHub account, take a moment to push the repository up to
the site.
24.10.2. The Home Page (index.html)
Run main.py and open the application in a browser. You should see a home
page:
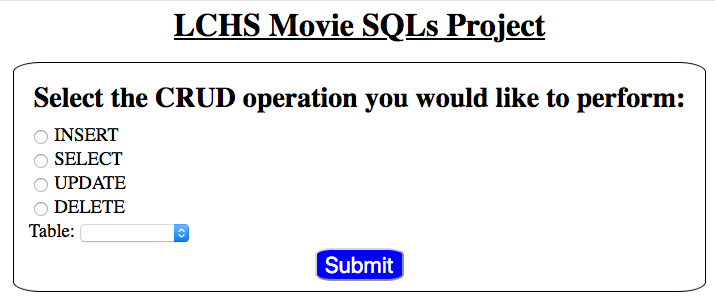
The form lets users select the SQL query type and a table from the database.
The home page gives users four options to choose from, plus a dropdown menu to
select a table. index.html serves as a gateway page. Its job is to
direct users to different pages based on the CRUD operation they pick.
Try it! Select an option and table, then click Submit. Repeat this for the other choices.
Tip
If you’re curious about how the gateway page operates, check out the
comments included with the index() function in main.py.
The index.html template also includes comments describing how the page
is put together.
Each form is complete, but none of them produce correct SQL strings yet. The functions controlling the pages need to be finished.
Your job is to fill in the missing pieces, starting with the easiest function. Be sure to follow the recommended order! Each part asks you to do a little more than the one that came before.
24.10.3. The DELETE Form
From the home page, select DELETE and the movies table. This will
redirect you to a specific form.
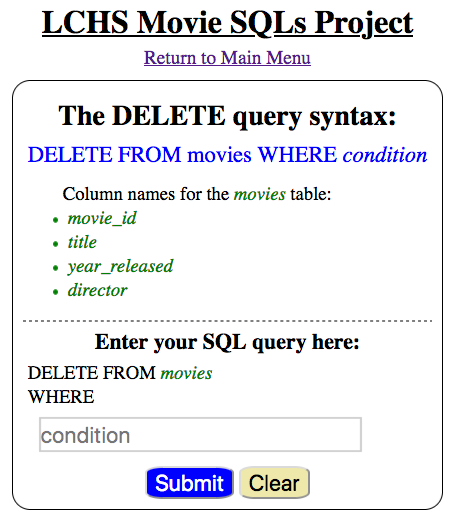
With the DELETE form, users submit a condition for the WHERE clause.
Try typing something into the input box, then submit the form. Nothing seems to
happen, because the delete_query() function in main.py is almost empty.
You need to add code to the function that will:
Request data from the form.
Build a
sql_querystring based on that input.Render the page again, but display the
sql_querystring below the form.
The
delete_query()function inmain.pybuilds a SQL query string.
Open
main.pyand add this code inside thedelete_query()function.48 49 50 51 52 53
def delete_query():
   if request.method == 'POST':
      pass
   else:
      pass
   return render_template('delete.html', tab_title = 'DELETE query', home = False)
Next, add code to collect the
conditiontext from the form. Also, collect the table name from the session cookie.48 49 50 51 52 53
def delete_query():
   if request.method == 'POST':
      condition = request.form['condition']
      table = session['table']
   else:
      pass
On line 50,
['condition']matches to the name attribute given to the input element indelete.html. Line 51 retrieves the value assigned tosession['table']. This value was set inside theindex()function.Use the
tableandconditionvariables to build the string for the SQL query. Also, assign the empty string tosql_queryin theelseclause.48 49 50 51 52 53 54
def delete_query():
   if request.method == 'POST':
      condition = request.form['condition']
      table = session['table']
      sql_query = f"DELETE FROM {table} WHERE {condition}"
   else:
      sql_query = ''
Finally, use the
render_template()function to passsql_queryto thedelete.htmltemplate.48 49 50 51 52 53 54 55 56 57
def delete_query():
   if request.method == 'POST':
      condition = request.form['condition']
      table = session['table']
      sql_query = f"DELETE FROM {table} WHERE {condition}"
   else:
      sql_query = ''

   return render_template('delete.html', tab_title = 'DELETE query',
      home = False, sql_query = sql_query)
Save your changes. Run
main.pyand submit the form several times to check your code. Fix any bugs that occur.
Congratulations! The delete_query() function now builds the required
string. Be sure to save, commit, and push your work.
Note
Right now, users can type whatever they want into the input box. Don’t worry about checking the accuracy of the SQL query yet.
24.10.4. The UPDATE Form
From the home page, select UPDATE and the directors table. When the new
page loads, notice that the form contains two input fields.
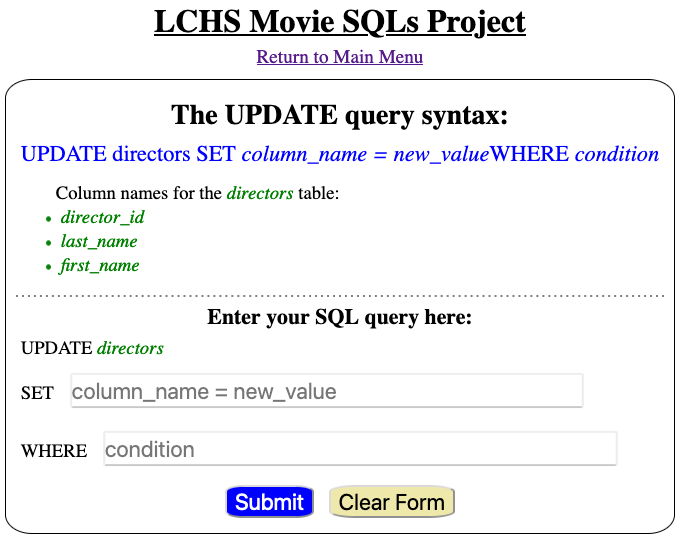
With the UPDATE form, users submit text for both SET and WHERE.
This page behaves in a similar way to delete.html. Users submit TWO text
fields, and the update_query() function sends back a completed query
string.
Open
update.htmland identify the name for each input element.16 17 18 19
<h3>Enter your SQL query here:</h3>
<p>UPDATE <span class="table-col-names">{{session['table']}}</span></p>
<label>SET <input class="query-input" name="new_value" type="text" placeholder="column_name = new_value" required/></label>
<label>WHERE <input class="query-input" name="condition" type="text" placeholder="condition"/></label>
Open
main.pyand find theupdate_query()function. Add a basicif/elseconditional.44 45 46 47 48 49 50
def update_query():
   if request.method == 'POST':
      pass
   else:
      sql_query = ''

   return render_template("update.html", tab_title = "UPDATE query", home = False)
Using the
delete_query()function as a model, replace thepasskeyword. Collect the SET and WHERE entries from the form and the table name from the session. Assign the values to the variablesnew_value,condition, andtable.Use the
tableandnew_valuevariables to build the first part of thesql_querystring:sql_query = f"UPDATE {table} SET {new_value}"
For an
UPDATEquery, theWHEREclause is optional. A user might not always submit one. Add a conditional to deal with this possibility:sql_query = f"UPDATE {table} SET {new_value}" if condition != '': sql_query += f" WHERE {condition}"
Finally, use the
render_template()function to passsql_queryto theupdate.htmltemplate.Save your changes and run the application to check your code.

The update_query() function combines several pieces of data to complete a SQL query string.
24.10.5. The INSERT and SELECT Forms
Follow the same process as above to finish the insert_query() and
select_query() functions.
Make sure to place parentheses
()around the column names and values in theINSERTquery.The
WHEREclause is optional inSELECT. Yourselect_query()function needs to deal with this.
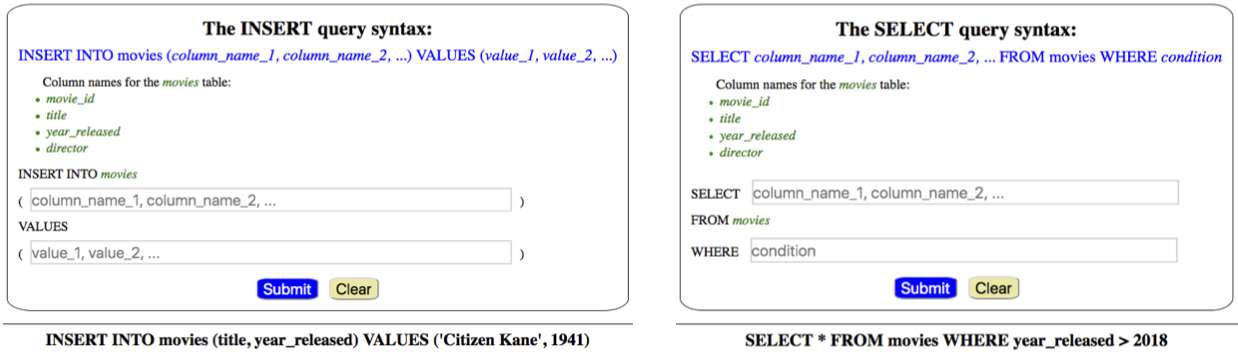
The insert_query() and select_query() functions also return SQL strings.