22.4. Adding Logic to Templates
Imagine we want to display the top three pet names for a particular year. We could easily create a list in Python to store these names, then pass that data to a template.
Example
Yes, we can sends lists to our HTML template! Dictionaries and objects are allowed as well.
1 2 3 4 5 6 7 | @app.route('/popular_pet_names')
def pet_names():
year = 2020
dogs = ['Bella', 'Max', 'Luna']
cats = [ 'Luna', 'Bella', 'Oliver']
birds = ['Kiwi', 'Blue', 'Sunny']
return render_template('...', year = year, dogs = dogs, cats = cats, birds = birds)
|
The template code might look something like this:
1 2 3 4 5 6 | <h1>Top Pet Names of {{year}}</h1>
<ol>
<li>{{dog[0]}} / {{cat[0]}} / {{bird[0]}}</li>
<li>{{dog[1]}} / {{cat[1]}} / {{bird[1]}}</li>
<li>{{dog[2]}} / {{cat[2]}} / {{bird[2]}}</li>
</ol>
|
While tedious, it doesn’t take that long to type the HTML for a list with only three rows.
Now imagine we want to extend the list to the top 10, 20, 100, or 200 pet names. Typing the HTML for that task doesn’t sound fun at all! Also, we would probably make several mistakes, so we should plan for some debugging time.
Fortunately, there is a better way.
22.4.1. Loops in Templates
For now, let’s just focus on the names for the dogs. With Python, we can easily
add or remove names to the dogs list. If we want to print these to the
console, we use a simple for loop.
1 2 | for dog in dogs:
print(dog)
|
Jinja3 allows us to do something similar inside a webpage. The general syntax for a loop is:
{% for item in collection_name %}
   {{item}}
{% endfor %}
The symbols {% %} surround code statements, and they show where the loop
begins and ends. Each time the loop repeats, item takes the value of the
next element in collection_name. The code does NOT appear on the webpage,
and the value for item gets inserted for the placeholder.
For the pet name template, the for loop would look like this. Note how line
3 looks just like the Python syntax, only without the ending colon, :.
1 2 3 4 5 6 | <h1>Top Dog Names of {{year}}</h1>
<ol>
{% for dog in dogs %}
<li>{{dog}}</li>
{% endfor %}
</ol>
|
Set up this way, the Jinja3 engine creates one <li></li> element for each
entry in dogs. If we use our Python function to add or remove names, the
template responds by resizing the list in the browser.
Note
The purpose of loops in Jinja3 is for display only. They are NOT used to perform calculations or process data. That type of logic belongs in our Python code.
Loops allow us to automatically create multiple HTML elements on a page. We provide the tags, attributes, and placeholders for a single entry. The iteration copies that format and inserts different values each time the loop repeats.
22.4.1.1. Using Index Values
If we want to loop through a collection by index instead of by item, the syntax for Python is:
for index in range(len(collection)):
For Jinja3, the syntax replaces the len function with |length.
{% for index in range(collection|length) %}
In both cases, index takes the values 0, 1, 2...
Example
We can use index values to complete our pet name list.
1 2 3 4 5 6 | <h1>Top Pet Names of {{year}} (Dogs / Cats / Birds)</h1>
<ol>
{% for index in range(dogs|length) %}
<li>{{dogs[index]}} / {{cats[index]}} / {{birds[index]}}</li>
{% endfor %}
</ol>
|
Even if the lists for dogs, cats, and birds are not the same
length, Jinja3 won’t throw an index out of range error. Instead, the
placeholders for the missing values show up as empty spots on the page.
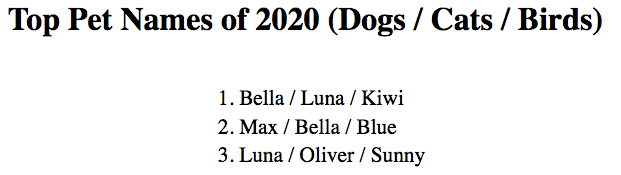
The 5th most popular bird name of 2020 was “Chicken”.
These 6 lines of code only produce 4 lines of text on the webpage. However, they would add more if we expand the list of pet names.
22.4.1.2. Placement Matters
{% for... %} and {% endfor %} repeat every element placed between them.
A small shift in the code can make a big difference in how the page renders.
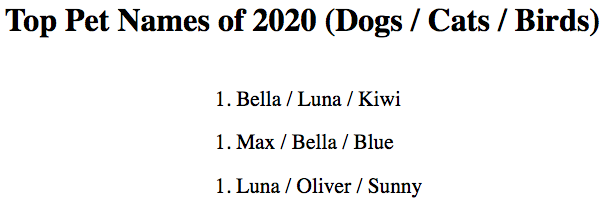
For example, let’s bring the <ol> tags inside the loop.
1 2 3 4 5 6 | <h1>Top Pet Names of {{year}} (Dogs / Cats / Birds)</h1>
{% for index in range(dogs|length) %}
<ol>
<li>{{dogs[index]}} / {{cats[index]}} / {{birds[index]}}</li>
</ol>
{% endfor %}
|
Instead of one list with three different entries, this version of the code produces three separate lists, each with only one element.
What do you think would happen if we moved the h1 element inside the loop
as well?
22.4.2. Try It!
Loops really come in handy whenever we need to build checkbox or radio inputs! Instead of having to code every single element, we can set up the template to build the form automatically.
In
main.py, paste in this starter code:1 2 3 4 5 6 7 8 9 10 11 12
from flask import Flask, render_template, request

app = Flask(__name__)
app.config['DEBUG'] = True

@app.route('/', methods=['GET', 'POST'])
def checkbox_form():

   return render_template('checkbox_form.html')

if __name__ == '__main__':
   app.run()
On line 8, define a
pizza_toppingsvariable. Assign it a list that contains at least five options. (It’s OK to have pineapple and pepperoni in the same list!)Inside
render_template(), pass the list of toppings to the HTML file.Open
checkbox_form.htmlin the workspace. Paste in this starter code:1 2 3 4 5 6 7 8 9 10 11 12 13 14 15 16 17 18
<!DOCTYPE html>
<html>
   <head>
      <meta charset="UTF-8">
      <meta name="viewport" content="width=device-width">
      <title>Checkbox Logic</title>
      <link rel="stylesheet" type="text/css" href="{{ url_for('static', filename='style.css') }}">
   </head>
   <body>
      <h1>Checkbox Logic</h1>
      <h2>Select Your Pizza Toppings</h2>
      <form action="/" method="POST">

         <!-- Your form code goes here. -->

      </form>
   </body>
</html>
Launch
main.pyand make surecheckbox_formrenders. Add a{{pizza_toppings}}placeholder to the page just to make sure your list is being sent to the template. (You can remove the placeholder after that).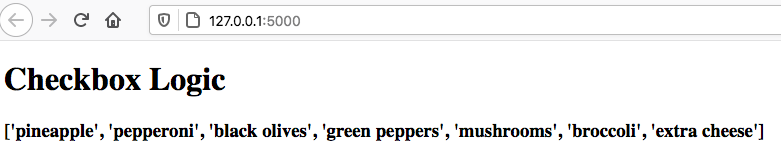
Successfully sending a Python list to the webpage.
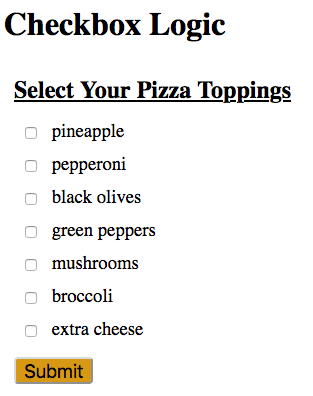
On line 14, add a
labelandinputelement for one checkbox. Include a{{topping}}placeholder for the label text and thevalue.<label><input type="checkbox" name="toppings" value="{{topping}}"/> {{topping}}</label><br>
On lines 13 and 15, add the statements
{% for topping in pizza_toppings %}and{% endfor %}. Save your work and refresh the page in your browser.Buona pizza!
The hex code for one pizza crust color is
#d79914.
22.4.2.1. Bonus Try It!
Convert the form to a radio button group!
Instead of using
type="checkbox"inside the input tag, replace it with a placeholder. Inmain.py, userender_template()to send the string'radio'to the template. Switch the inputs back by sending'checkbox'.Be sure to update the
titleandh1as well.Can you make this happen?
Adding a loop to a template allows us to make dynamic changes to the structure of the page.
22.4.3. Check Your Understanding
The following questions refer to this code sample:
1 2 3 4 5 6 | <section>
<h3>My Pets</h3>
<ul>
<li>{{pet}}</li>
</ul>
</section>
|
Assume that we define a pets list that contains 4 animals.
Question
Adding {% for pet in pets %} and {% endfor %} around the <li> tag
produces:
- 4 headings
- 4 unordered lists
- 4 list items
- 4 headings each with 4 list items
Question
Moving {% for pet in pets %} and {% endfor %} above and below the
<section> tags produces:
- 1 heading and 4 unordered lists with 4 pets each
- 4 headings and 4 unordered lists with 4 pets each
- 1 heading and 4 unordered lists with 1 pet each
- 4 headings and 4 unordered lists with 1 pet each