20.1. Web Forms
Up until now, we have looked at webpages that simply display data. We either
used HTML to create our own page, or we opened up our browser and sent a
GET request to pull up a page we wanted.
Of course, there are plenty of webpages that require us to supply data. We see this anytime we need to fill out a survey, login to one of our accounts, or sign up online for a new service.
In this chapter we are going to learn more about how web pages handle data collected from HTML forms. A web form is used to accept input from a user and send that data to a server.
20.1.1. Create a Form
To declare a form in HTML, we use the <form> tags. Inside this element, we
must include some type of input elements in order to capture information
from the user.
Example
Examine the HTML code and webpage in the editor below. Note how the
h1andpelements appear on the page, but the form itself seems to be missing.An empty
formelement will not appear on a web page until we add one or moreinputelements inside of it.Add a basic
<input>tag to the HTML and see how the webpage changes. Replace line 13 with the code:13 14 15
<form> <input type="text"/> </form>
Once the new page renders, notice that a box appears. Clicking inside this box allows us to type something!
20.1.1.1. Local HTML Forms
We used an embedded Trinket editor above just to provide a quick start. Let’s move this into Visual Studio Code, since we will do most of our work locally from now on.
Launch VS Code. Open your
local_practicefolder and create a new directory calledforms_chapter.Navigate into
forms_chapterand initialize it as a new repository withgit init.Create an
index.htmlandstyle.cssfile inside the folder.Paste your code from the Trinket editor above into the
index.htmlfile.Save and commit your work.
Open
index.htmlin a new tab of your browser to confirm that your setup works.Use
git branchto check the name of your default branch. If necessary, usegit branch -m old-branch-name mainto change its name tomain.
20.1.2. Input Element
The input element adds an interactive field, which allows the user to
enter data. input elements have two very important attributes: name and
type.
The
nameattribute identifies the input’s value when the form is submitted.The
typeattribute defines the value expected from the input box. These value types include text, numbers, dates, email addresses, etc.
The syntax for an input tag is:
<input type="..." name="..."/>
For the example, in the HTML code above, we could use this for the input
element:
<input type="text" name="username"/>
Notice that input tags are self-closing. This means that the element
only requires a single tag, which ends with />.
Warning
Values are NOT submitted for an <input> unless it includes a name
attribute.
20.1.3. Labels
Right now, our HTML form contains a single input box (also called a field). However, we don’t actually tell the user what they need to type into that box. Not good!
To make the user’s experience better, we need to provide them with a clear idea of what goes into each field. This is especially true if our form contains more than one input!
<label> tags attach specific text to an input field. This tells the user
the purpose of that field. The simplest way to use the <label> tags is to
wrap them around <input> tags.
Example
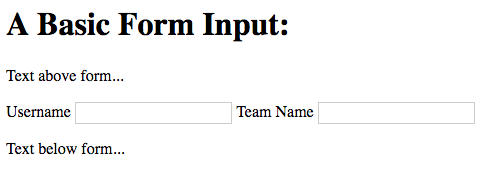
Let’s add a second input box and some labels to our basic form:
13 14 15 16 | <form>
<label>Username <input type="text" name="username"/></label>
<label>Team Name <input type="text" name="team"/></label>
</form>
|
Now our form is more user-friendly:
A second way to attach a label to an input is to use the id and
for attributes. id goes inside the input tag, and for goes
inside <label>.
This works by assigning the SAME string to each attribute. When for is
used, the <input> element does NOT have to be inside <label></label>.
Try It!
Replace the first wrapped label/input pair with this:
14 15 | <label for="user">Username</label>
<input id="user" name="username" type="text"/>
|
Note that the appearance of the page doesn’t change, since the two formats do the exact same thing.
20.1.3.1. Field Focus
Try clicking on the Username and Team Name labels below. What happens?
Now try clicking on the labels in your own basic form page. (Cool!)
For text inputs, when the label is clicked, the input gains focus. This means that the browser selects the element. That field is now ready to receive input.
Different input types will show different behaviors when their labels are
clicked. For non-text inputs, when the label is clicked, a value is selected.
This behavior can be seen with radio and checkbox elements, which we
will learn about soon.
Examples
Click on the label next to each input element.
1 2 3 4 | <form>
<label>Text: <input name="demo" type="text"/></label><br>
<label>Checkbox: <input type="checkbox" name="newsletter"/></label>
</form>
|
20.1.4. Value Attribute
The value attribute for an <input> tag sets a default value for the
field. When we use the value attribute, the browser pre-fills that data
into the input box. The user can change the value by typing something else in
the field.
Example
Here is an input element with a default value of Python.
1 2 3 4 5 | <form>
<label>Which language ROCKS?
<input name="language" type="text" value="Python"/>
</label>
</form>
|
Try It!
Add default values to the Username and Team Name fields in your
basic form.
When the input box contains a default value, what happens when you click the label?
20.1.5. Check Your Understanding
Question
What is the purpose of the name attribute for input elements?
- It adds a text label to the input box.
- It identifies the type of data the user should put in the input field.
- It references the input value when the form is submitted.
- It applies focus to the input element.
Question
Which input attribute sets a default value?
-
value -
name -
type -
id