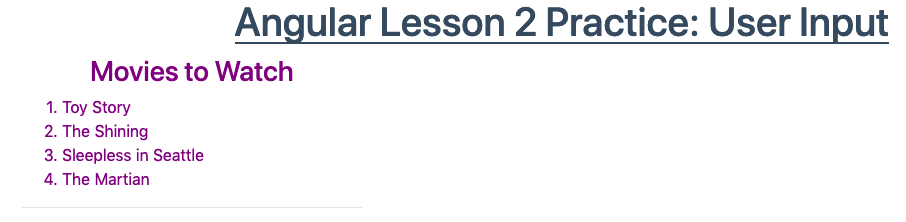
So far, if we want to change the number of items in our movie and chore lists, we have to go into the code and alter the arrays. This is inefficient. It would be better if we could make the changes on the screen.
From the lesson2 folder in VSCode, open the
examples/input-practice/src/app/movie-list folders and select the
movie-list.component.html file.
The starter code should match this:
1<div class='movies col-4'>
2   <h3>Movies to Watch</h3>
3   <ol>
4      <li *ngFor ="let movie of movies">{{movie}}</li>
5   </ol>
6   <hr>
7
8</div>
In the terminal, navigate into the input-practice folder. Enter
npm install to add the Angular modules, then run ng serve. The web page
should look like this:
Now let's modify the code to accept user input. Be sure to code along with each step.
Recall that the HTML input tag creates a box where the user
can enter data. This data is retrieved by referencing the input element's
value property.
<input type='text' placeholder="Enter Movie Title Here"/> to line 7,
then reload the page.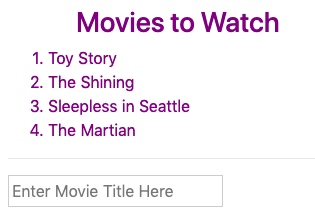
Typing characters into the box does not do anything yet, since we have not included any instructions to deal with the data.
Angular extends the input element by declaring a reference variable
and also an event that triggers data collection. Modify the input element
in line 7 by adding #newMovie inside the tag:
<input #newMovie type='text' placeholder="Enter Movie Title Here"/>
To store the typed characters in the newMovie variable, we need to wait
for a particular event to occur. One of the simplest is to wait for a
keyup. Modify line 7 one more time:
<input #newMovie (keyup)='true' type='text' placeholder="Enter Movie Title Here"/>
(keyup)='true' waits for the user to tap and release a key when the cursor
is in the input box. When this happens, any characters in the box are stored in
newMovie. However, we still need a place for the data to go.
Add a <p> element to line 8 of your code, and include a placeholder for
the value of newMovie. Save and reload the page:
1<div class='movies col-4'>
2   <h3>Movies to Watch</h3>
3   <ol>
4      <li *ngFor ="let movie of movies">{{movie}}</li>
5   </ol>
6   <hr>
7   <input #newMovie (keyup)='true' type='text' placeholder="Enter Movie Title Here"/>
8   <p>{{newMovie.value}}</p>
9</div>
When the keyup event is triggered, data gets stored in the newMovie
variable. The newMovie.value placeholder on line 8 displays that data on
the screen.
Try It
Save your work, reload the page, and then play! Type into the input box to verify your code works.
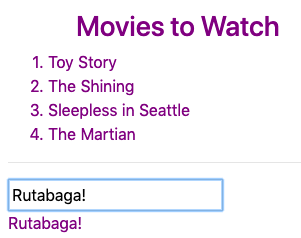
As you add or remove characters from the input box, you should see a real-time update of the text on the screen.
In the example above, we used the keyup event to trigger data collection.
This choice stores data in newMovie every time a key is released. For
adding a new movie title to our list, however, it would be better to wait for
the user to finish typing.
keyup¶The keyup event waits for ANY key to be released, but Angular allows us to
modify the keyword to wait for a SPECIFIC key. If, for example, we want to
record data when the '0' key is released, then we would replace
(keyup)='true' with (keyup.0)='true'.
The general syntax for this modification is keyup.key, and key refers
to any character on the keyboard---including shift, enter, and
space.
Try It
Change the keyup event in line 7 to:
keyup.enter,keyup.arrowup,keyup.qRefresh the page after each change and explore how each one affects collecting user input.
Other key combinations are described at alligator.io.
Instead of waiting for a specific key to be pressed, let's wait for the user
to click. Replace the (keyup) event with (click) in line 7:
<input #newMovie (click)='true' type='text' placeholder="Enter Movie Title Here"/>
Notice that the page now changes only when the user clicks inside the input
box. This method is similar to keyup.enter because it gives the user a
specific action to perform that records the entry without changing the text.
Since most of us are used to pressing the "Enter" key to submit our input, clicking inside the box might not be the best option. Fortunately, we know how to add a button to our HTML.
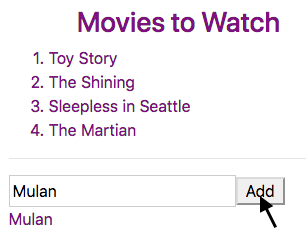
Add a <button> element with a click event to line 8. Also, change
the event in line 7 back to keyup.enter:
 1<div class='movies col-4'>
 2   <h3>Movies to Watch</h3>
 3   <ol>
 4      <li *ngFor ="let movie of movies">{{movie}}</li>
 5   </ol>
 6   <hr>
 7   <input #newMovie (keyup.enter)='true' type='text' placeholder="Enter Movie Title Here"/>
 8   <button (click)='true'>Add</button>
 9   <p>{{newMovie.value}}</p>
10</div>
Refresh the page and type a title into the input box. Tapping "Enter" or clicking the "Add" button should display your text below the box.
We now have a way to collect user input and store it in a variable. We also learned how to access the data and display it on the web page.
To accept user input, Angular requires three items:
input tag,#variableName,On the next page, we will learn how to make that input appear in our list of movies.