15.4. Thymeleaf Form Tools
Thymeleaf provides some handy attributes for working with form fields. They make use of the fact that, when using model binding, each model field contains a lot of information about the corresponding form input needed. In particular, the model field and its annotations often determine:
The name of the form field (that is, the value of its
nameattribute).The validation rules and corresponding error messages for the field.
Thymeleaf provides some convenient attributes to make wiring up a form much easier and cleaner.
15.4.1. Display Validation Errors for a Field - Video
Note
The starter code for this video is found at the validation-errors branch of the coding-events-demo repo.
The final code presented in this video is found on the display-errors branch As always, code along to the
videos on your own coding-events project.
Tip
Some hawk-eyed students notice a small quirk after finishing their
display-errors constructor. Each time the page reloads, the id
counter for the database entries increases by 1, even if no new row is
added. This leads to a table that contains gaps between the id values.
This is OK! There is no need to correct the quirk right now.
15.4.2. Display Validation Errors for a Field - Text
15.4.2.1. Using th:field
We can use the th:field attribute on a form input to instruct Thymeleaf to
add field-specific attributes to the form, such as name and id.
Consider our second input, which currently looks like this:
17 18 19 | <label>Description
<input type="text" name="description" class="form-control" />
</label>
|
Above, we set the name attribute of the input element equal to
description". We do this because we want this input data to be bound to the
description field of the Event class when the form is submitted.
A better approach uses th:field to bind the description field
when the form is rendered.
17 18 19 | <label>Description
<input type="text" th:field="${event.description}" class="form-control" />
</label>
|
With this syntax, Thymeleaf will look for a variable named event and use
its description property to set the values of the name and id
attributes. The generated input looks like this:
<input type="text" id="description" name="description" class="form-control" />
We don’t need to use the id attribute in this case, but it doesn’t hurt
anything by being there. Now, Thymeleaf sets name on its own, based on the
field identifier.
For this to work, two more steps are necessary. First, we add constructor to
Event that doesn’t require any arguments, also called a
no-arg constructor.
27 28 29 30 31 32 33 34 35 36 37 | public Event(String name, String description, String contactEmail) {
this();
this.name = name;
this.description = description;
this.contactEmail = contactEmail;
}
public Event() {
this.id = nextId;
nextId++;
}
|
This code includes two changes:
A no-arg constructor has been created. It simply sets the
idof the object, leaving all other fieldsnull.The previously-existing constructor now calls
this(), which calls the no-arg constructor to set theidbefore setting the values of all other fields.
Finally, we have to pass in an empty Event created with the new no-arg
constructor when rendering the form. Back in EventController, we update the
handler:
26 27 28 29 30 31 | @GetMapping("create")
public String displayCreateEventForm(Model model) {
model.addAttribute("title", "Create Event");
model.addAttribute("event", new Event());
return "events/create";
}
|
Notice line 29, which passes in an Event object created by calling the
no-arg constructor.
Note
It’s also allowable to pass in the Event object without a label:
model.addAttribute(new Event());
In this case, Spring will implicitly create the label "event", which is
the lowercase version of the class name.
Using this technique on our other form fields completes the task of binding the object to the form during rendering.
8 9 10 11 12 13 14 15 16 17 18 19 20 21 22 23 24 25 26 27 28 29 30 | <form method="post">
<div class="form-group">
<label>Name
<input type="text" th:field="${event.name}" class="form-control" />
</label>
<p class="error" th:errors="${event.name}"></p>
</div>
<div class="form-group">
<label>Description
   <input type="text" th:field="${event.description}" class="form-control" />
</label>
<p class="error" th:errors="${event.description}"></p>
</div>
<div class="form-group">
<label>Contact Email
<input type="text" th:field="${event.contactEmail}" class="form-control" />
</label>
<p class="error" th:errors="${event.contactEmail}"></p>
</div>
<div class="form-group">
<input type="submit" value="Create" class="btn btn-success" />
</div>
</form>
|
One additional result of using th:field is that if the Event object has
a value in any bound field, the input will be created with that value in its
value attribute. For example, if the event object has a
contactEmail of me@me.com, then the resulting form input would be:
<input type="text" id="contactEmail" name="contactEmail" value="[email protected]" class="form-control" />
The value is then visible in the form field when the page loads. This may not seem immediately useful, but it actually is. Recall our form submission handler:
33 34 35 36 37 38 39 40 41 42 43 | @PostMapping("create")
public String processCreateEventForm(@ModelAttribute @Valid Event newEvent,
Errors errors, Model model) {
if(errors.hasErrors()) {
model.addAttribute("title", "Create Event");
return "events/create";
}
EventData.add(newEvent);
return "redirect:";
}
|
This method checks for validation errors and returns the user to the form if it finds any. It uses model binding to create a new event object, but this event object is also passed into the view when re-rendering the form. This means that if there are validation errors, the form will be rendered with the values that the user previously entered, preventing the user from having to re-enter all of their data.
15.4.2.2. Using th:errors
The Thymeleaf attribute th:errors is used similarly to th:field to
display field-specific error messages. Recall that when we added our validation
annotations to each model field, we also
added a message argument. Setting th:errors to
a field will display any validation errors for that field.
For example, let’s add a new element to the first form group:
9 10 11 12 13 14 | <div class="form-group">
<label>Name
<input th:field="${event.name}" class="form-control" />
</label>
<p class="error" th:errors="${event.name}"></p>
</div>
|
Setting th:errors="${event.name}" tells Thymeleaf to insert any error
messages related to the name field of event into the paragraph element.
We add class="error" to allow us to style this element, for example with
red text. A simple rule in our styles.css file will do the trick:
.error {
color: red;
}
Note
Make sure that styles.css is included in the head fragment of fragments.html, or the stylesheet will not load.
Using this attribute on all of the fields gives us our final form template code:
8 9 10 11 12 13 14 15 16 17 18 19 20 21 22 23 24 25 26 27 28 29 30 | <form method="post">
<div class="form-group">
<label>Name
<input type="text" th:field="${event.name}" class="form-control" />
</label>
<p class="error" th:errors="${event.name}"></p>
</div>
<div class="form-group">
<label>Description
<input type="text" th:field="${event.description}" class="form-control" />
</label>
<p class="error" th:errors="${event.description}"></p>
</div>
<div class="form-group">
<label>Contact Email
<input type="text" th:field="${event.contactEmail}" class="form-control" />
</label>
<p class="error" th:errors="${event.contactEmail}"></p>
</div>
<div class="form-group">
<input type="submit" value="Create" class="btn btn-success" />
</div>
</form>
|
Now, when the form is submitted with invalid data, our custom validation error messages will display just below the given inputs.
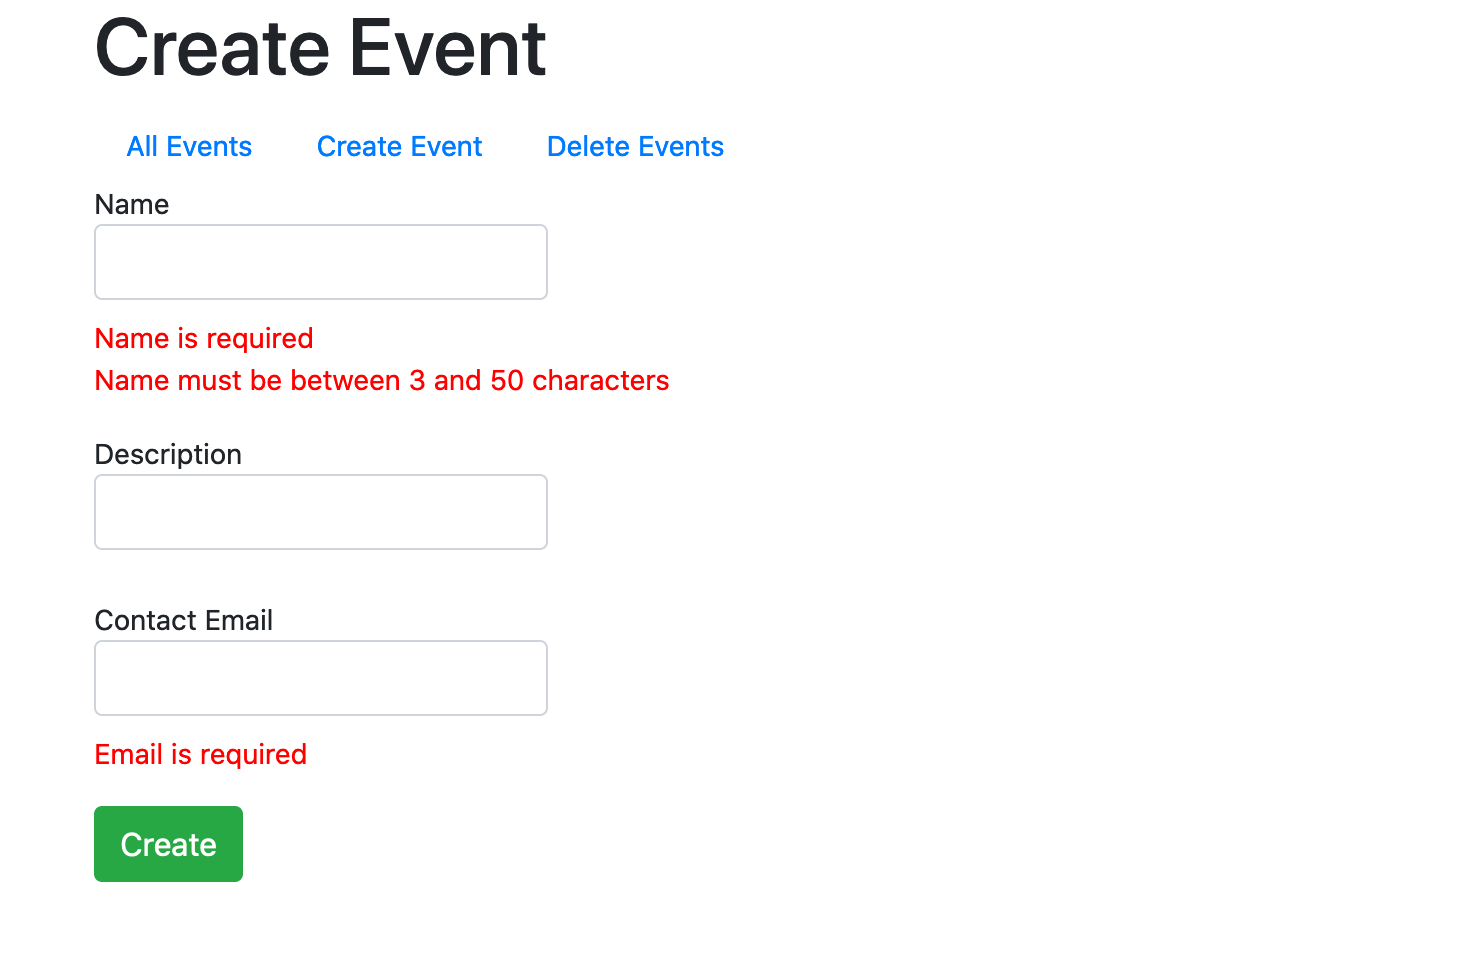
The result of submitting an empty form
15.4.3. Check Your Understanding
Question
Which HTML attributes will a th:field attribute NOT influence?
idnamevaluefield