15.2. Validation Annotations
Within the model of a Java web application, we can define validation rules using annotations from the javax.validation.constraints package. This package provides a variety of annotations that are useful in common circumstances, and which can be applied to model fields.
15.2.1. Common Annotations
We’ll use only a few of these annotations, but you can find a full list in the package documentation.
Annotation |
Description |
Syntax |
|---|---|---|
|
Specifies minimum and/or maximum length for a string. |
|
|
Specifies the minimum value of a numeric field. |
|
|
Specifies the maximum value of a numeric field. |
|
|
Specifies that a string field should conform to email formatting standards. |
|
|
Specifies that a field may not be |
|
|
Specifies that a string field contains at least one non-whitespace character. |
|
Example
To apply the validation rules of the example on the previous page to the fields of a User model class, we can use @Size and @NotBlank.
@NotBlank
@Size(min = 3, max = 12)
private String username;

@NotBlank
@Size(min = 6)
private String password;
15.2.2. Defining Validation Messages
Each of these annotations takes an optional message parameter that allows you to define a user-friendly description to be used when validation fails.
Example
@NotBlank(message = "Username is required")
@Size(min = 3, max = 12, message = "Username must be between 3 and 12 characters long")
private String username;

@NotBlank(message = "Password is required")
@Size(min = 6, message = "Sorry, but the given password is too short. Passwords must be at least 6 characters long.")
private String password;
We will see how to ensure these messages are properly displayed in the next section, Validating Models in a Controller.
15.2.3. Applying Validation Annotations - Video
Note
The starter code for this video is found at the model-binding branch. of the coding-events-demo repo.
The final code presented in this video is found on the add-validation-annotations branch. As always, code along to the
videos on your own coding-events project.
15.2.4. Applying Validation Annotations - Text
To configure validation on the model-side, we begin by adding validation annotations to each field to which we want to apply constraints.
For our Event class, we add @Size and @NotBlank to the name field, and just @Size to the description field.
16 17 18 19 20 21 | @NotBlank(message = "Name is required.")
@Size(min = 3, max = 50, message = "Name must be between 3 and 50 characters")
private String name;
@Size(max = 500, message = "Description too long!")
private String description;
|
The min and max parameters for @Size specify the minimum and maximum number of allowed characters, respectively. Omitting either of these means that no min or max will be applied for the field. For our description field, leaving off min effectively makes this field optional.
Each of our annotations also receives a message parameter, which provides a user-friendly message to display to the user if the particular validation rule fails. We will see how to display these in a view a bit later.
Next, we add a new field to store a contact email for each event. This is a String named contactEmail. Validating email addresses by directly applying each of the rules that an email must satisfy is extremely difficult. Thankfully, there is an @Email validation annotation that we can apply to our new field.
After adding this new field to our constructor, and generating a getter and setter, our class is done for the moment.
11 12 13 14 15 16 17 18 19 20 21 22 23 24 25 26 27 28 29 30 31 32 33 34 35 36 37 38 39 40 41 42 43 44 45 46 47 48 49 50 51 52 53 54 55 56 57 58 59 60 61 62 63 64 65 66 67 68 69 70 71 72 73 74 75 76 77 78 79 | public class Event {
private int id;
private static int nextId = 1;
@NotBlank
@Size(min = 3, max = 50, message = "Name must be between 3 and 50 characters")
private String name;
@Size(max = 500, message = "Description too long!")
private String description;
@Email(message = "Invalid email. Try again.")
private String contactEmail;
public Event(String name, String description, String contactEmail) {
this.name = name;
this.description = description;
this.contactEmail = contactEmail;
this.id = nextId;
nextId++;
}
public String getName() {
return name;
}
public void setName(String name) {
this.name = name;
}
public String getDescription() {
return description;
}
public void setDescription(String description) {
this.description = description;
}
public String getContactEmail() {
return contactEmail;
}
public void setContactEmail(String contactEmail) {
this.contactEmail = contactEmail;
}
public int getId() {
return id;
}
@Override
public String toString() {
return name;
}
@Override
public boolean equals(Object o) {
if (this == o) return true;
if (o == null || getClass() != o.getClass()) return false;
Event event = (Event) o;
return id == event.id;
}
@Override
public int hashCode() {
return Objects.hash(id);
}
}
|
Tip
The full list of Java validation annotations is in the documentation for javax.validation.constraints.
Before we can start up our application, we need to add a new column to the events/index template to make contactEmail visible.
8 9 10 11 12 13 14 15 16 17 18 19 20 21 22 23 | <table class="table table-striped">
<thead>
<tr>
<th>ID</th>
<th>Name</th>
<th>Description</th>
<th>Contact Email</th>
</tr>
</thead>
<tr th:each="event : ${events}">
<td th:text="${event.id}"></td>
<td th:text="${event.name}"></td>
<td th:text="${event.description}"></td>
<td th:text="${event.contactEmail}"></td>
</tr>
</table>
|
Now we can start up our application and test. Submitting an empty form at /events/create still results in an event being created, which may not be what you were expecting.
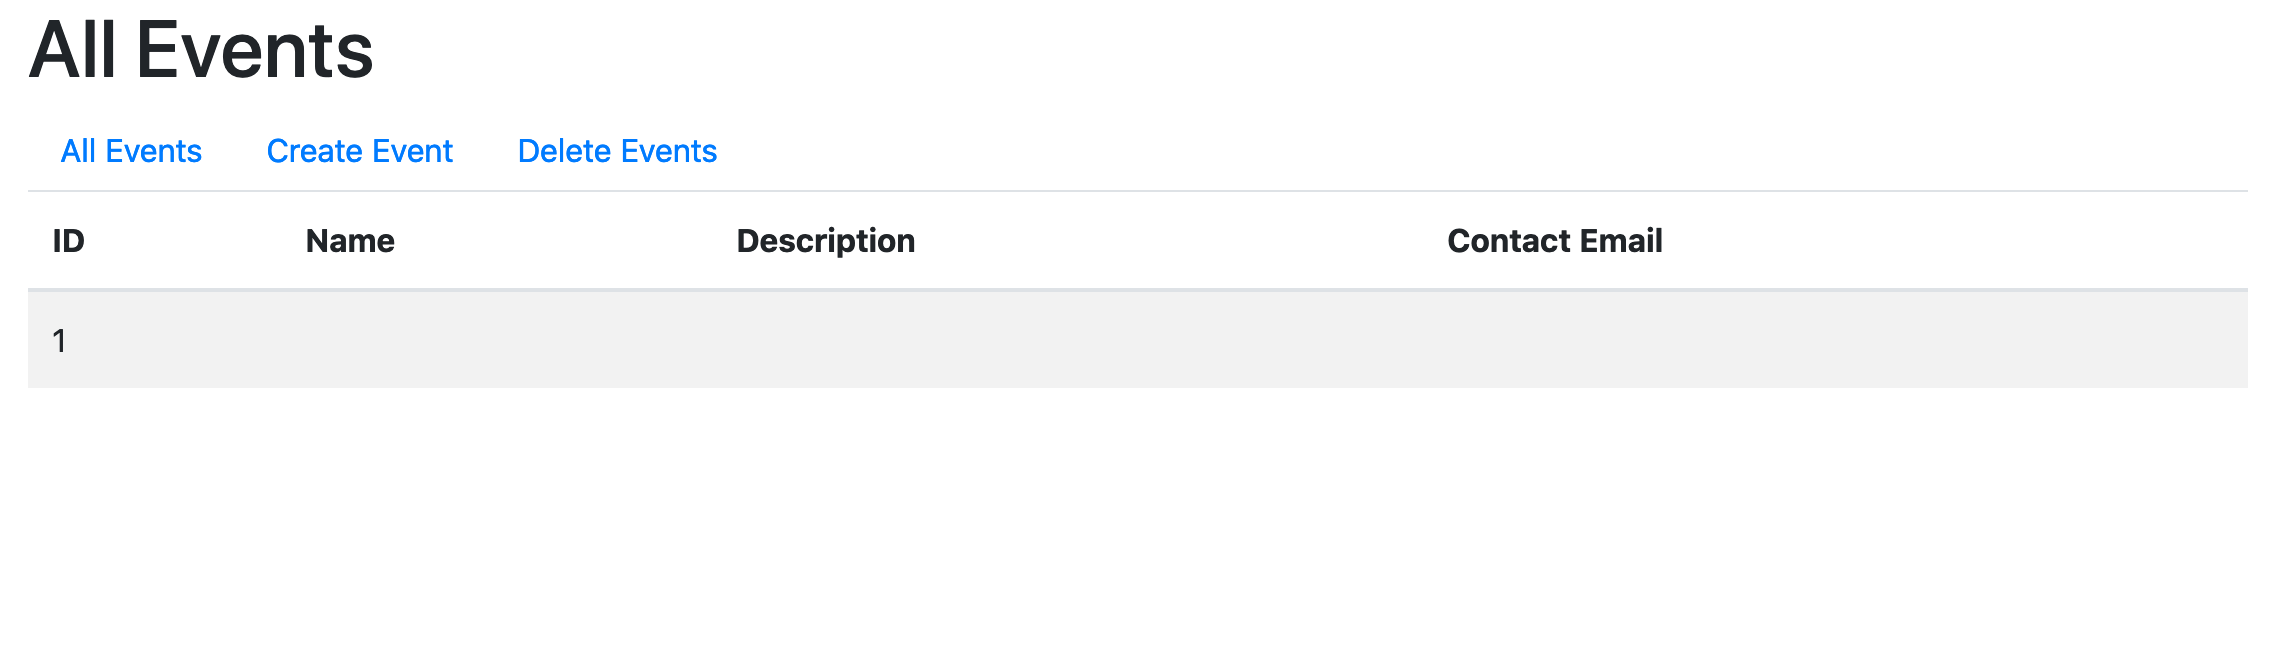
Even after adding validation annotations, we can still create invalid data.
Rather than a bug, this is expected behavior. Recall that validation involves both the model and controller, but we have not modified the controller in any way. Validation annotations simply define the validation rules that should be used to check data. The responsibility of checking the data before saving a new event lies with the controller.
In the next section, we’ll modify the controller to properly check for valid data.
15.2.5. Check Your Understanding
Question
True or False: When using @Size you must provide both min and max arguments.
Question
True or False: Adding validation annotations to a model ensures that bad data is not saved.