23.4. How to Create an HTML Page in Visual Studio
Open your Visual Studio and create a new project.
23.4.1. For Mac Users
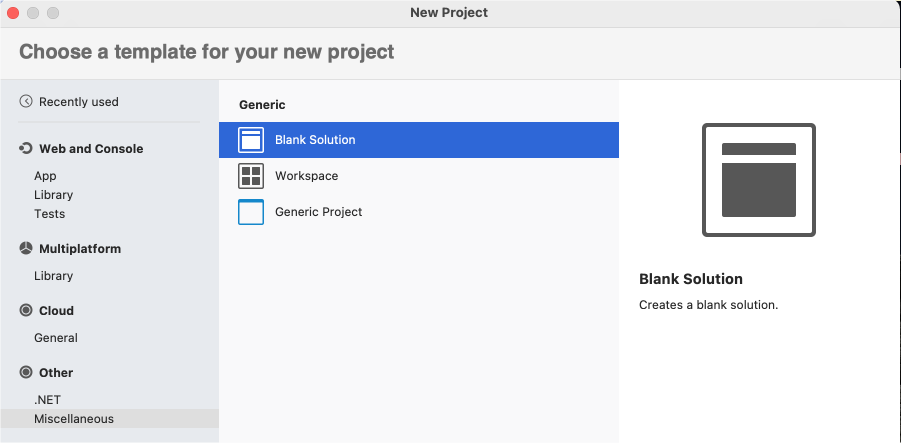
Select either a Generic or Blank project.
Name your solution and project.
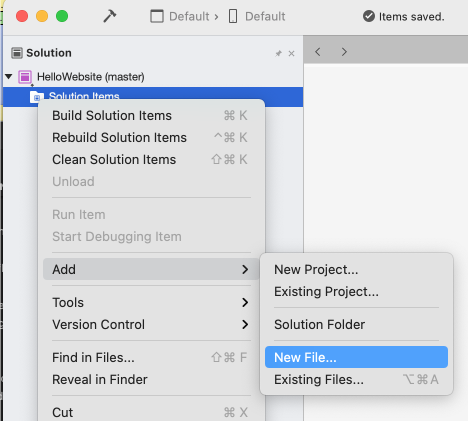
Once your project is created, open your Solution Explorer.
Right-click on your project, select Add then New File …
A pop-up menu will open, select Web from the left column.
A list of project types will appear, select HTML page
Name this page
index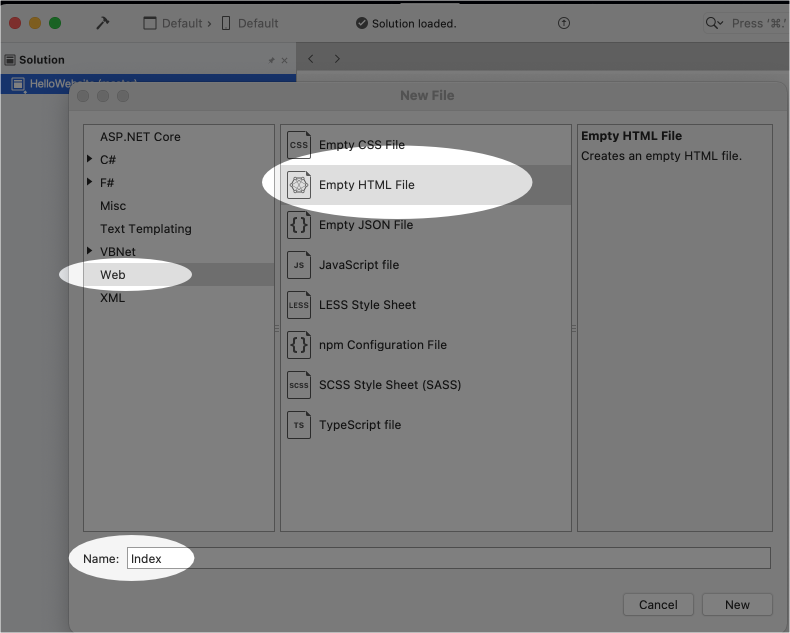
Click New
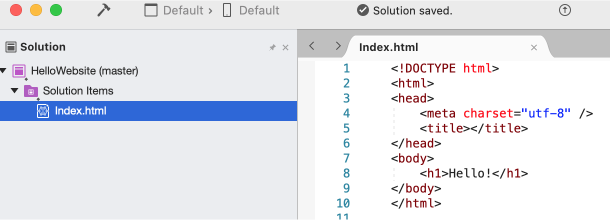
Inspect your new HTML page.
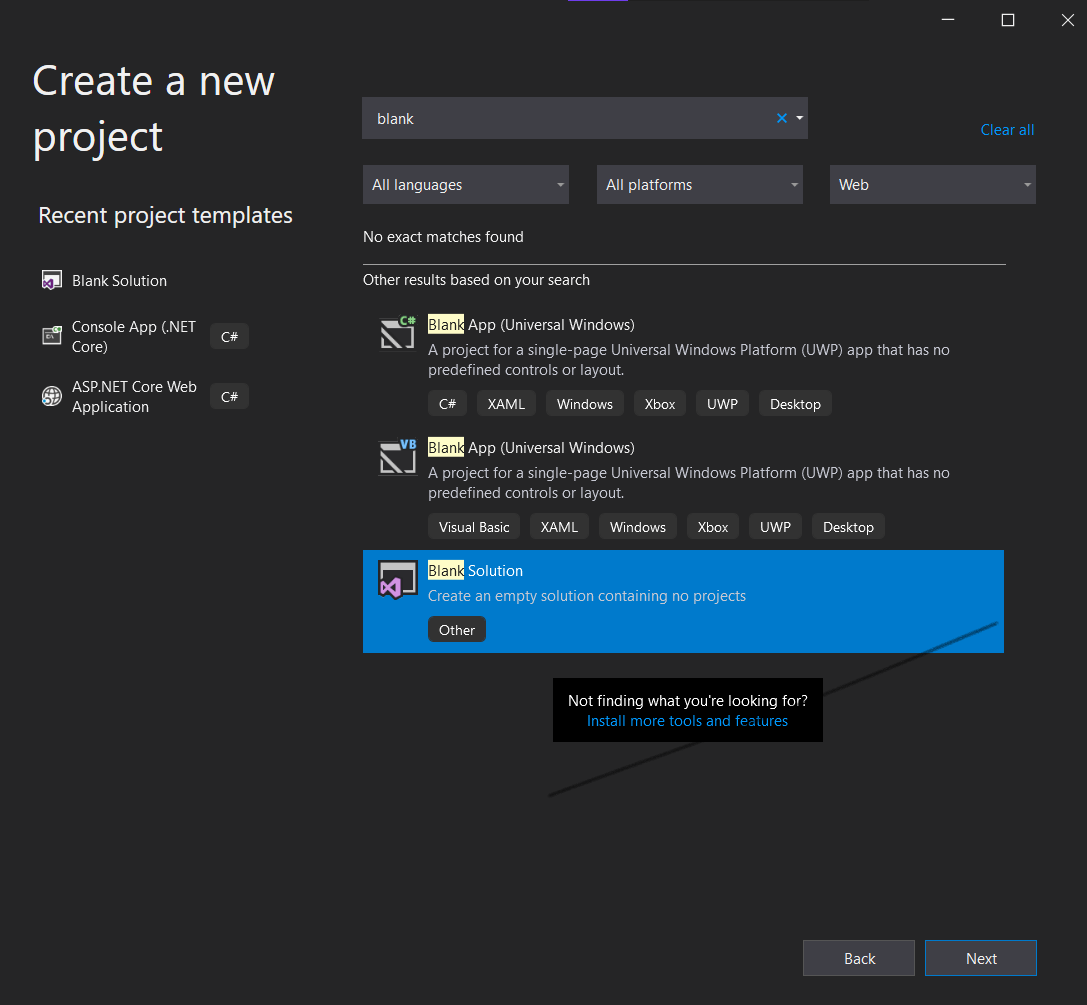
23.4.2. For Windows Users
Search for a “Blank” or Generic project, and select it.
Name your solution and project.
Once your project is created, open your Solution Explorer.
Right-click on your project, select Add then New Item …

Select HTML Page
Name it
indexClick New
Inspect your new HTML page.

23.4.2.1. Both Mac and Windows
Once you have your HTML page created, you are ready to move on to the exercises.