29.6. Components
In Angular a component controls one part of the page, called a view.
Angular builds a web page by combining multiple components together. Splitting our page into individual components makes our application more organized. It also increases our ability to focus on one section of our web application at a time.
Everything in Angular centers on the idea of building a webpage from separate, smaller pieces. We must understand how to get these pieces to work together, and that begins by exploring what makes up each individual component. In order to build a reliable component, we must understand how each of its parts work and interact.
29.6.1. Start Fresh
In the terminal, navigate back to the angular_practice folder you created
on the Angular First Steps page. Create a new
project called component-practice.
$ ng new component-practice
Open the app.component.html file in VSCode. Remove ALL of the code and
replace it with an empty div element.
1 2 3 | <div>
</div>
|
OK, the stage is set for a closer look at components.
29.6.2. Component Files
Angular components consist of 4 files:
an HTML file (.html)
a CSS file (.css)
a typescript file (.ts)
a test file (.spec.ts)
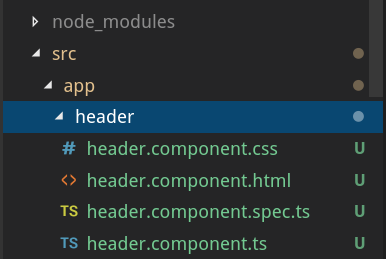
Visual of file tree after adding a new component, header, to the project.
Looking at the file tree, we see that all four files contain the name of the
component---header, in this case. Also, the files are located in a folder
named after the component.
If we add a new component named task-list, the four files created inside
the task-list folder would be called:
task-list.component.htmltask-list.component.csstask-list.component.tstask-list.component.spec.ts
Each file contains information specific to that component.
task-list.component.html holds the HTML required for the task-list and no
other component. task-list.component.css only styles html within the
task-list folder, the typescript code in task-list.component.ts only
applies to this component, and all the tests for task-list will be found
in task-list.component.spec.ts.
29.6.3. Adding a New Component
Each component is a smaller part of an overall web application. The main
component, app, serves as a base structure, and it comes standard with all
Angular applications. It is the container that holds all of the other
components, and it organizes them into the web application.
When you generate a new component using the Angular CLI, it is automatically
added to app. Let's explore how this process works.
29.6.3.1. ng generate
To create a new Angular component, the terminal syntax is:
$ ng generate component component-name
Warning
A common mistake is to create a new component in the wrong location, say in
the src folder instead of in app.
ng generate places the new component folder within your current
directory. Use the terminal to navigate to where you want the component to
go BEFORE running the generate command.
Creating a task-list component looks something like this:
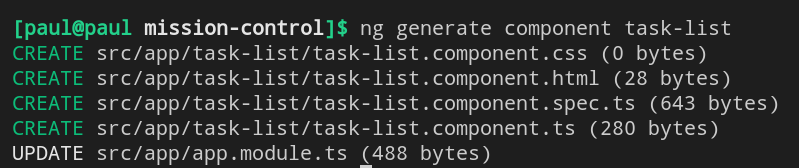
Terminal output when creating a new component.
From the output, we see that the ng generate command created four new files
in the src/app/task-list folder.
Note
Recall that ng generate can be shortened to ng g.
29.6.3.2. Try It
Use the terminal panel in VSCode to navigate into the
appfolder.$ ls first-project component-practice $ cd component-practice $ cd src $ cd app $ ls app.component.css app.component.spec.ts app.module.ts app.component.html app.component.ts
Run
ng generate component task-list.Add a
headercomponent by runningng generate component header.
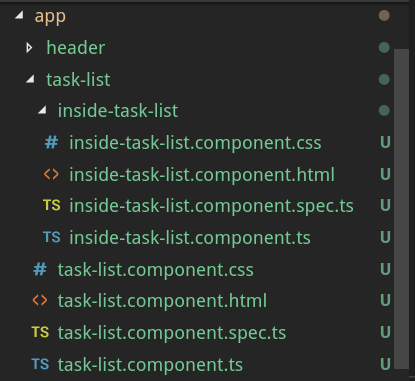
When done, your file structure in VSCode should look something like:
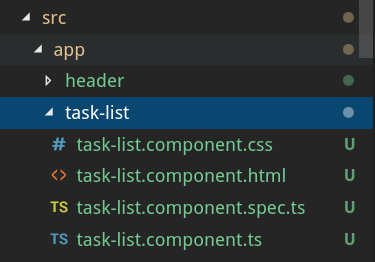
File tree of the newly added task-list component.
29.6.4. app.module.ts
In order to communicate with the new components, app.module.ts needs new
import statements. Fortunately, ng generate updates the code
automatically. We do not need to worry about taking care of this task
ourselves.
Before ng generate:
1 2 3 4 5 6 7 8 9 10 11 12 | import { BrowserModule } from '@angular/platform-browser';
import { NgModule } from '@angular/core';
import { AppComponent } from './app.component';
@NgModule({
declarations: [ AppComponent ],
imports: [ BrowserModule ],
providers: [],
bootstrap: [AppComponent]
})
export class AppModule { }
|
After generating the header and task-list components:
1 2 3 4 5 6 7 8 9 10 11 12 13 14 15 16 17 18 | import { BrowserModule } from '@angular/platform-browser';
import { NgModule } from '@angular/core';
import { AppComponent } from './app.component';
import { TaskListComponent } from './task-list/task-list.component';
import { HeaderComponent } from './header/header.component';
@NgModule({
declarations: [
AppComponent,
TaskListComponent,
HeaderComponent
],
imports: [ BrowserModule ],
providers: [],
bootstrap: [AppComponent]
})
export class AppModule { }
|
Angular updates app.module.ts by adding new import statements on lines
5 and 6 as well as expanding the declarations array on line 9.
Note
Generating new components automatically updates app.module.ts. However,
if you delete a component, you must MANUALLY remove its import
statement and its name in the declarations array.
29.6.5. Arranging Components
Run ng serve to launch the webpage. The page shows up empty because we
removed all of the code from app.component.html except for the div
tags.
Modify app.component.html as follows:
1 2 3 | <div>
<app-header></app-header>
</div>
|
Save your change and wait for the webpage to refresh. You should now see the text "header works!" at the top of the page.
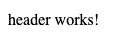
This is another helpful feature with Angular---when you correctly implement a new component, confirmation text appears on the screen.
How did <app-header></app-header> make this happen? Open
header.component.ts in VSCode:
1 2 3 4 5 6 7 8 9 10 11 12 13 14 | import { Component, OnInit } from '@angular/core';
@Component({
selector: 'app-header',
templateUrl: './header.component.html',
styleUrls: ['./header.component.css']
})
export class HeaderComponent implements OnInit {
constructor() { }
ngOnInit() {
}
}
|
Line 4 defines the HTML tag for the header component to be app-header.
If we try changing the string to 'orange', we would see the "header
works!" text disappear from the webpage. This is because the HTML tag
<app-header> is no longer linked to the component. The string assigned in
line 4 MUST match the tags used in app.component.html.
29.6.5.1. Modify the Header Text
Open header.component.html in VSCode:
1 | <p>header works!</p>
|
Ah ha! The HTML file contains the text that appeared on our webpage. Anything
added to this file will appear between the <app-header></app-header> tags
in app.component.html.
Try It
Replace line 1 in
header.component.htmlwith:1 2 3 4 5 6 7
<h1>My header works!</h1>
<p>This is not a header, but I'm adding it anyway.</p>
<div style="text-align: center">
   <h2>Look! A centered h2.</h2>
   <p>More centered text.</p>
</div>
<p>Not centered text.</p>
Save your code and refresh the page. How does its appearance change?
What happens if we use TWO
<app-header>elements inapp.component.html? Try it to find out.1 2 3 4
<div> <app-header></app-header> <app-header></app-header> </div>
29.6.5.2. Bring in task-list
Line 4 in header.component.ts defined the app-header tag, and line 4 in
task-list.component.ts does something similar.
Modify app.component.html as follows:
1 2 3 4 | <div>
<app-header></app-header>
<app-task-list></app-task-list>
</div>
|
Your webpage should look similar to:
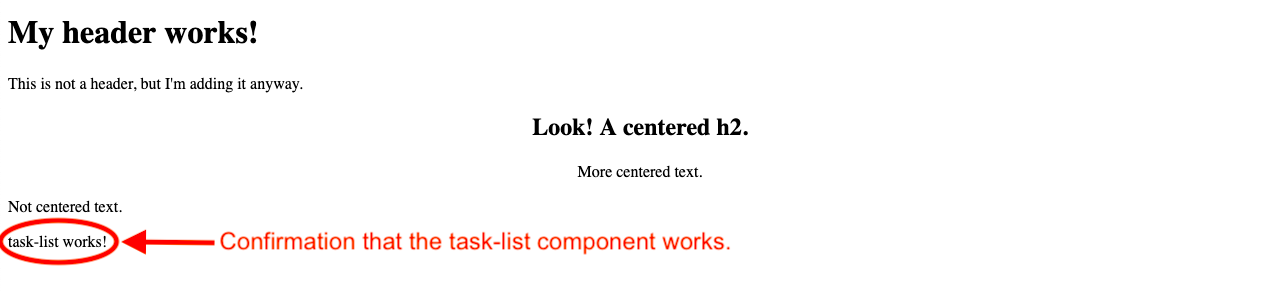
Confirmation that task-list is properly working in your project.
Try It
Move <app-task-list></app-task-list> above <app-header></app-header>
and see how the webpage changes.
29.6.5.3. THIS IS WHY TEMPLATES ARE AWESOME!
Trying to correctly format and place content on a webpage can be difficult, especially if you need to present lots of data or mix different formatting styles for headings, lists, plain text, etc.
Rather than deal with our header, task-list, and other content at the same time, creating components allows us to:
Create a simple HTML file that serves as a framework.
Format each piece of our content separately, without worrying about how that formatting affects other parts of the webpage.
Easily add content to the framework by using custom HTML tags.
Quickly relocate the components on a page just by rearranging their custom tags.
29.6.6. Component Nesting
Components can be put inside of other components. In essence, this is how the
app component works. It is the component that holds all other components.
However, sometimes you might want to nest a new component inside of another one
rather than in app.
Let's assume we want to add a new component within our task-list folder. In
this case, we navigate into the task-list directory and then run the
ng generate component command.
$ ls
   app.component.css    app.component.spec.ts   app.module.ts   task-list
   app.component.html   app.component.ts        header
$ cd task-list
$ ng generate component inside-task-list
Running this command nests our new folder inside of the task-list folder,
and it contains the four files we would expect.
Nested components.
When we place one component inside of another, we must pay attention to how the
components interact. The nested component is called the child, while the
original component is called the parent. In our example, task-list serves
as the parent, while inside-task-list is the child.
Any CSS, HTML, or JavaScript we write for the nested component (the child) only affects that component. Changes to the child do NOT affect the parent.
The parent component DOES influence the nested one. For example, any CSS within
task-list.component.cssapplies to bothtask-list.component.htmlANDinside-task-list.component.html.If we want
inside-task-listto have different styling, we need to add code toinside-task-list.component.cssto override the parent.
29.6.7. Check Your Understanding
If you have not already done so, use ng generate to nest the
inside-task-list component inside the task-list component.
Question
EXPERIMENT! Discover.
Where could we place the <app-inside-task-list></app-inside-task-list>
element to make "inside-task-list works!" appear on the screen? Select ALL
options that work.
Place the element in
app.component.html.Place the element in
task-list.component.html.Place the element in
inside-task-list.component.html.Place the element in
index.html.