1 2 3 4 5 6 | CREATE TABLE seeds (
seed_id INTEGER PRIMARY KEY AUTO_INCREMENT,
crop VARCHAR(40),
encourages VARCHAR(80),
use_by INTEGER
);
|
1.4. Exercises: SQL, Part 1
In order to practice SQL commands, you must first set up a new database (model) in MySQL Workbench. In the program, each new model is called a schema.
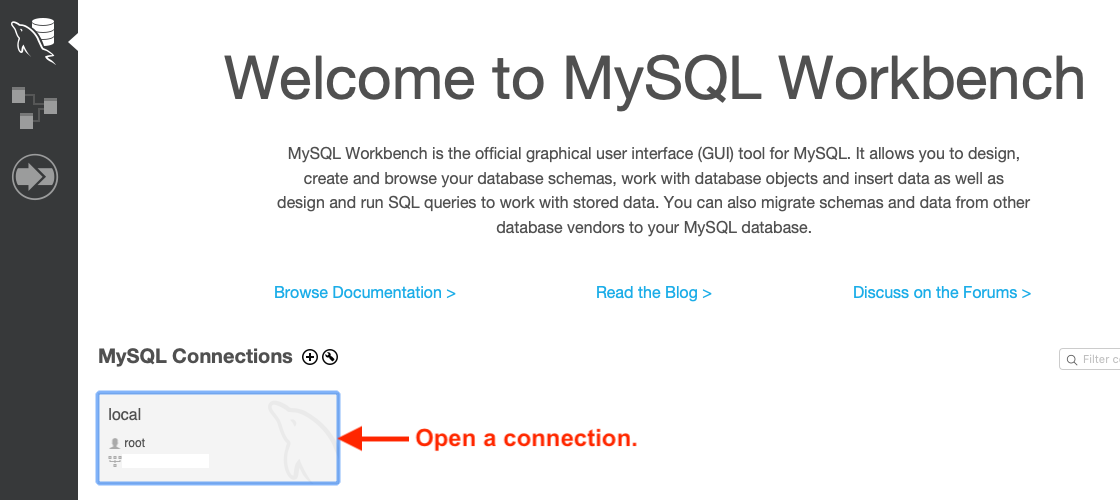
Open MySQL Workbench and open a connection. You may be prompted once or twice for passwords, depending on how you set up your root.
Click on the Create New Schema button and give the database a distinctive name.
Click Apply, and accept all of the default options when prompted. You should see the new database when you click the Schemas tab.
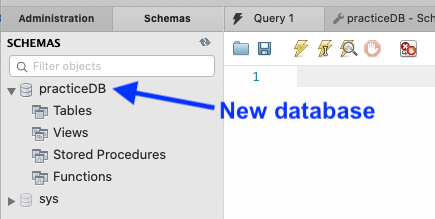
Your new database is almost ready to use. The last step is to set the model as the default option for SQL commands. Do this by double-clicking its name in the file tree.
Good. You are set up for this lesson’s practice. Complete the following exercises in the Query tab of MySQL Workbench. If no query tab is currently open in the editor, select File –> New Query Tab.
Tip
If you have questions about how to use MySQL Workbench, do not hesitate to reference the documentation.
1.4.1. Table Setup
Imagine that you want to apply your new SQL skills to bring some order to your
garden. For these exercises, you will use a seeds table to store some
information. The table will have 4 columns:
seed_id: This is a unique number assigned to each row in theseedstable.crop: Identifies what the seeds grow (e.g. yellow bell peppers).encourages: Identifies the benefits of planting the crop (e.g. nitrogen fixation, attracts bees, etc.)use_by: The year the seeds expire.
The crop and encourages columns will hold VARCHAR data types, and
each must include a parameter that specifies the maximum number of characters.
seed_id and use_by will be integers.
Put the following script into the query tab.
Line 2 establishes seed_id as the unique identifier—the
PRIMARY KEY—for each record in the table. AUTO_INCREMENT assigns
every new entry a different integer value.
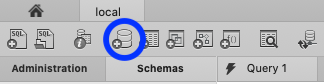
MySQL Workbench allows you to run one SQL command, a set of commands, or all of the commands listed in the editor pane. Hover over each lightning bolt icon in the panel to see these options.

Execute icons in MySQL Workbench.
Execute the CREATE_TABLE command using the simple lightning icon.
Next, verify that the table was created by inspecting your schema:
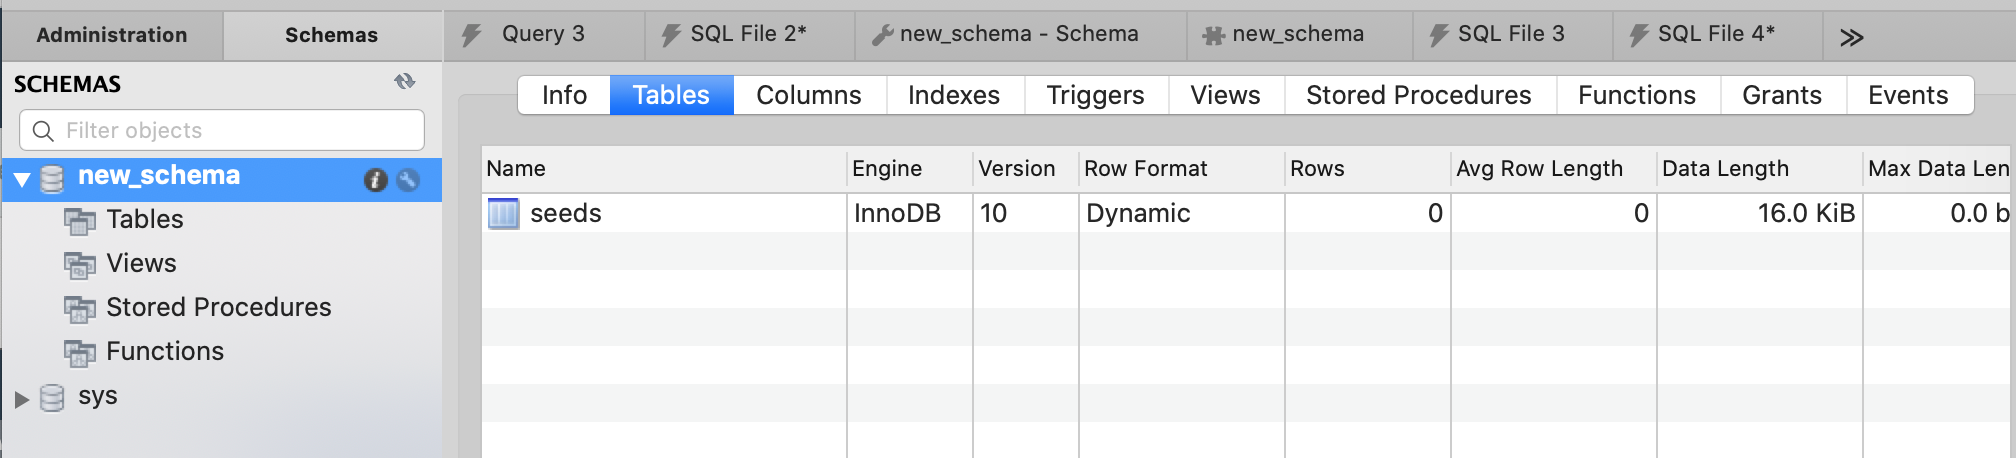
Schema information panel showing the seeds table.
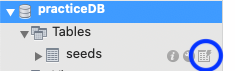
Or, you may also see the seeds table listed under the schema in the file tree.
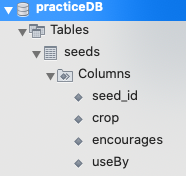
File tree showing the seeds table.
Tip
Some users may need to refresh the Schemas tab to update the file tree view.
1.4.2. Create
Open up a new query tab for the SQL commands you code in this section.
Use the following SQL command to add a new entry to the
seedstable.1 2
INSERT INTO seeds (crop, encourages, use_by) VALUES ("Agastache", "bees & hummingbirds", 2020);
Notice that you do NOT need to provide a value for
seed_id, since it is set up to auto-increment every time a new record is created.Tip
At any time, you can confirm that a table contains data by clicking on the table icon next to its name.
Add another new entry to the
seedstable, choosing your own values for the columns.To add values to only some of the columns of the table, simply omit those column names and values from the SQL command.
1
2
INSERT INTO seeds (crop, use_by)
VALUES ("Sun Gold Tomato", 2022);
Add 3 - 5 more records to the
seedstable. At least one of these entries should include values for all of the columns.
Note that null gets stored in a column whenever a value for that field is
not supplied.
1.4.3. Read
Open up a new query tab for the SQL commands you code in this section.
Use
SELECT ... FROM ...to list all of the data for all of the columns in theseedstable.List ONLY the
cropdata from the table.List the
cropanduse_bydata, and useORDER BYto organize the information in DECREASING order by year.- Bonus: For entries with matching
use_byvalues, order first by year and then alphabetically by crop name.
- Bonus: For entries with matching
List a single entry based on its
seed_idvalue. You will need to include aWHEREin your SQL command.
1.4.4. Update
Open up a new query tab for the SQL commands you code in this section.
Warning
The general syntax for a SQL update is:
UPDATE table_name
SET column1 = newValue1, column2 = newValue2, ...
WHERE condition;
If you leave out the WHERE clause, then ALL records in the table will
be updated!
Update a single record based on its
seed_id.- The first entry we added in the Create section has
seed_id= 1. UseUPDATE ... SET ... WHEREto change theuse_bydate for this entry to 2024. - Use a single
UPDATEstatement to change two columns for the entry withseed_id= 4.
- The first entry we added in the Create section has
Use
ALTER TABLEto add a new column, calledexpired, to the table. Set the data type toboolean.With a single
UPDATEcommand, set theexpiredvalue totruefor all entries that have ause_byof this year or earlier.
Be sure to list the seeds table to confirm your changes.
1.4.5. Delete
Open up a new query tab for the SQL commands you code in this section.
Warning
If you leave out the WHERE clause in the DELETE FROM command, then
ALL records in the table will be lost!
There is no undo option after running DELETE.
Delete a single record from the table. Be sure to use its
seed_idrather than any other column value in theWHEREclause.Use a single
DELETEcommand to remove any seeds from the table that have expired.
1.4.6. Bonus Exercises
Whew! You made it through all the exercises. Nice work!
Take a quick break and, if you wish, try these additional tasks that go above and beyond the basic SQL commands.
- Use logical operators (
AND,OR,NOT) inWHEREstatements. - List the complete records for the seeds, but only if the
encouragescolumnIS NOT null. - Do you have several entries with the same
cropvalue? If so, you can display a list that avoids repeats by using the SELECT DISTINCT keywords. - Experiment with changing the data type of a column.
- Research the difference between
DROP DATABASE table_namevs.DELETE FROM table_name.