Static Website
Configuring NGINX to Serve a Static Website
A common task performed by a web server is to serve websites.
Sometimes the website to be served is a static website. A static website only requires that the HTML, CSS, JS, and media files (like .jpgs) need to be served as an HTTP Response.
The default configuration of NGINX includes an example of a static website configuration.
The NGINX configuration file can be found at /etc/nginx/conf.d/default.conf:
server {
  listen      80;
  server_name localhost;

  location / {
      root    /usr/share/nginx/html;
      index   index.html index.htm;
  }

  error_page    500 502 503 504   /50x.html
  location = /50x.html {
      root    /usr/share/nginx/html;
  }
Upon making an HTTP request to localhost the following HTML is returned:
<!DOCTYPE html>
<html>
<head>
<title>Welcome to nginx!</title>
<style>
    body {
        width: 35em;
        margin: 0 auto;
        font-family: Tahoma, Verdana, Arial, sans-serif;
    }
</style>
</head>
<body>
<h1>Welcome to nginx!</h1>
<p>If you see this page, the nginx web server is successfully installed and working. Further configuration required.</p>

<p>For online documentation and support please refer to
<a href="http://nginx.org/">nginx.org</a>.<br />
Commercial support is available at
<a href="http://nginx.com/">nginx.com</a>.</p>

<p><em>Thank you for using nginx.</em></p>
</body>
</html>
Rendered in browser it looks like a normal webpage:

Editing the Existing Static Website
We can tap into the index.html file stored at the root of the default configuration file found at: /usr/share/nginx/html to change the file NGINX is serving.
Open /usr/share/nginx/html/index.html with your editor of choice.
Change the contents of index.html to:
<!DOCTYPE html>
<html>
<head>
<title>My Site!</title>
<style>
    body {
        width: 35em;
        margin: 0 auto;
        font-family: Tahoma, Verdana, Arial, sans-serif;
    }
</style>
</head>
<body>
<h1>Welcome to my site!</h1>
<p>I am exploring how the HTML file can be changed, and NGINX will serve the changed file without skipping a beat.</p>

<p>NGINX doesn't care about the contents inside of the file's it is serving, it is simply serving the files in the manner it is instructed.</p>

<p><em>Brought to you by [YOUR NAME HERE]!</em></p>
</body>
</html>
Note
Make sure to substitute [YOUR NAME HERE] with your actual name!
After making the changes make sure to save the file!
After make a new request to localhost.
Warning
It is likely that the web browser has cached the response from NGINX. You will need to force the browser to make a new web request and not simply load from the browser’s local cache. You can force the web browser to make a new web request with the hard refresh keyboard shortcut ctrl + shift + r.
Web browser output:
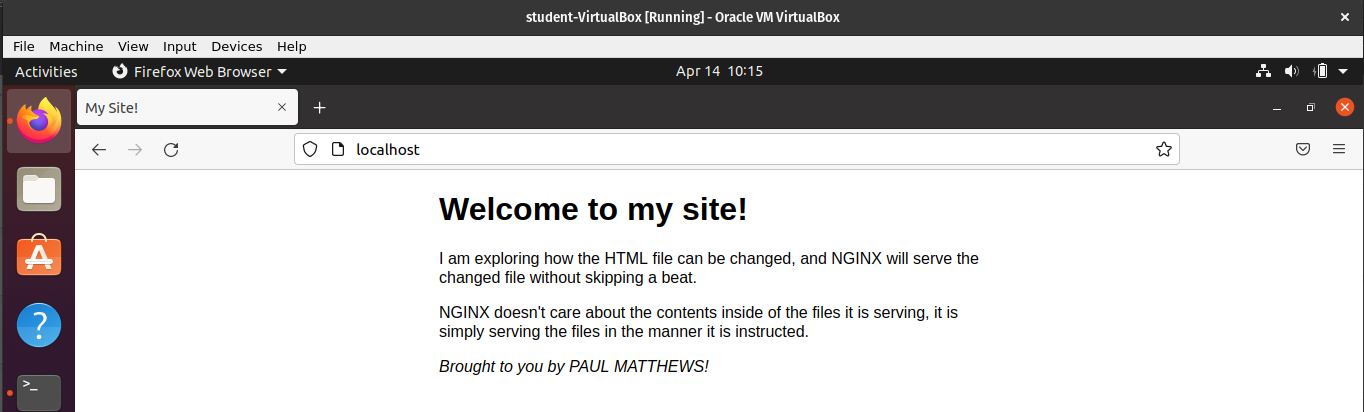
Congratulations. You changed the HTML that NGINX is configured to serve.
Note
This is not the preferred way of working with NGINX. More realistically you will have already generated HTML/CSS/JS/media files that may have a complex file structure. In which case you will want to configure your own NGINX conf file.
New Configuration File
A better practice than using the default.conf file is to create a new .conf file for the server that is being configured.
In this case let’s create a new .conf file for the Angular Orbit Report.
Delete Original default.conf File
First up, delete the original default.conf file. It has served its purpose.
sudo rm /etc/nginx/conf.d/default.confValidation:

Create New orbit-report.conf File
sudo touch /etc/nginx/conf.d/orbit-report.confValidation:

Add Configuration to orbit-report.conf
Add the following configuration to orbit-report.conf:
server {
    listen 80;
    server_name localhost;

    location / {
        root /home/student/website/orbit-report;
        index index.html;
    }
}
Configuration breakdown:
server: defining a new server in NGINXlisten: the port the server is listening on (standard HTTP 80)server_name: the domain name, or IP address of the server (localhost)location /: URL path location directive, dictates how HTTP requests to the/(root) are handledroot: the location of the files to be served at the configured pathindex: the filename for any non-provided file paths (attached automatically by NGINX, never seen by the web user)
Note
If you reload the nginx configuration file and make a request to localhost you would see a 404 Not Found error, because currently the directory /home/student/website/orbit-report/ does not have an index.html file.
Clone Build Artifacts
NGINX is expecting /home/student/website/orbit-report/ to contain the artifacts (HTML, CSS, JS, media files), as of now the directory doesn’t exist and the build artifacts are missing.
Luckily the build artifacts are stored on GitHub.
From your home directory:
git clone https://github.com/LaunchCodeTechnicalTraining/orbit-report-artifactsFrom here we will want to move the contents of orbit-report-artifacts into /home/student/website/orbit-report/.
Move Build Artifacts to /home/student/website/orbit-report
Create /home/student/website/orbit-report
mkdir -p /home/student/website/orbit-reportBonus
The -p flag instructs the mkdir command to make any necessary parent directories in the path provided. In this case it’s likely that both website/ and /website/orbit-report are being created!
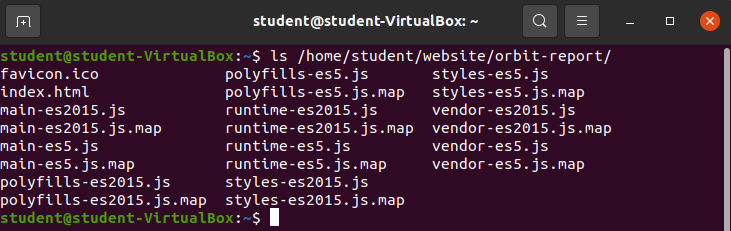
Move all files in /home/student/orbit-report-artifacts/ into /home/student/website/orbit-report:
mv /home/student/orbit-report-artifacts/* /home/student/website/orbit-report/Validation:
Reload Configuration
sudo nginx -s reloadAccess Site
Make a web request to localhost.
