Git Rebase
Note
You will be using py-demo-web-logs-rebase as the github repository for this walkthrough.
Merging with Git Rebase
Rebase is another way to merge branches. The git rebase command will reapply commits from the current branch on top of the target branch.
To perform a git rebase the command is as follows:
git rebase [target-branch]
Note
You are rebasing the current branch on top of the [target-branch].
Repository Staged for Rebase
- Fork this repository:
https://github.com/LaunchCodeTechnicalTraining/py-demo-web-logs-rebaseto your personal github account - Clone the forked repo to your own machine:
git clone https://github.com/[your-github-username]/py-demo-web-logs-rebase cdinto the root folder of the project inside of your terminal
Perform the Rebase
This project is currently staged for a git rebase. There has been a feature branch merged into the master branch already. In order to merge the remaining branch new-function into master we will need to resolve the merge conflicts within the main.py and .gitignore files.
Checkout to the new-function branch and perform the git rebase:
Run the following commands:
git checkout new-functiongit rebase master
Rebase works by taking the original full history of the [target-branch] (in this case master) and builds each of the commits from the current working branch (in this case new-function) one at a time, adding to the history of the [target-branch].
Bonus
During rebase conflicts can come up at any point in time between the first commit and the last commit of the current working branch as the commits are being built in order.
Merge Conflicts
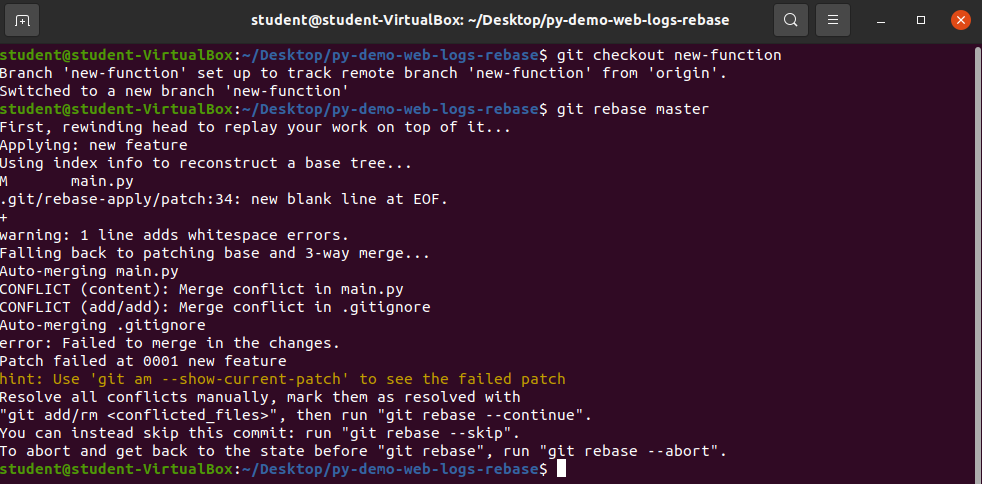
You will receive a notification that there are merge conflicts in main.py and .gitignore and that the conflicts need to be resolved manually before continuing the rebase onto the master branch.
The output looked similar to:
Auto-merging main.py
CONFLICT (content): Merge conflict in main.py
CONFLICT (add/add): Merge conflict in .gitingore
Auto-merging .gitignore
error: Failed to merge in the changes.
Resolve all conflictrs manually, mark them as resolved with
"git add/rm <conflicted_files>", then run "git rebase --continue"
The output is telling us:
- Two Conflicts were detected in this commit: in
main.pyand in.gitignore - It asks you to resolve the conflicts manually and mark them as resolved with the
git addorgit rmcommand - After the conflicts have been resolved you can then run
git rebase --continue.
Let’s resolve the conflicts so you can continue the rebase.
Resolve Conflicts
- Open up the
main.pyfile with vim:
Run the command vim main.py.
Git Conflict Syntax
Git is simply a tool. It cannot make decisions. When a conflict emerges git will inform you about the conflict, but leaves it up to you to resolve the conflict.
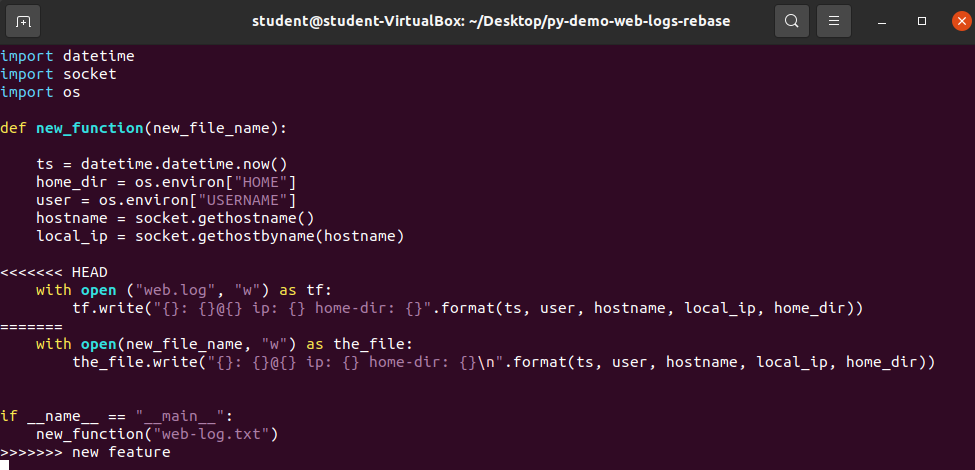
Let’s take a look at the syntax git uses to inform us of conflicts:
<<<<<<< HEAD
    with open("web.log", "w") as tf:
      tf.write("{}: {}@{} ip: {} home-dir: {}".format(ts, user, hostname, local_ip, home_dir))
=======
    with open(new_file_name, "w") as the_file:
      the_file.write("{}: {}@{} ip: {} home-dir: {}\n".format(ts, user, hostname, local_ip, home_dir))

if __name__ == "__main__":
    new_function("web-log.txt")
>>>>>>> new feature
Git needs to tell us where the conflict happens, and the two possible options:
- Option one is marked as
<<<<<<< HEADindicating the conflicting section of the target branch (in this casemaster) - Option two is marked as
>>>>>>> new featureindicating the conflicting section of the current working branch (in this casenew featurewhich we are currently rebasing onto the target branch) - They are delineated by seven equal signs (
=======)
This conflict syntax is always used to show merge conflicts.
Bonus
Since git uses a consistent syntax to highlight merge conflicts many IDEs have built in functionality to find the unique syntax to further highlight the conflicts and provide you with options for choosing one or the other, or both. Following is the default behavior of Visual Studio Code when a git conflict has been detected:
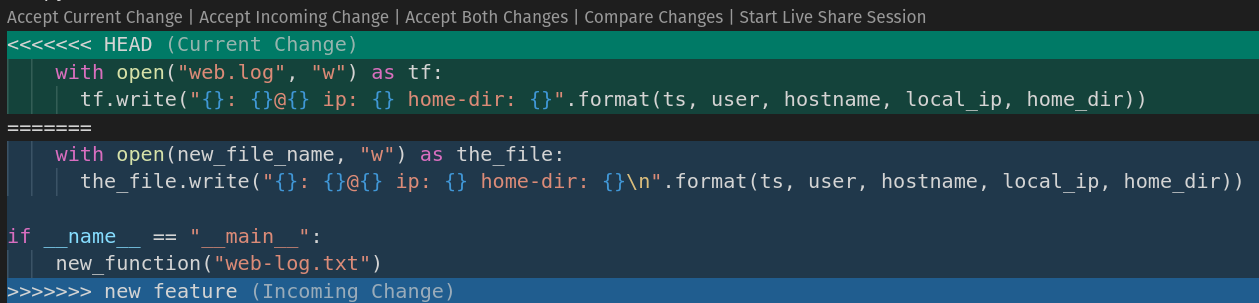
Notice VSC is adding in some colors, clarifying information about current change and incoming change, and provides buttons to assist with handling the conflict in the form of:
Accept Current ChangeAccept Incoming ChangeAccept Both ChangesCompare Changes
Options that will help the user decide which block of code they want to keep.
In the case of this example we will be aspects from both changes and will need to manually enter in our code and clear out any git conflict syntax (the <<<<<<< HEAD, >>>>>>> new feature, and =======).
Manually Resolving Conflict in main.py
Paul and John both made changes to the main.py file. We need to decide which ones we want to keep and which to throw away.
The changes that we want to keep in this walkthrough include the following:
- function created in John’s solution
- name of file used in Paul’s solution (
web.log)
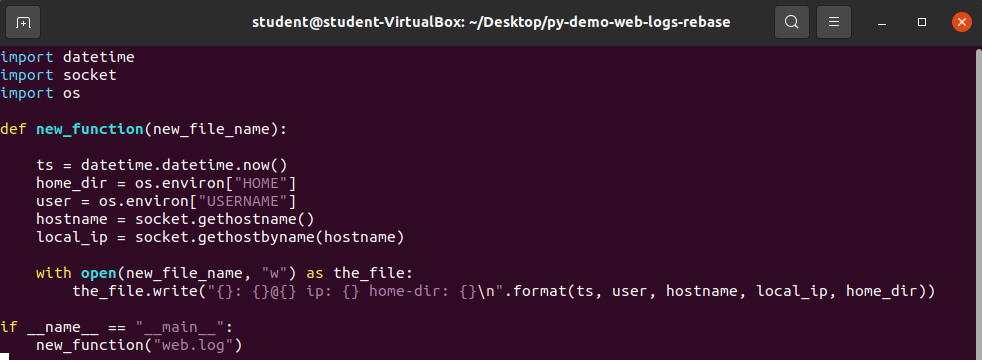
After making the required changes to the file it should look similar to the above image.
- Write the changes and exit vim.
Warning
Make sure to write the changes to the file before exiting vim!
Now that the conflicts have been resolved inside of the main.py file you need to resolve the conflicts inside of the .gitignore file.
Manually Resolving the Conflict in .gitignore
Open the .gitignore file with vim.

Knowing that web.log is the name of the file preferred you can remove everything else from the .gitignore file so that there are no conflicts.

Write the file and exit vim so that you are back inside of the py-web-logs-continued directory.
Staging
All conflicts have been resolved you will need to add the changes to staging so that you can continue the rebase onto master.
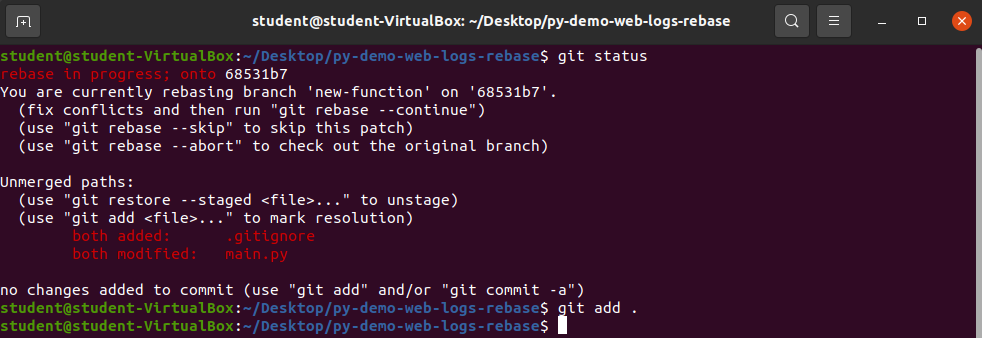
Run the following commands:
git status: check changes madegit add .: add changes to staging
Bonus
If you run the command git status after adding the changes to staging you will notice that it says “all conflicts fixed: run “git rebase --continue”.
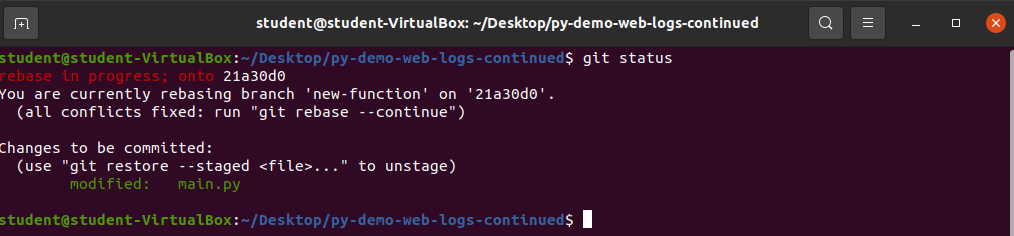
Git Rebase --Continue
Since you have added the changes to staging you can now continue the git rebase.

Run the command git rebase --continue.
This tells git to continue the rebase by building additional commits from the current branch on top of the target branch. It will build any remaining commits and inform you of any detected git conflicts. After all of the commits have been successfully built and any conflicts have been resolved the rebase will complete.
Note
In this example there will be no additional conflicts so rebase should complete after running git rebase --continue.
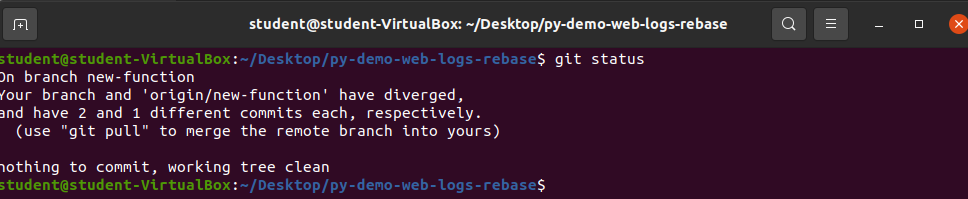
Pushing Local Changes to Remote Branch
You have completed a git rebase. If you run the command git status you will receive a notice that your branch and origin/new-function have diverged. This is because you rebased your local new-function branch onto the local master branch. Git is smart enough to detect that your local repository’s current working branches history has diverged from the remote repository’s branch of the same name. This is a good thing, this is what we were attending to accomplish with the rebase!
If you attempt to run the command git push origin new-function without force the push will be denied because the divergence in histories between your local and remote branches. Again git is detecting an issue and needs us to tell it which history we want it to keep. We can tell git to keep the history of the remote branch (pull), or the history of our local branch (push). In either case we will need to use the --force option to overwrite our local or the remote branch’s history.
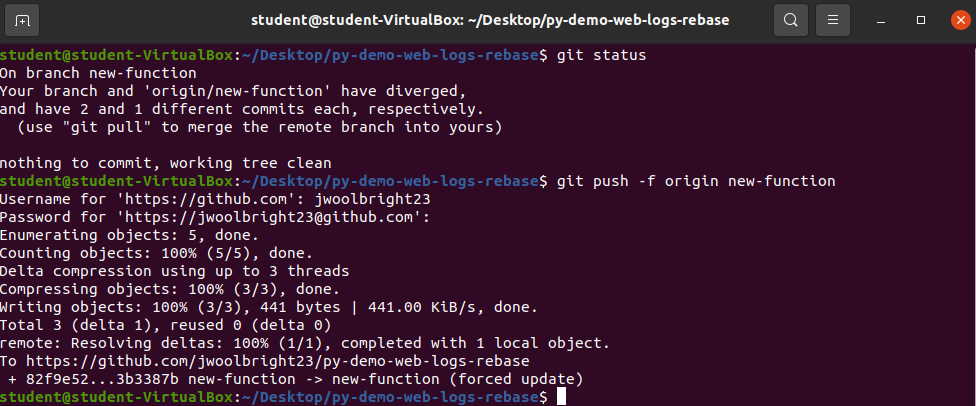
Run the command git push -f origin new-function.
Now that the local changes have been pushed to the remote repository you should be able to merge the branch without conflict.
Open up the pull request from the new-function branch on your personal github account and merge the pull request!
Warning
You may need to change the base repository and base branch reference!
- Click the
Create pull requestbutton. - Click the
Merge pull requestbutton. - Click the
Confirm mergebutton. - Click the
Delete branchbutton.
You have successfully completed a git rebase!
Recap:
- Checkout to branch needing to be merged
- Rebase the branch onto master with
git rebase master - Resolve merge conflicts
- Add changes to staging
- Continue rebase with
git rebase --continue
- Rebase the branch onto master with