Review: Basic Git Workflow
Review: Creating a Local Git Repo
A common git task is to create a new directory and then initialize a git repository inside of the directory. This is likely a task you have done before, but we will be reviewing it together.
For this example you will create a new directory inside of your user home directory called local-repository.
- cd to your user home directory (home/student)
- make a folder called
local-repository - cd into your newly created directory
Now you will need to initialize git inside of this new directory you created with the git init command.
Warning
Make sure to cd into your newly created directory before running the git init command inside of your terminal.

Running the above command creates a new subdirectory named local-repository/.git/. This file holds all of the required repository files.
Bonus
After running the git init command you may notice that if you type in the ls command it does not show the .git folder inside of our directory. Remember that you can use the ls -a command to show all folders within a directory, including hidden ones.
Review: Creating a Remote Git Repo
There are multiple ways to create a remote repository on git. The simplest way of doing so is to use GitHub. After logging in, navigate to the repositories tab and click the green New button.

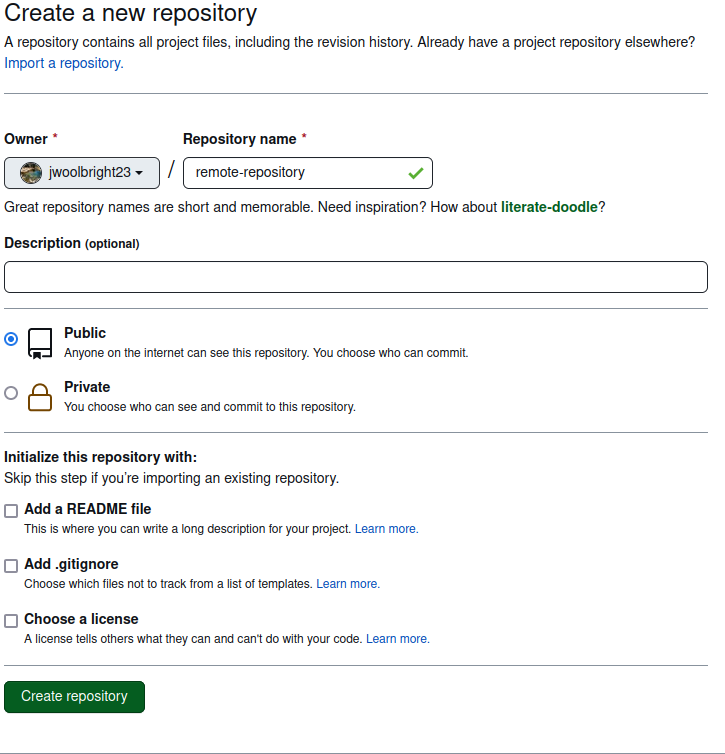
The new repository page provides a wizard with a few options to create the new repository. The only required option is to provide the remote repository with a name. For this walkthrough you will use the name remote-repository.
Bonus
A breakdown of the remaining options:
- Description: Provide the remote repo with a description
- Public or Private repository: Public (anyone on the internet can access), Private (only those with proper authentication can access)
- Add a README file: File to provide information about the project.
- Add .gitignore: File that instructs the local & remote repository to ignore certain files or directories. Files will be completely ignored when performing
git commands(likeadding, commiting, and pushing). - Choose a license: The license for the project. We will not be covering licenses in this course. If you would like to know more please visit the Github documentation on Licensing a Repository
For this walkthrough you should only provide this repo with a name and leave the optional settings as they were defaulted.
Click the Create repository button.
New Empty Repository
After clicking the Create repository button you should see the following view:
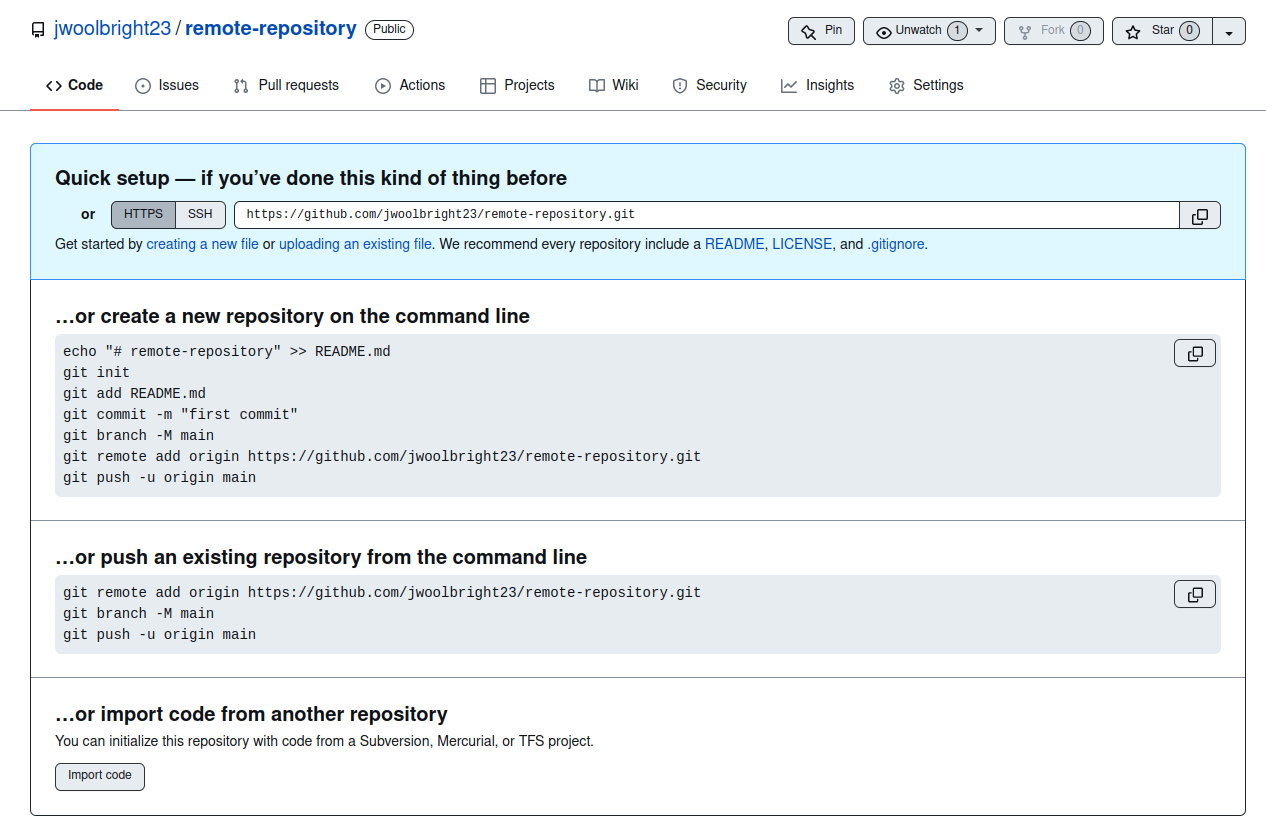
This page provides you with instructions for using this remote repository.
You can:
- create a new local repository from the command line, and add this remote repository to the local repository.
- push an existing local repository to this empty remote repository, after adding this remote repository to your local repository.
- import code from another repository.
As you have already completed the steps of the first option, we will be walking through that option.
We already created the directory (local-repository) and initialized it as a local repository (local-repository/.git).
We now need to add the new remote repository to our local repository. This is how it knows where to push and pull from.
Adding a Remote Repo to an existing Local Repo
Jump back over to the directory inside the terminal where you created a local repository.

Once inside of the directory we can run the following command:
git remote add origin https://github.com/"github-username"/remote-repository.git
Note
The above command is adding a new remote repository by the name of “origin” to our existing local repository. You can have as many remote repositories connected to a local repo as you would like. To add another remote you would just give it a different name. For example: git remote add conclusion https://github.com/"github-username"/remote-repository.git. Think of the terms “origin” and “conclusion” in this example as variables. You are giving the remote repo a name for git to reference when pushing and pulling code.
The second command in the image above is: git remote -v. This command will show you all of the remote repositories connected to your local repository.
Your terminal should output the following information about our remote repo:
- origin
https://github.com/github-username/remote-repository.git(fetch) - origin
https://github.com/github-username/remote-repository.git(push)
Stage, Commit, and Push Local Changes
Now that you have added you remote repository (origin) to your local repository you can begin to synchronize folders and files between the two. Lets add an example-folder with an example-file inside of it to push to our new remote.

In the picture above we created a new folder called example-folder and added a file to that folder called example-file. Lets add a small message inside of our example-file using nano.

inside of your terminal run the command nano example-file.
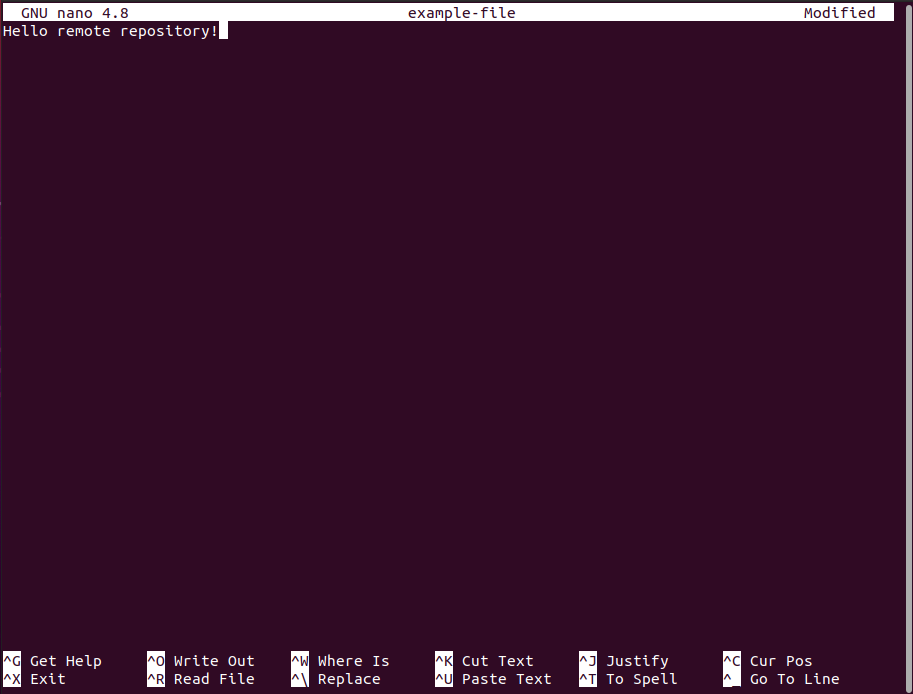
Feel free to write whatever message you would like. Just remember to write the file before exiting. You can do so using ctrl+O to “Write Out”. Hit the enter key to save the file name and ctrl+x to exit nano.
Now that we have made some changes to our project directory we want to stage them for our first commit to the remote repository.
Change back into the root folder of this project directory using the cd .. command.
Staging
Now that we are inside of the root folder we can check any changes that have been made using the git status command.
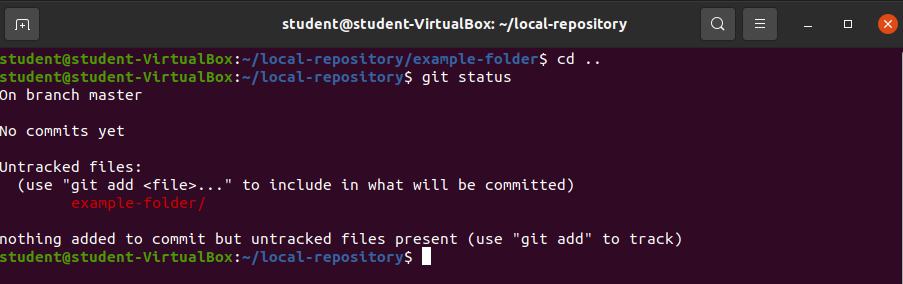
As you can see there are untracked files inside of our project directory. We want to stage these changes for a commit using the git add command.

Type in the command git add example-folder/ and hit the enter key. You will notice that there will not be any output after hitting enter. But if you type in git status once more you will see that there are now changes to be committed, in this case new file: example-folder/example-file.
Bonus
There are a couple of ways you can add files to staging. If you want to be specific like in the example above you type out the path of what folders or files you want to include. If you would like to add all folders and files changed into staging you can use the command git add .. This will add all untracked files into staging so that you are able to commit them all at once. This is very useful if you only have a small amount of files that were changed. However if you have a large portion of untracked files you most likely want to commit them separately so that you can be more specific with your commit messages.
Commit to Local Repository
Now that you have changes ready to be committed you can do so with the command git commit. There are a multiple things to consider when committing code to a new project repository. So before you do so lets touch base on them.
- Meaningful Commit messages: You want your commit messages to be meaningful so that you or anyone else working on the project has a good idea of what changes were made for any given commit.
- Title, and Body of Commit: Ideally every commit has a title and a body explaining what changes were made to the file.
After considering the above lets make our first-commit. All commits usually have the following structure: git commit -m "title of commit" -m "body message"

Enter the following command git commit -m "first-commit" -m "added an example-folder with an example-fle containing a message".
Note
In some instances you may want to create a commit with just a title. In this case you would simply use the git commit -m "title" command. We recommend providing titles, and bodies to your commits, but it is not necessary.
Git Log
Now that you have made a commit you can check to see what the commit looks like using the git log command.
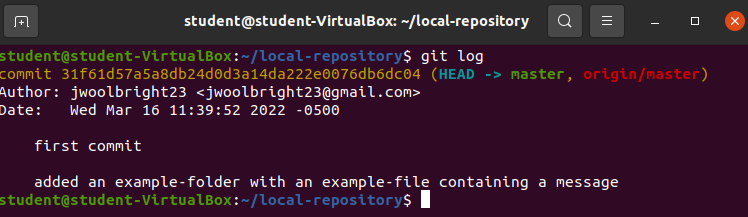
As you can see the log shows us that a commit was made to the master branch from a specific Author on a specific Date. Below that you can see what the title of the commit was in addition to a description of what was included.
Push Local Changes to Remote Repo
The final step is to push the changes that we staged and committed in our local repository to the remote repository. To accomplish this you must use the git push command specifying what branch you want to push the changes to.

Enter git push origin master into your terminal.
Note
The above command is pushing changes from your local repository to the remote repository named origin onto the branch named master. In this case your remote repository doesn’t have any branches, or files. This push will create the branch master with all committed work to the remote repository.
You will be asked for your username and password.
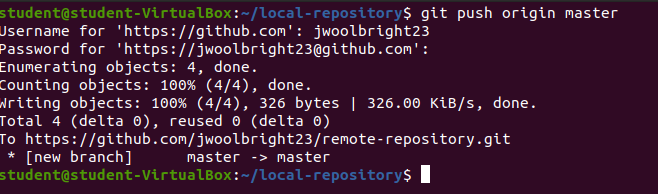
Enter your username and password for the changes to be pushed into the remote repository.
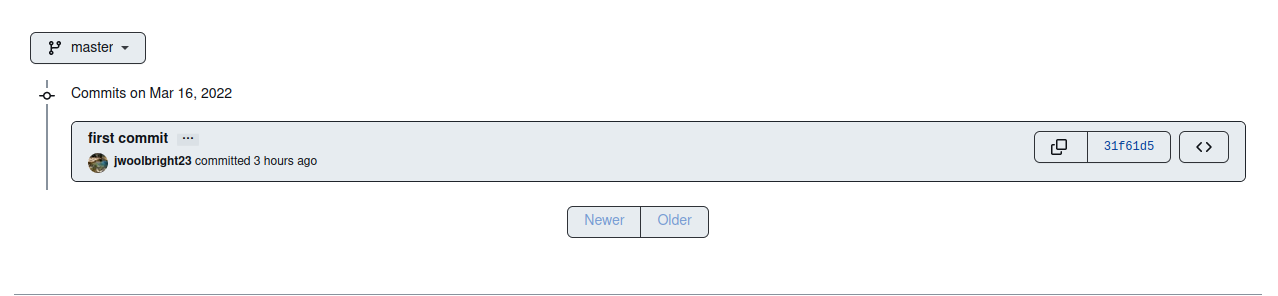
Your remote repository should now contain the added files and changes made!
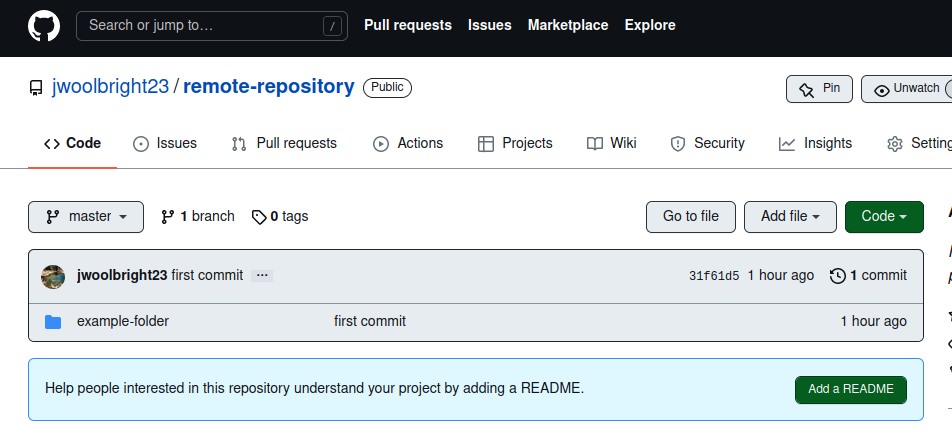
You can also view your commit by clicking on the 1 commit section to view all commits inside of the remote repository.
Recap:
This walkthrough was a refresher on the following:
- Creating a local repository
git init
- Creating a remote repository on github
- Adding a remote repo to our local repo
git remote add <remote-reference-name> <remote-repository-url>
- Staging, Committing, and Pushing local changes to a remote repository
git add,git commit,git push