Updating Files & Directories
Update Files and Directories
You can update the contents of a file/directory or the metadata (name, last modified, permissions) of a file/directory.
Updating Metadata
Moving Files and Directories
The filename and path of a file/directory is a key piece of metadata. In many instances it makes sense to move a file, or directory to a new location within the file-system. You can move a file/directory with the mv command.
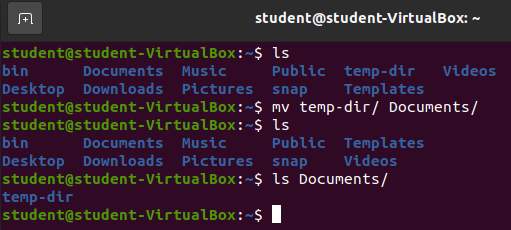
Let’s create a new directory temp-dir and a new file temp.file both in our home directory.
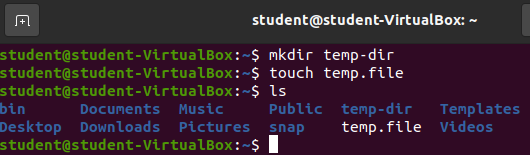
Now we have /home/student/temp-dir/ and /home/student/temp.file. Let’s move temp.file into our new directory temp-dir/.
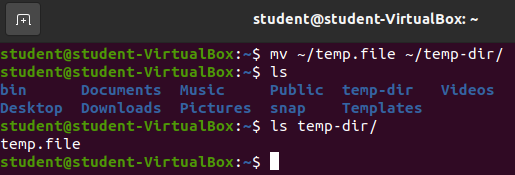
mv requires two arguments. The first argument is the file/directory we want to move. The second argument is the directory that will hold the file/directory we want to move.
So to move the temp.file into the temp-dir we would need a command like: mv ~/temp.file ~/temp-dir/
Note
You can use absolute or relative paths with the mv command. So you could have accomplished the same task with absolute paths:
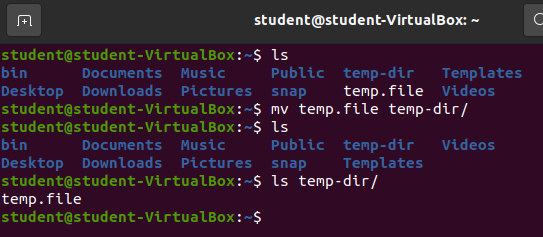
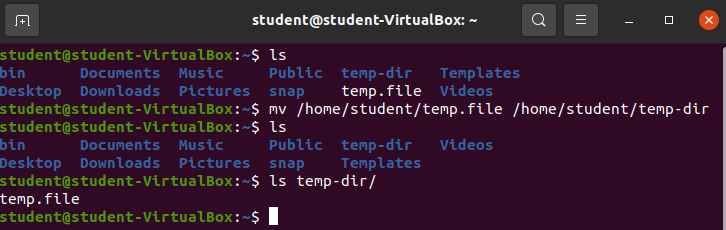 Or you could have accomplished the same task with relative paths:
Moving Directories
The mv command works with directories as well. Let’s move the ~/temp-dir directory into the ~/Documents directory. Our first argument will be temp.dir as it represents the file/directory we want to move. The second argument will be Documents as it represents the directory we want to move our contents into.
mv ~/temp-dir/ ~/Documents
Moving to Rename Files and Directories
When you use the mv command you are affecting metadata by updating the absolute path of the file/directory. The previous section focused on changing the directories that hold a file/directory. However, with the mv command you can also change the name of a file/directory.
Let’s change the name, but not location, of a file. Currently we have a file: /home/student/Documents/temp-dir/temp.file what if we wanted to change the name of that file to roster.txt?
We can use the mv command to update the absolute path. The parent directories will stay the same, but we will simply provide it a new filename.
mv ~/Documents/temp-dir/temp.file ~/Documents/temp-dir/roster.txt
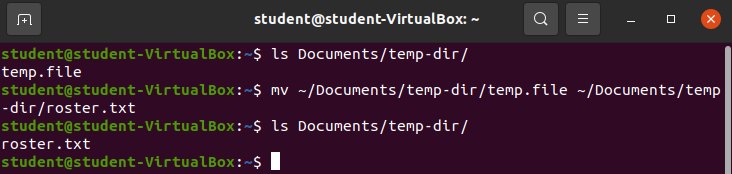
This command updated the name of the file without changing it’s location. Under the hood, the absolute path of the file was updated and that’s the purpose of the mv command. The absolute path started as /home/student/Document/temp-dir/temp.file and we updated it to /home/student/Document/temp-dir/roster.txt!
Bonus
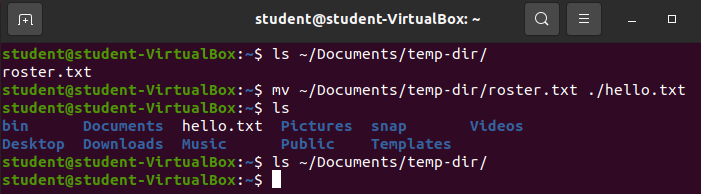
You can both update the location and the name of a file in one mv command.
 This command moved the
 roster.txt file from the temp-dir/ directory into the current working directory (as represented by ./) and renamed it to hello.txt. That’s a lot of work packed into one command!
Updating File Contents
While changing the metadata attached to a file is important, it’s not as common as updating the contents of a file. This section will focus on updating the internal contents of a file with the GNU bash shell terminal editor called nano.
Opening a file using a terminal text editor:
nano filenamevim filenameemacs filename
Bonus
echo "newline" >> filename
Open the file in your favorite text editor or IDE. Visual Studio Code, IntelliJ, Pycharm, Atom, etc.
Using nano
GNU’s nano stands for Nano’s ANOther editor. There is a very long history of terminal based text editors, they far outdate the graphical text editors you are familiar with.
Note
If you find any pair of computer enthusiasts that worked on computers between 1960-1990 they will likely have strong, but different, opinions on their favorite terminal text editor! These strong opinions still exist in many internet communities. You may have heard of the zealous arguments between vim and emacs users. nano, vim, and emacs are just three of the many dozens of terminal text editors that exist.
nano is a great choice as it is the most straightforward to use and it comes as a part of the standard package of most Linux/GNU distributions. We will predominately use nano to edit files in this course. We will also explore some of the basics of vim.
Opening a File
Opening a file with nano is very straightforward. We simply execute the nano command with one argument, the file we wish to open. If the file exists, its contents will be populated into nano. If the file does not exist, it will be created as an empty file and opened within nano.
When you open the file you will leave the Bash shell behind and the nano text editor will take up the entirety of your terminal window.
Let’s create and open a new file in our home directory called myname.txt.
nano ~/myname.txt

After executing the command you will see the ~/myname.txt file opened in the nano text editor:
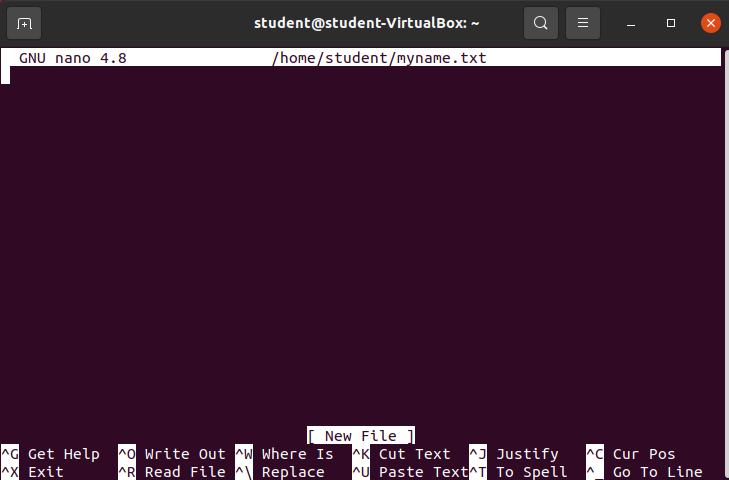
There are three sections of the nano text editor:
- The top of the screen shows the version (
GNU nano 4.8) and the currently opened file (/home/student/myname.txt) - A large block of space, with a cursor. This is the area where we can create, read, update, and delete any of the contents of the file.
- The bottom of the screen contains a useful collection of control keys allowing us to save, exit, or assist us in editing the file.
Add Contents to the File
Go ahead and type your name into the file:

I simply typed directly on my keyboard and nano added the contents to the file! You can also use the arrow keys on your keyboard to navigate the file.
Write File
Once you are happy with the changes you have made to the file, we need to write the changes to the hard disk.
nano provides a control key combo for writing files. By simply holding the control (ctrl) and then pressing the o key nano will Write Out the file.
Give it a shot.
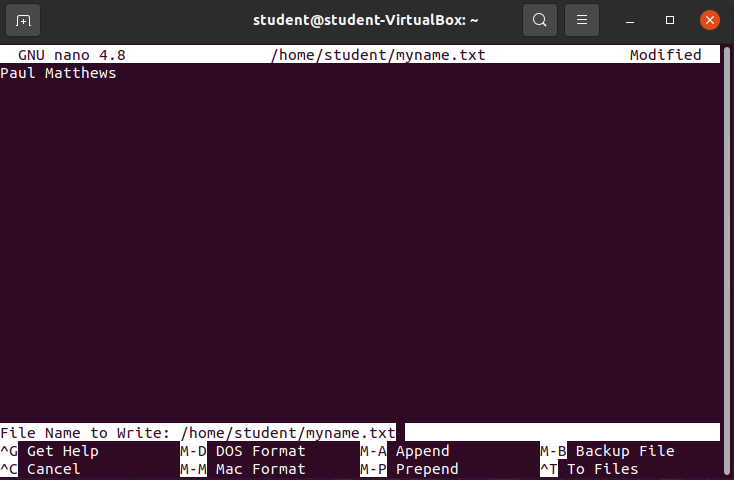
Notice the change to the nano window. A new message towards the bottom of the screen (above the control key combos) is confirming the name and location of the file to be written.
The /home/student/myname.txt file didn’t exist before we opened the file. It is standard behavior for nano to ask us to confirm before creating and writing the contents of the file.
You can simply hit enter on your keyboard to write the /home/student/myname.txt file with the contents you provided in the window. Try it out.
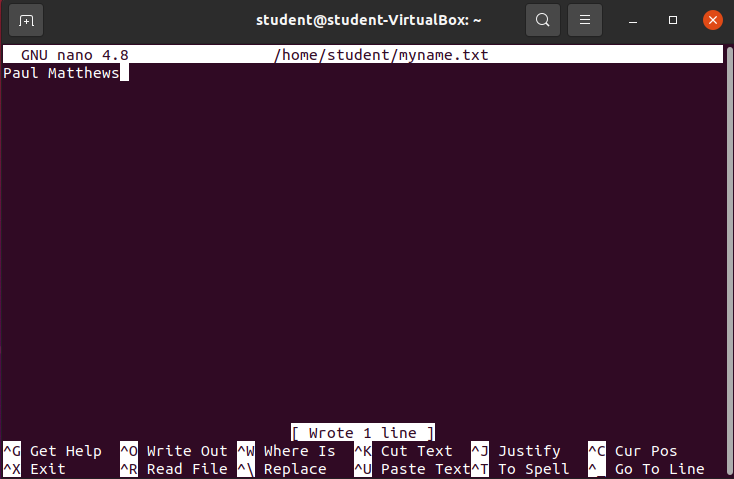
nano was kind enough to confirm that one line was written, as indicated by the message above the control key combos.
Exit File
To exit a file you simply need to invoke the control combo key for the Exit option. You should be able to see from the avaible options that it is ctrl + x.
Try it out.

Since the file had been written in the previous step, and had no changes nano immediately exited the file and returned us to our Bash shell.
Note
If you invoke the exit condition of nano while having unsaved changes, it will prompt to write, or discard the changes before exiting to the Bash shell.
Looking at the New File
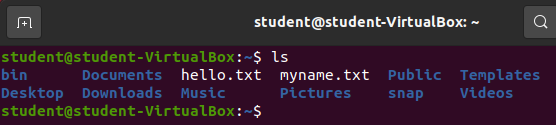
Let’s see the new file. Enter ls ~ to see the new myname.txt.
And let’s cat out the contents of our file:
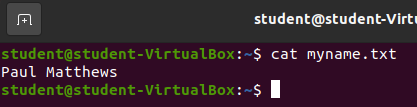
We have successfully opened a file, edited the contents of a file, wrote a file, and displayed the contents of a file all from our terminal!
Bonus
Like everything in this class, you will become more comfortable the more you practice. If you truly want to become comfortable and productive with a terminal text editor you need to use one often. nano is straightforward to use, but lacks the many features you will find in vim or emacs. For now practice creating and editing some files with nano. Soon we will learn about installing new software and you can take it upon yourself to learn how to use either vim or emacs. Conquering the basics and being comfortable with some of their more advanced uses will benefit you greatly if you work with Linux systems in your career.