Changing File Permissions
Name
chmod- change file mode bits
Usage
The chmod command allows you to change the permissions on any given file so that you can update the read, write, and execute status for the file owner, group and all other users.
chmod [OPTION] [file-name]Chmod Numerical Expressions
When changing permissions of a file with the chmod command you must understand the numerical expressions for each type. Each option has a binary representation that allows you to create a numerical value to express all of the possible selections.
Read(r) is represented by the number4.Write(w) is represented by the number2.Execute(x) is represented by the number1.
You can combine or add these numbers together to represent a combination to set explicit file permissions.
If you wanted to provide a file with Read and Write permissions you would assign a 6 (adding Read: 4 and Write: 2) to the owner, group, or all others.
See the table below for more explanation:
| Chmod | Description |
|---|---|
| 7 | 4(r) + 2(w) + 1(x) = 7 rwx: read, write and execute |
| 6 | 4(r) + 2(w) = 6 rw-: read and write |
| 5 | 4(r) + 1(x) = 5 r-x: read and execute |
| 4 | 4(r) r--: read only |
| 3 | 2(w) + 1(x) = 3 -wx: write and execute |
| 2 | 2(w) -w-: write only |
| 1 | 1(x) --x: execute only |
| 0 | 0 --- : none |
Examples
Navigate to your desktop and create a new file called chmod-example.
touch chmod-exampleCheck the permissions of the newly created file:
ls -lOutput:

You will notice the file currently has the following permissions:
ReadandWritefor thestudentownerReadandWritefor thestudentgroupReadonly for all others
Pick your favorite editor and add the following code to the chmod-example file:
#!/bin/bash

echo "Hello chmod example!"
Write the changes to the file and exit the editor.
Read Only Permissions
Now that you have created a new file and viewed the existing permissions it is time to use chmod command to change them.
Change the permissions of the chmod-example file so that all users only have read permissions:
chmod 444 chmod-exampleOutput:

The above command can be broken down as follows:
chmod: the command name4: read only for student owner4: read only for student group4: read only for all other users
This is confirmed when viewing the file permissions of chmod-example: -r--r--r--.
Bonus
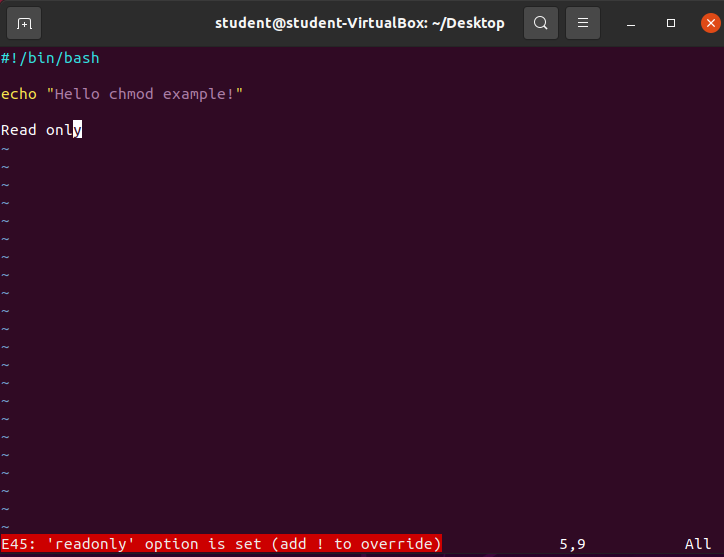
If you were to try and edit the file again you would get a message notifying you that you are trying to edit a readonly file.
Write Only Permissions
Change the permissions of the chmod-example file so that all users only have write permissions:
chmod 222 chmod-exampleOutput:

Execute Only Permissions
Change the permissions of the chmod-example file so that all users only have execute permissions:
chmod 111 chmod-exampleOutput:

Note
When a file is changed to have execute permissions on a Ubuntu operating system you will notice that the color of the file has been changed to green. This quality of life improvement is a part of the terminal emulator application that is hosting our CLI shell.
Read, Write, and Execute
In order to give a file owner read, write, and execute permissions, but restrict the group and all other users to only execute you can execute the following command:
chmod 711 chmod-exampleOutput:

The above 711 chmod options provide the student user with read, write, and execute permissions while leaving the student group and all others with only execute permissions.
Execute the file
Now that the current user student has read, write, and execute permissions on the chmod-example you can execute the file directly!
./chmod-example
Recap:
chmodcommandchmod [OPTIONS] file-name
Read only permissions:r--(4)Write only permissions:-w-(2)Execute only permissions:--x(1)Read, Write, and Execute:rwx(7)