VirtualBox Image Creation
Before you can create the Virtual Machine that utilizes the Ubuntu Image you need to open VirtualBox.
Open VirtualBox
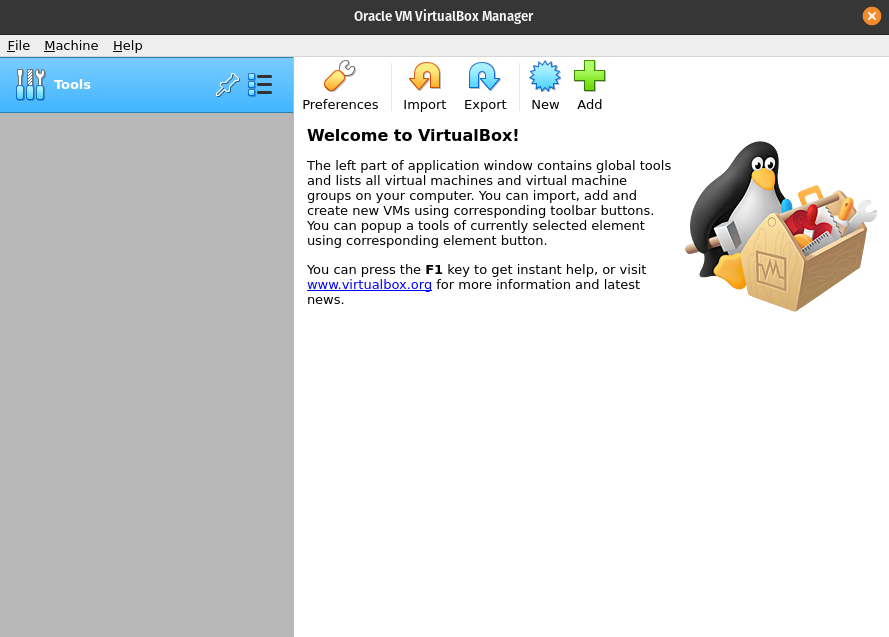
Open VirtualBox the same way you would open any software. Once it is open you should be greeted by the VirtualBox Manager Window:
Create a New Virtual Machine
In the VirtualBox Manager Window click the New button. Its icon is the blue spiky icon.
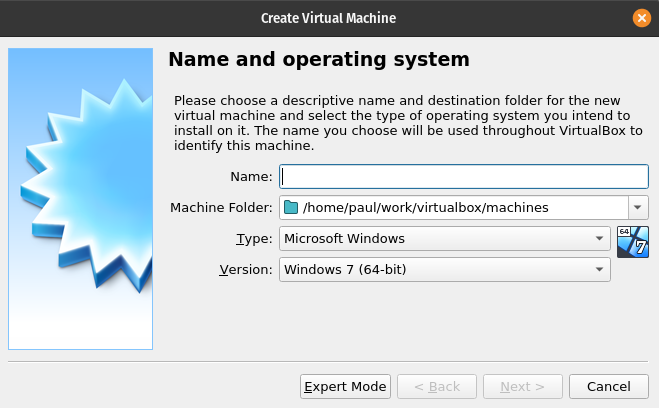
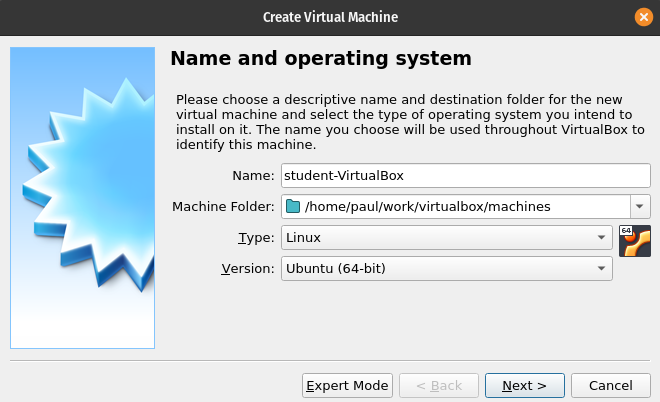
After clicking the New button a Create Virtual Machine wizard will open and will guide you through creating a new Virtual Machine. The wizard window looks like the following picture.
Note
If you have never used VirtualBox before, which is likely, you will be prompted by your host OS to give VirtualBox access to your files including your Downloads, and Documents directories. Make sure to grant VirtualBox permission to these locations!
Using this wizard you will configure all of the components of the Virtual Machine:
- Virtual Machine Name
- Virtual Machine Type
- Virtual Machine OS version
- Virtual Machine Memory Size
- Virtual Machine Hard Disk
Virtual Machine Name
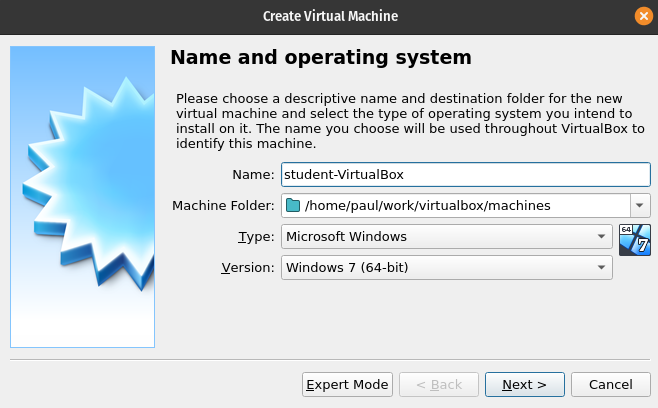
In the Name textbox enter student-VirtualBox:
Virtual Machine Type
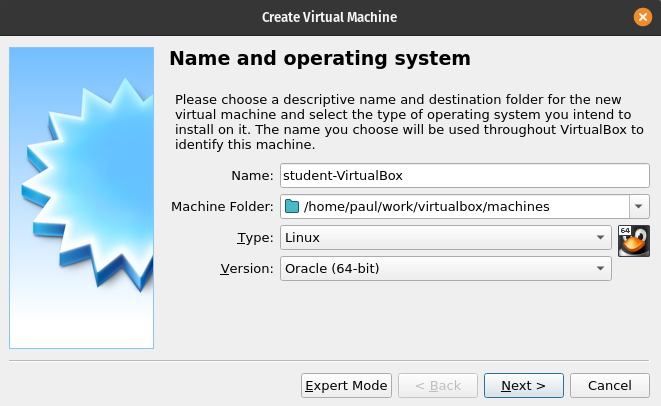
In the Type dropdown select Linux from the dropdown box:
Virtual Machine OS Version
In the Version dropdown select Ubuntu (64 bit):
After entering all three of the preceding components click the Next button.
Note
You will not be changing the default value on the Machine Folder component. Your default location is dependent on your host opearating system. For a MacOS it will be similar to /Users/user-name. For a Windows OS it will be similar to C:\Users\user-name.
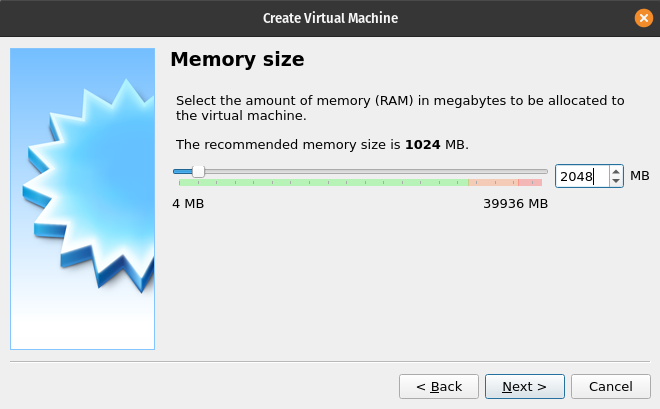
Virtual Machine Memory Size
You need to configure the amount of RAM this Virtual Machine has access to. Your host computer has a certain amount of RAM, you cannot provide all of the RAM to the Virtual Machine because your host computer still needs access to some of the memory.
For this step you will be entering 2048 (2 GB) into the only textbox on this window:
Note
You could also use the slider bar to configure the amount of RAM to provide to the Virtual Machine. We don’t recommend this, because it’s difficult to be precise. Make sure to provide at least 2048 MB of RAM.
After entering 2048 into the textbox click the Next button.
Virtual Machine Hard Disk
Similar to the RAM of your Virtual Machine you need to provide a certain amount of hard disk space from the Host operating system. However, this hard disk space needs to be formatting in a way that allows for an operating system to function.
Luckily, VirtualBox will perform this formatting for us after completing the wizard.
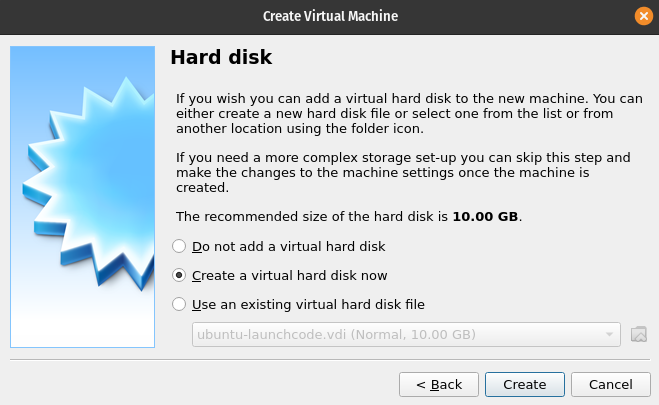
Create a Virtual Hard Disk
You will be creating a new VirtualBox managed virtual hard disk.
Leave the first setting on the default value Create a virtual hard disk now.
Click the Create button.
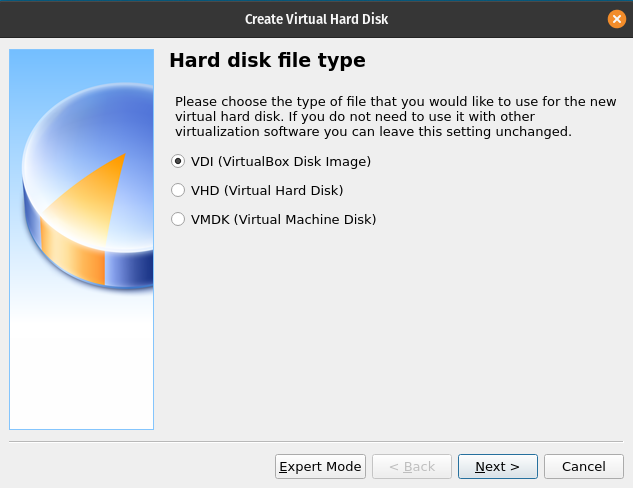
Select Hard Disk Type
You will be using the VirtualBox preferred VDI (VirtualBox Disk Image) which should be the default value.
After confirming the VDI option click Next.
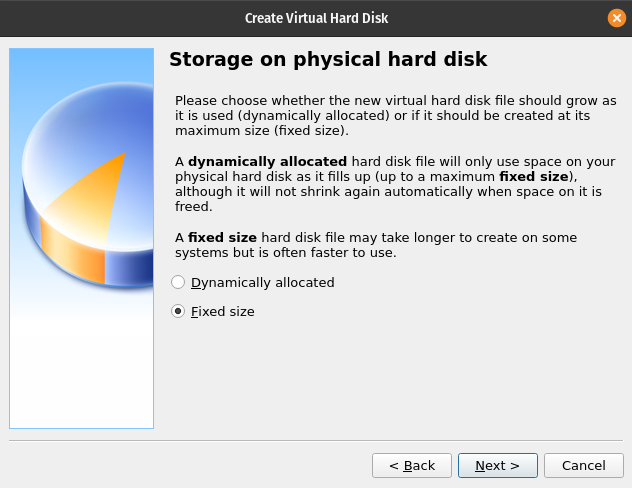
Fixed or Dynamic Hard Disk
VirtualBox allows you to dynamically add more space to your Hard Disk. However, this slows down the entire Virtual Machine because of the flexible nature of the hard disk size.
For this reason you will be using the Fixed size for your virtual hard disk.
After selecting the Fixed size option click Next.
Note
If you are creating your own personal Virtual Machine after this class, you may want to use a dynamically sized hard disk. This will offer you more flexibility with regards to the virtual machine hard disk usage.
File Location and Size
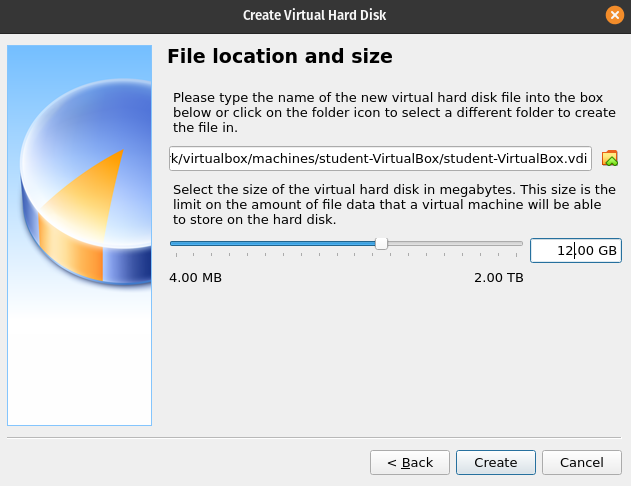
The file location for the VirtualBox you will leave as the default value. You will want to adjust the size of the virtual hard disk. The default value is 10.00 GB. You should change this to 12.00 GB as shown in the image below.
After entering 12.00 GB click the Create button.
VirtualBox Manager Homepage
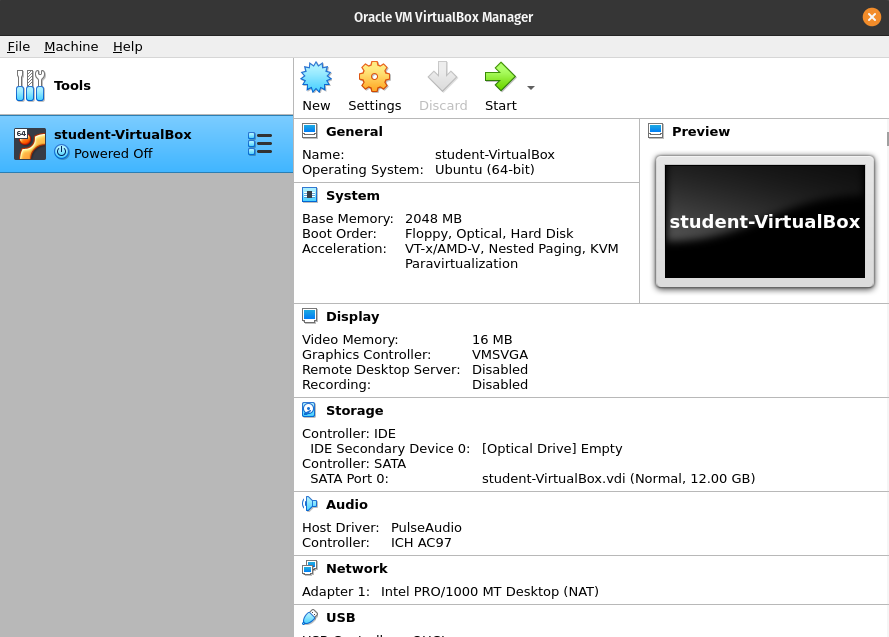
After completing all of the steps above your virtual machine will be created. When you view the VirtualBox homepage you should see a window similar to the following image:
Review
As a final step let’s review all of the settings we configured into this virtual machine. You can see these in the window displaying the student-VirtualBox virtual machine.
General
- Name:
student-VirtualBox - Operatating System:
Ubuntu (64 bit)
System
- Base Memory:
2048 MB
Storage
- Controller :IDE:
- IDE Secondary Device 0:
[Optical Drive] Empty
- IDE Secondary Device 0:
- Controller :Sata:
- SATA Port 0:
student-VirtualBox.vdi (Normal 12.00 GB)
- SATA Port 0:
Take note of the IDE Secondary Device 0, this is referencing the CD drive of this specific image. It is currently empty, which makes sense, as we don’t have a CD in our computer! In order to load Ubuntu we are going take the Ubuntu.iso image we downloaded earlier and virtually insert it into this optical drive. This will allow us to boot into Ubuntu and load it into this virtual image.
Note
In this course will not be discussing the audio, network, usb, shared folders, or description. The VirtualBox software does allow you to configure these settings if your virtual machine needs customized access to these host operating system tools.
Next Steps
After completing the above instructions please move on to the next portion of the installation process located in the article below:
