21.9. Exercises: Flask Intro
In the following exercises, you will create a Flask application that does the following:
Uses a form to collect a hex code from the user.
Validates the submitted code.
Returns feedback to the user.
Displays the color produced by the hex code.
21.9.1. Part A: Setup
The starter code for this project is stored in a GitHub repository. You will need to clone the repo to your device.
Open your
flask_projectsfolder in Visual Studio Code. Enterpwdin the terminal to verify your path.$ pwd /Users/username/Desktop/local_practice/flask_projects
Download the stater code into this directory. In the terminal, enter the command:
$ git clone https://github.com/LaunchCodeEducation/lchs_flask_intro.git
Use File –> Open to open the
lchs_flask_introfolder. You should see five files in the left panel.
21.9.1.1. Install Flask
Use the terminal to create a virtual environment, activate it, and install Flask to your project.
Mac Users:
$ python3 -m venv exercises-env
$ . exercises-env/bin/activate
(exercises-env) $ pip install Flask

Windows Users:
$ py -3 -m venv exercises-env
$ . exercises-env/Scripts/activate
(exercises-env) $ pip install Flask
21.9.1.2. Add Directories
Remember that Flask requires you to store your templates and supporting files in specific places inside your project.
Use the buttons in VS Code to create the
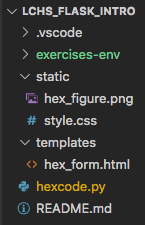
staticandtemplatesdirectories.Drag the HTML file into
templates. Move the image and CSS files intostatic.Your file tree should now look like this:
Before moving on, make sure to save and commit your work.
21.9.2. Part B: Render the Form
From the terminal, use
python hexcode.pyto launch the application.Open your browser and navigate to
http://127.0.0.1:5000/hex_form. Unfortunately, the form doesn’t look very nice right now. By moving the.htmland.cssfiles into different directories, we broke the link between them.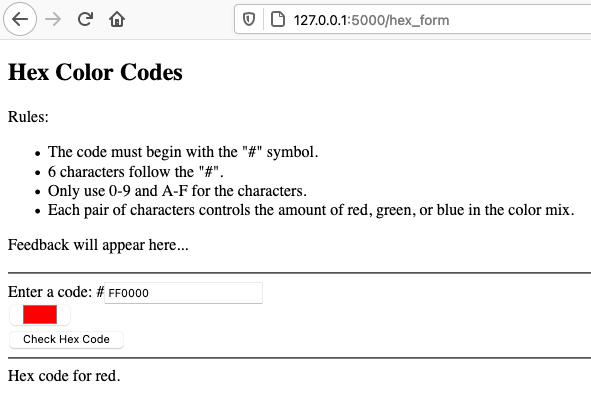
Your webpage rendered, but it needs some work.
Open the
hex_form.htmlfile in Visual Studio Code. On line 7, update thehrefattribute. Replacestyle.csswith the url_for function.7
<link rel="stylesheet" type="text/css" href="{{url_for('static', filename='style.css')}}">
On line 27, do the same thing to update the
srcattribute inside the<img>tag. Be sure to change the filename tohex_figure.png.Save your changes. Refresh the webpage to make sure the style rules and image are now in place.
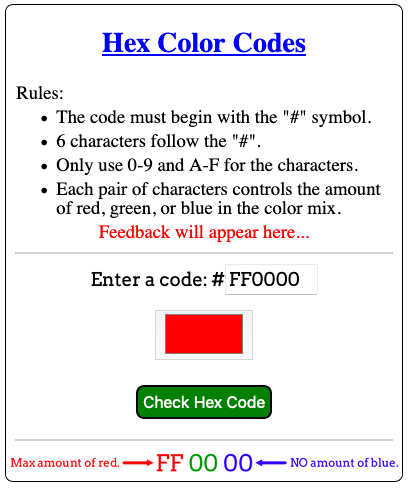
Your form now.
21.9.2.1. Add Placeholders
Notice that the input elements on lines 23 and 24 use the hard-coded hex
value FF0000. Every time the page loads, the text in the input box will
always show FF0000, and the color box will always be red.
23 24 | <label>Enter a code: #<input type="text" name="hex" value="FF0000" required/></label><br>
<input type="color" value="#FF0000" disabled/>
|
Add placeholders to the template to make the input boxes change when the form is submitted.
In lines 23 and 24, replace
FF0000with the{{hex}}placeholder:23 24
<label>Enter a code: #<input type="text" name="hex" value="{{hex}}" required/></label><br>
<input type="color" value="#{{hex}}" disabled/>
Be sure to keep the
#symbol in line 24.In line 21, replace the
Feedback will appear here...text with a different placeholder. Use whatever variable name you want, but remember to surround it with double curly braces{{}}.Now open
hexcode.py. In thehex_form()function, addhexand your feedback variable. Assign values to them.Also, add arguments to the
render_template()function to pass the values to the template.6 7 8 9 10 11
@app.route('/hex_form')
def hex_form():
   hex = 'FF0000'
   feedback = ''

   return render_template('hex_form.html', hex=hex, feedback=feedback)
Save your changes and make sure the webpage still works.
In the Python code, change the value of
hexto00FF00,0000FF, or987654. Save, then refresh the page. It should respond differently to each of the values.Test your feedback placeholder by changing its string in the Python code.
Once you have the template responding to the data you send to it, save and commit your work.
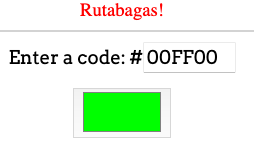
The values assigned in the Python code show up on the webpage.
21.9.3. Part C: Collect User Input
Right now, nothing much happens when you click the Check Hex Code button. You need to add more code so you can do something with the form data.
In
hex_form.htmladdactionandmethodattributes inside the<form>tag. Assign them values of"/hex_form"and"POST", respectively. Refresh the webpage, then submit the form. You should see an error message.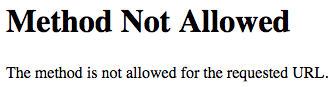
Your form sends a
POSTrequest, but the Python function is expecting aGETrequest. This is why the page renders OK initially, but not after the button is clicked.To fix this, return to the
hexcode.pyfile. Update the@app.routedecorator to accept two types of HTTP requests. This should take care of the Method Not Allowed error.8
@app.route('/hex_form', methods=["GET", "POST"])
21.9.3.1. Check the Method
When the page first loads, the browser sends a GET request and receives the
hex_form template from the Flask server. The browser sends a POST
request when the form is submitted, and we want the page to change in response.
To make this happen, update your Python code.
Add this conditional to the
hex_form()function:9 10 11 12 13 14 15 16
def hex_form():
   if request.method == 'POST':
      # More code will go here...
   else:
      hex = 'FF0000'
      feedback = ''

   return render_template('hex_form.html', hex=hex, feedback=feedback)
request.methodreturns the type of HTTP request received by the server. Ifrequest.method == 'POST'returnsTrue, then the form was submitted. You need to recover the data.Use
request.formto get the hex code and assign it to a variable.9 10 11 12 13 14 15 16 17
def hex_form():
   if request.method == 'POST':
      hex = request.form['hex']
      feedback = "Successful submission!"
   else:
      hex = 'FF0000'
      feedback = ''

   return render_template('hex_form.html', hex=hex, feedback=feedback)
Line 11 recovers the value from the input element with
name="hex".There is no form data for
feedback, but it does need a value. Assign it any message you like on line 12.Save the changes, then reload the webpage. Use the form to submit several valid hex codes. You should see the input boxes change, and the feedback line should appear.
What happens when you submit an INVALID hex code, like
AA9?Be sure to commit your changes before continuing.
Note
If the browser sends a GET request to the server,
request.method == 'POST' returns False. In that case, the else
clause runs. hex and feedback get assigned the default values of
FF0000 and the empty sting.
You can make this happen by clicking in the address bar of the browser and tapping Enter. This resets the form to its original appearance.
21.9.4. Part D: Validate the Input
Your application is working now and transferring data between the Python code and the HTML template. The next step is to add validation to check if the user submits a valid color code.
The rules for hex codes are simple. They start with the # symbol, followed
by 6 other characters. These characters can be any combination of digits
(0-9) and the letters A-F.
As written, the HTML code includes the # symbol where it is needed. All you
need to focus on is validating the 6 characters. You will do this in two steps.
First, check the length of the input. Next, check the individual characters.
21.9.4.1. Check Input Length
Perform the validation right after you collect the user’s hex code from the form.
10 11 12 | if request.method == 'POST':
hex = request.form['hex']
# Your validation code goes here.
|
hexmust contain exactly 6 characters. Add a conditional to check the length of the string collected from the form.If the string is NOT 6 characters long:
Assign an error message to the feedback variable. This should explain to the user why their code didn’t work.
Re-assign a value to
hexto replace the user’s invalid one. This can be the empty string or a valid code. (Keep in mind that this value ofhexwill be sent to the template).
If the string is 6 characters long, assign the empty string to the feedback variable.
Save, then refresh the form in the browser. Submit at least 3 hex codes to check your work (one too long, one valid, one too short).
Once you have the length validation working, save and commit your progress.
21.9.4.2. Check Characters
You will use a separate function to check the characters in the hex code.
Near the top of your Python program, define the
valid_hex_charsfunction.4 5 6 7 8
app = Flask(__name__)
app.config['DEBUG'] = True

def valid_hex_chars(parameter_name):
   # Your code here.
The function should:
Include a parameter that accepts the user’s hex code.
Use a loop to check if each character is either a digit (0-9) or a letter (A-F). Case does NOT matter for the letters.
Return
Trueif all 6 characters are valid.Return
Falseif even one character is incorrect.
Back in the
hex_form()function, modify your conditional by adding anelifclause:elif not valid_hex_chars(hex): # Your new code here. else: # Your old code here.
Note that the
elifstatement calls thevalid_hex_chars()function. If the hex characters are invalid, assign a different error message to the feedback variable.Save, then refresh the form in the browser. Submit several different hex codes to test this part of the validation.
Tip
Valid hex codes:
987654,AaBbCf,3CF98bInvalid hex codes:
1234AG,k23Wb4,87*654