25.4. Create the Game Page
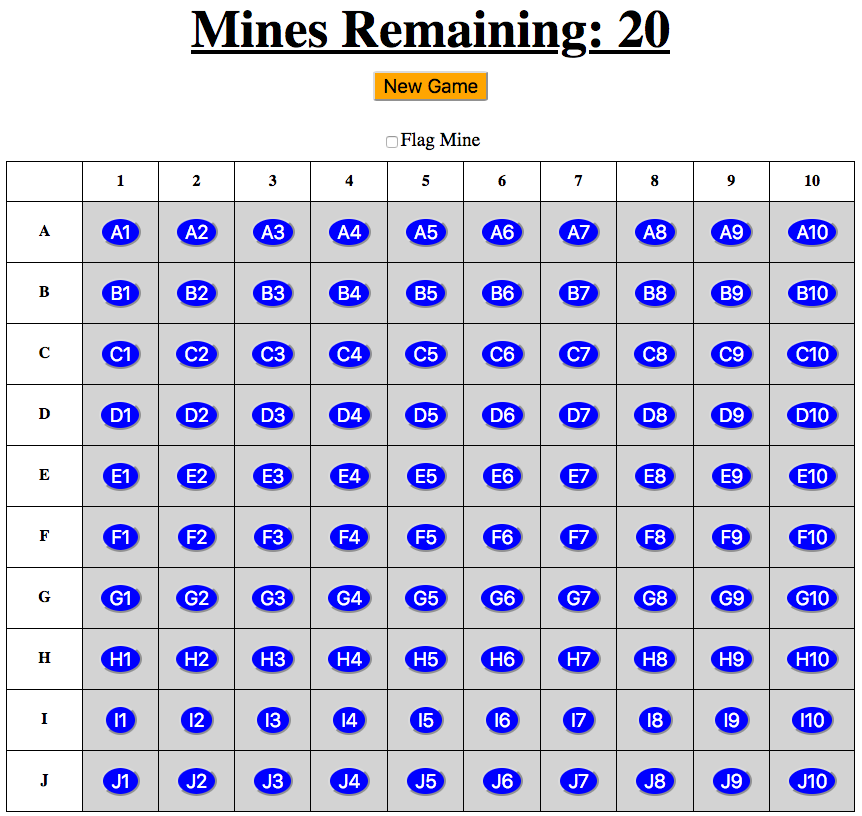
To play Minesweeper, the home page links to a different HTML template. The game screen contains a title, a mine counter, a New Game button, and the the active board.

The game board is one big HTML form.
25.4.1. Build mines.html
The structure of the game board is very similar to the one we built in
index.html. However, this time the buttons will be active, and the entire
table will be part of a large form element.
Unlike the home page, the HTML we use for the board will change once we start adding Python code to run the game. We’ll start simple, and then update the elements and/or attributes in later steps.
The form on the game page behaves differently than most of the ones we’ve
created before. Instead of filling in an input field, users submit their
cell choices by clicking the different buttons. In this case, each button
serves as a separate input. To make the form work this way, we must assign a
different value to each button. One of these will be submitted when the user
clicks on the board.
Open your Minesweeper project and code along with the video to build the game page:
25.4.2. Video Summary
The game board looks just like the one on the home page. However, this one has active buttons, and it is included inside a
<form></form>element.Paste in the same table code from
index.html. Change the attributes in thebuttonelements to:Make them active,
Give each one the same
name,Set
type="submit",Use a placeholder to assign a
valuethat matches the cell coordinates (A10, B4, C7, etc.).
Inside the same form, add a Flag Mine checkbox above the game board, and center it.
In the
<header></header>element, add the New Game button.Style the
<button>with themenuclass.Give it the same
nameandtypeas the buttons in the table.Set the
valueto be the empty string.Use the
formattribute to match the button to the<form id="game-board" ...>element.
As we add more code to
main.py, we will need to update the HTML and styling for the cells in the table.
