10.6. Studio: Skills Tracker
Wouldn’t it be nice to have a small tracker to show us what skills we have built and where we are at in learning them? Let’s build something that would let us do just that!
As always, read through the whole studio before starting!
At the end of the studio, your final project should be able to take input from a user via a form and post the information in a way that is easy to read.
10.6.1. Start up Spring
10.6.1.1. Using the Spring Initializr
Head to the Spring initializr to initialize a new Spring project.
For Project, select Gradle Project, for Language, select Java, and for Spring Boot, select 2.4.x (whichever is the most recent release, that is NOT a snapshot).
For Project Metadata, we can use org.launchcode as Group and skills-tracker as the artifact. Also, remember to expand Options so you can make sure that Java 11 is selected!
Finally, we want to add Spring Web and Spring DevTools as our dependencies.
Double check that everything is ready to go and click Generate!
10.6.1.2. Launching IntelliJ
Unzip the newly generated skills-tracker.zip and move the folder into the directory where you are keeping your homework for this class!
Open IntelliJ and select Import Project. Double click bootRun and head to localhost:8080 to make sure there is nothing there.
Now you are ready to start coding!
10.6.2. Creating Controllers
In your org.launchcode package, add another package called controllers and add a class called SkillsController.
Inside SkillsController, you will add several methods to accomplish the following:
At
localhost:8080, add text that states the three possible programming languages someone could be working on. You need to have anh1with the title “Skills Tracker”, anh2, and anolcontaining three programming languages of your choosing.At
localhost:8080/form, add a form that lets the user enter their name and choose their favorite, second favorite, and third favorite programming languages on your list. Useselectelements for each of the rankings. Just as with the exercises, we will use@GetMapping().Also at
localhost:8080/form, use@PostMappingand@RequestParamto update the HTML with anh1stating the user’s name and anolshowing the three programming languages in the order they chose.
10.6.3. End Result
At the end of the studio, when you navigate to localhost:8080, you should see the following:

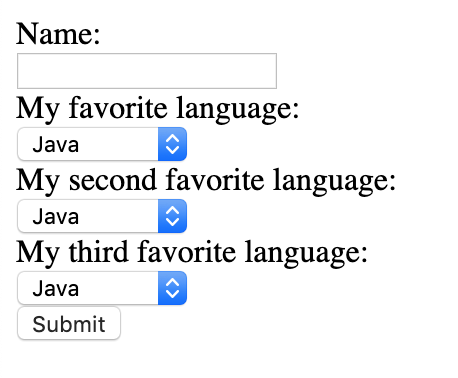
When you navigate to localhost:8080/form, you should see a blank form that looks something like:
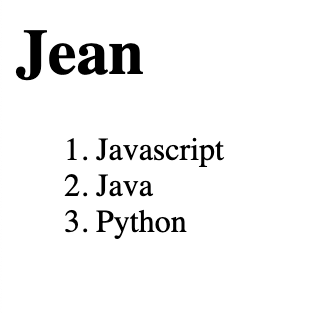
If you fill out the form, your page may render like so:
10.6.4. Bonus Missions
Reformat your
formpage to use a table instead of an ordered list.Add a new path to the site to display the information from the completed form.