1.5. Your First Java Project
Following the “Hello, World” trend, let’s create a new IntelliJ project.
Create a new folder to hold your Java practice files. Since you will be creating lots of small projects as you move through this course, we suggest that you also add sub-folders with names corresponding to the related chapters and projects. Something like
java-practice/chapter-name/project-name.Select the New Project option from the welcome screen.

Start a new project
Clicking New Project opens a window with a series of project settings to select. This window is called the new project wizard.
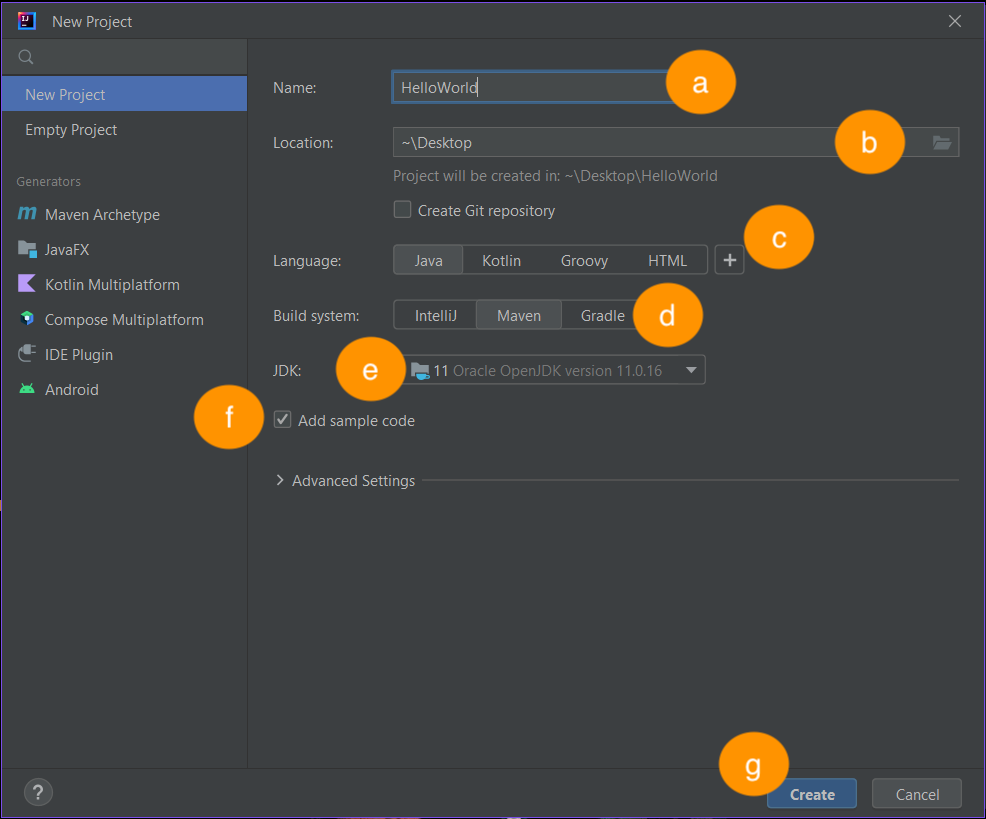
Name your project. In this example, we named our project
HelloWorld.Select the Location to save your project. The reading suggested using a folder to store all of your Java projects. This example is using the Desktop.
Choose Java from the Language options.
For the Build System, select Maven. We will discuss build systems more in a later lesson.
For JDK, you’ll want to use version 11 that you have downloaded. If 11 is not already selected in the SDK window, click New on the right and find the JDK you have just downloaded.
Check the Add sample code option for this project. This will allow you to run Java in the terminal.
Select Create to create your new Java project.
You should now see your new Java Project. Below is the view of your new project. The section on the left is the project’s file tree.
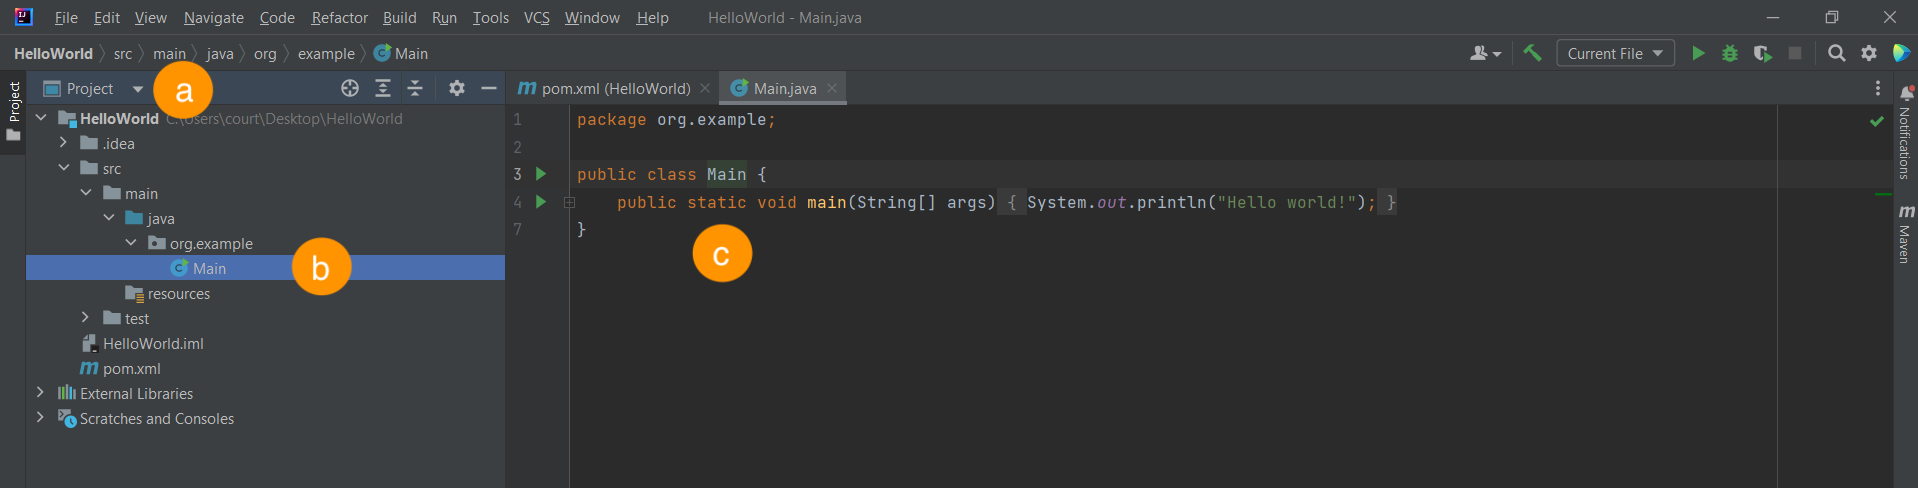
IntelliJ project contains file tree (b) on left and Main class on the right (c).
Click on the item labeled Project with an icon that looks like a file folder on the left of the project window. This will list the files in your file tree.
Explore your file tree until you find your
Main.javafile. Clicking the triangle next to the project name,HelloWorld, displays thesrcfile, followed by the base package we created, and finally ourMain.javafile.Main.javais also opened on the right in this initial project view.
In line 1,
package org.example, establishes a package, which Java uses to help organize and encapsulate our code. This is a default setting. You can update this in the New Project Wizard under the Advanced Settings drop down menu. For this project, the default setting is all we need.In line 3, you should see the
Mainclass. We’ll dive into the use of amainfunction andMainclass later. At this point, let’s just get right to printing our greeting. Somewhere in your project you should see the following command:System.out.println("Hello, world!");
Before we run this program, let’s guess what the output will be. Ok sure, we haven’t gone over this exact syntax yet, but you can take a guess at what this line will do.
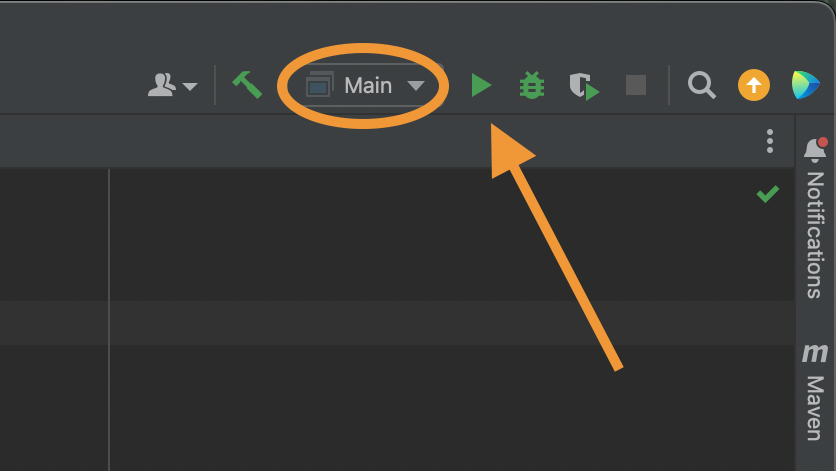
To run your program in IntelliJ, you have several options.

IntelliJ run code options
You can click on any of the green triangles indicated above, or choose Run from your top menu bar.
Note
If you are having trouble running your program, try selecting the Main project from the Configuations menu. This is located between the green hammer and the green Run triangle on the top left of your menu.
Once run, IntelliJ will generate a third panel in your view, with your program’s output:
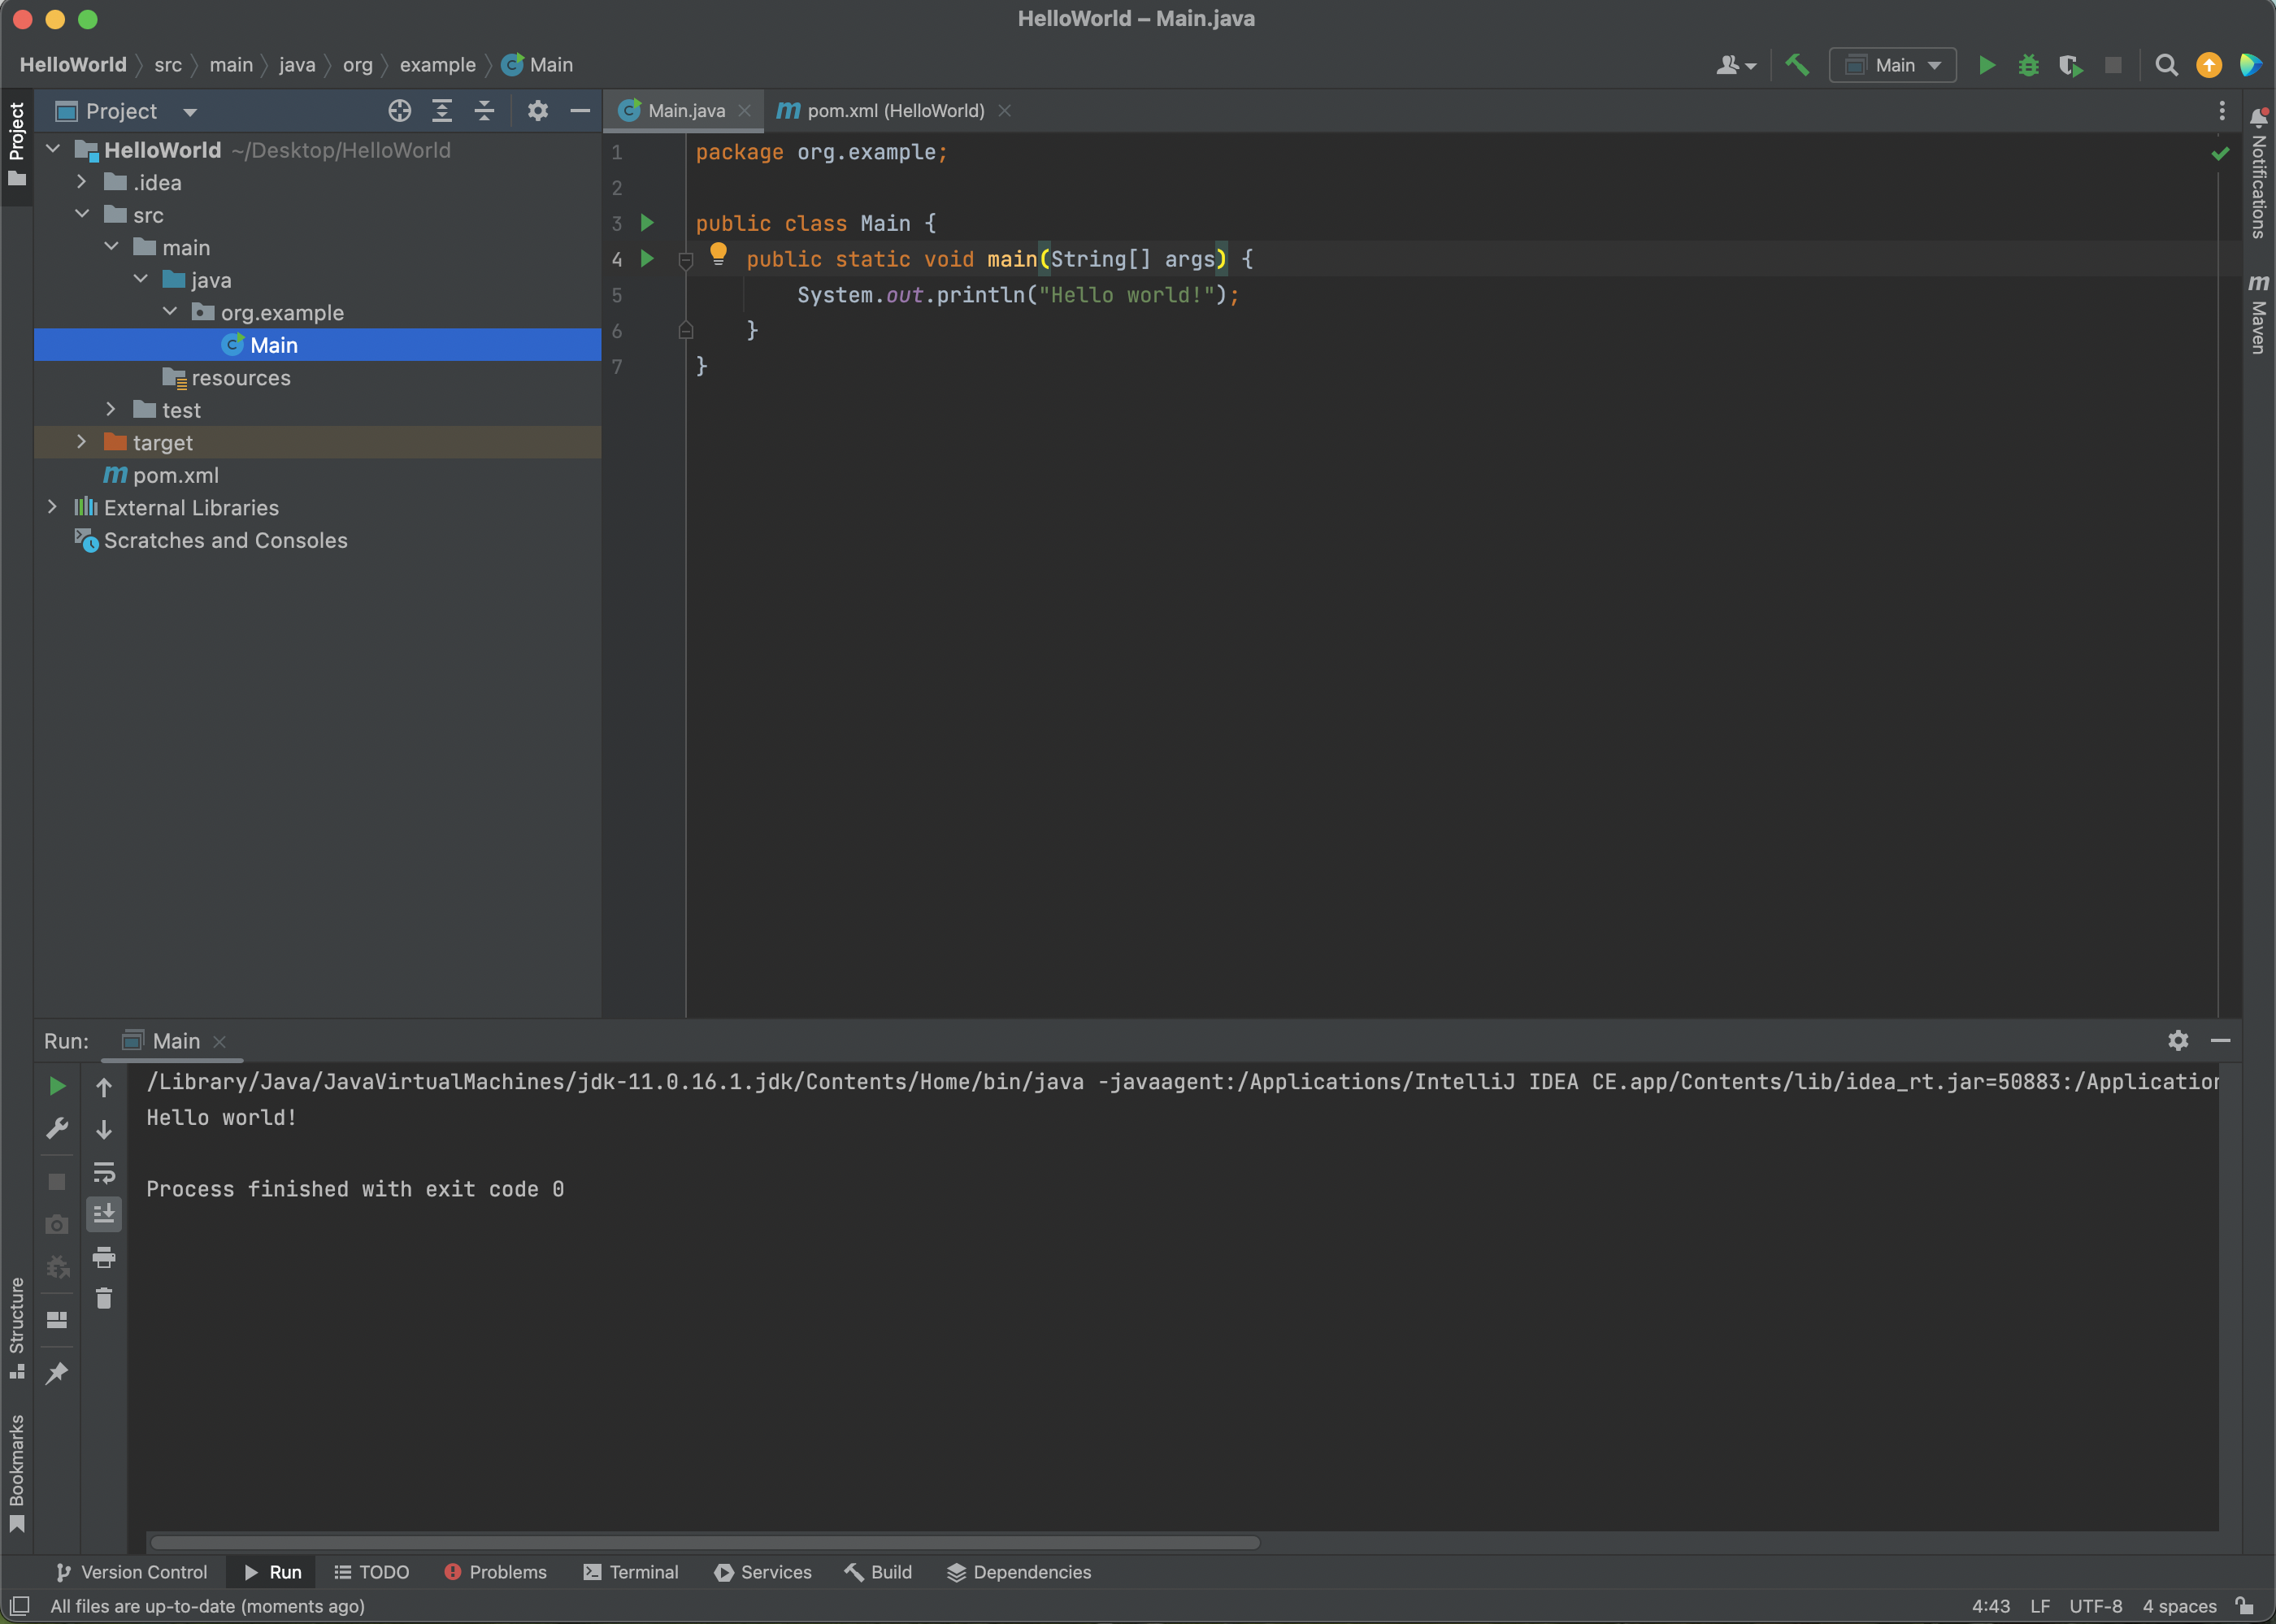
IntelliJ output
This is just the start of your relationship with IntelliJ. Now that we know the fundamentals, let’s return to Java basics so we can start writing more code.
1.5.1. Check Your Understanding
Question
Given the code below, which line is responsible for printing a message?
1 2 3 4 5 6 7 | public class HelloWorld {
public static void main(String[] args) {
System.out.println("Hello, World");
}
}
|
line 1
line 3
line 4
Question
In the sourcecode above, which line is responsible for defining the class?
line 1
line 3
line 4