Task 1: Getting Started
Code Together
Coding together allows you to work as a team so you can build bigger projects faster.
In this studio, we will practice the common Git commands used when multiple people work on the same code base.
You and a partner will code in tag-team shifts. By the end of the studio, you should have a good idea about how two people can work on the same code at the same time. You will learn how to:
- Quickly add code in pull + push cycles (Important! This is the fundamental process!)
- Add a collaborator to a GitHub Project
- Share repositories on GitHub
- Create a branch in Git
- Create a pull request in GitHub
- Resolve merge conflicts (which are not as scary as they sound)
This lesson reinforces:
- Creating repositories
- Cloning repositories
- Working with Git concepts: Staging, Commits, and Status.
Overview
The instructor will discuss why GitHub is worth learning. You already know how to use a local Git repository with one branch, giving you the ability to move your code forward and backward in time. Working with branches on GitHub extends this ability by allowing multiple people to build different features at the same time, then combine their work. Pull requests act as checkpoints when code flows from branch to branch.
Students must pair off for this exercise. If you have trouble finding a partner, ask your TA for help.
Gitting Ready
You are going to simulate a radio conversation between a shuttle pilot and mission control. You and your partner will alternate tasks, so decide who will be the Pilot and who will be the Control.
Before you and your partner can begin your collaboration, some preparation is required first. You will both start by creating a new repository on your separate GitHub accounts.
Step 1: Create a New Local Repository
Control and Pilot: Both of you need to complete steps 1 - 6 on your own machines.
In the terminal, navigate to your development folder. Enter the following 3 commands to create a new project. Replace
-ROLEwith your part in this studio, either-pilotor-control.$ mkdir communication-log-ROLE $ cd communication-log-ROLE $ git initNoteIMPORTANT: To avoid confusion later, it’s critical that you and your partner give different names to your repositories.
For the remainder of this studio, we will refer to the repo as
communication-log.Launch Visual Studio Code. Use the File menu to open the
communication-logfolder.Create a new file called
index.htmland open it in the workspace.Paste this code into
index.html:1 2 3 4 5 6<!DOCTYPE html> <html> <body> <p>Radio check. Pilot, please confirm.</p> </body> </html>Save your work, then stage and commit it.
a. First, check the
status.$ git status On branch main Initial commit Untracked files: (use "Git add <file>..." to include in what will be committed) index.html nothing added to commit but untracked files present (use "git add" to track)b. The output shows is that
index.htmlis not staged. Let’saddeverything in this directory, then check thestatusagain.$ git add . $ git status On branch main Initial commit Changes to be committed: (use "git rm --cached <file>..." to unstage) new file: index.htmlc. The output tells us that the file is staged. Now let’s
commit. After that, we can see a record of our progress by usinggit log.$ git commit -m "Started communication log." [main (root-commit) e1c1719] Started communication log. 1 file changed, 5 insertions(+) create mode 100644 index.html $ git log commit 679de772612099c77891d2a3fab12af8db08b651 Author: Chris <[email protected]> Date: Wed Apr 5 10:55:56 2021 -0500 Started communication log.Use the command
git branchto check the name for the default branch. If necessary, change the name tomain.$ git branch * default_name $ git branch -m default_name main.GitHub uses
mainfor its default branch. To make things easier, you should always try to match your local and remote branch names.
Great! You’ve got your project going locally. The next step is to push it up to GitHub.
Step 2: Push Your Repository To GitHub
Control and Pilot: Complete steps 1 - 5 on your separate devices and GitHub accounts.
Go to your GitHub profile in a web browser. Click on the “+” button to add a new repository (called a repo for short).
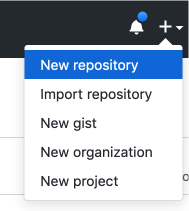
The New Repository link is in the dropdown menu at top right on GitHub.
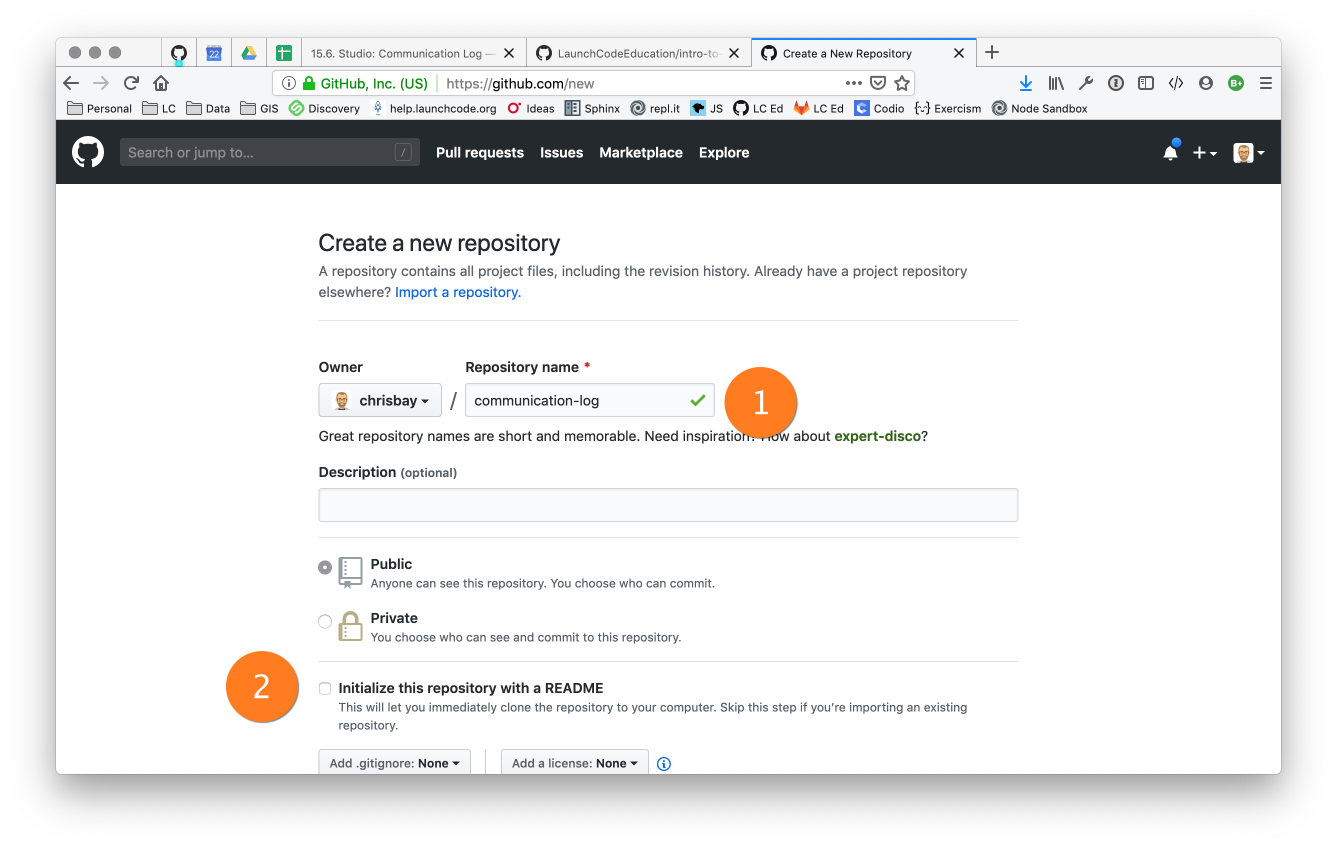
On the next page, fill in the Name and Description fields. Also, uncheck the Initialize this repository with a README option, then click Create Repository.
 Note
NoteIf you initialize with a README, Git will refuse to merge the remote repo with your local one. There are ways around this, but it’s faster and easier to just create an empty repo on GitHub.
After clicking, you should see something similar to:

Now go back to your terminal and copy/paste the commands shown in the GitHub instructions. These should be very similar to:
$ git remote add origin https://github.com/your-username/communication-log.git
$ git branch -M main
$ git push -u origin main
Confirm that GitHub has the same version as your local project. Click around and make sure that everything is as you expect it to be.
Git the Teamwork Started!
You’ve successfully created a new GitHub repository and pushed content to it. Now it’s time for you and your partner to start collaborating on the same repo.
For the remaining sections of this studio, keep an eye on the Control and Pilot role tags. Make sure that you both perform your tasks in the recommended order. Mixing things up won’t destroy the universe, but it will make finishing the studio more complicated.
Even when it is not your turn to complete a task, read and observe what your partner is doing. The steps here mimic a real-world collaborative Git workflow.
Step 3: Add A Collaborator
Control, the first step is yours. In order for Pilot to make changes to your GitHub repository, you must invite them to collaborate.
Control: In your web browser, go to your
communication-logrepo. Click the Settings button then select the Manage Access option.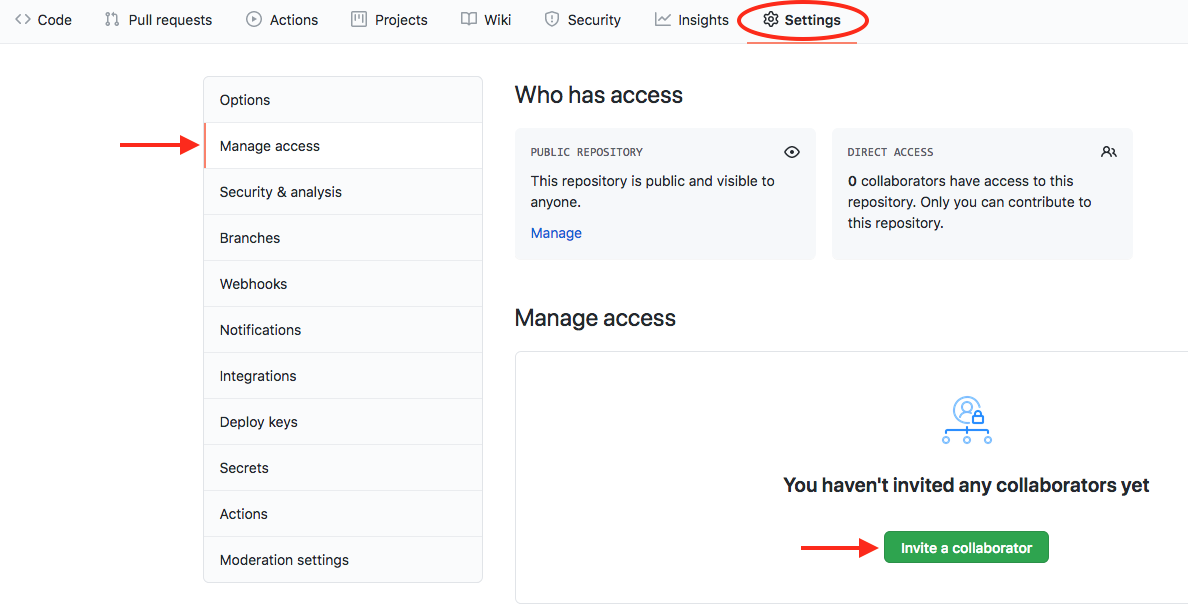
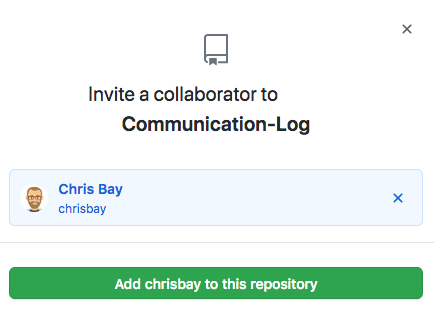
Control: Click on the green Invite a collaborator button. Enter your partner’s GitHub username and click Add to repository.
Pilot: You should receive an email invitation to join this repository. View and accept the invitation.
Pilot: If you don’t see the email, check your Spam folder. If you still don’t have the email, login to your GitHub account. Visit the URL for Control’s copy of the repo. You should see an invite notification at the top of the page.
Step 4: Clone Project from GitHub
Pilot, did you and your partner give different names
to your communication-log repositories?
If not, take a moment to find your local communication-log folder on
your machine and rename it!
Pilot: Go to Control’s GitHub profile and find their
communication-logrepo. Click on the green Code button. Select the HTTPS option and copy the URL to your clipboard.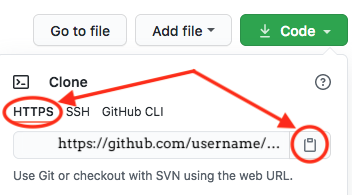
Pilot: In your terminal, navigate back to your development folder and clone Control’s repo. You should be OUTSIDE of any other Git repositories.
The clone command looks something like this:
$ git clone https://github.com/username/communication-log.gitReplace the URL with the address you copied from GitHub.
Pilot: You should now have a copy of Control’s project on your machine.
Git Talking
Whew! That was quite the setup experience. Now you’re ready to dive into the main part of the studio.
On to Part 2!