23.8. Studio: The DOM and Events
Now that we can build a basic flight simulator, we want to add more controls for the staff at our space station. The HTML, CSS, and JavaScript files are provided. For each event, the requirements and desired effect is listed.
23.8.1. Getting Started
First, fork the studio repository to your Github account. To do so, on the studio repository page on Github, click the "Fork" button.

A popup appears asking where to fork the repository to and you select your profile. You should now have a copy of the repository on your own profile!
Note
Not only is forking repositories an important Git skill, it is especially vital in the class so that everyone has the same starter code! Before continuing, make sure that the repository is now on your profile and you are working with your copy of the starter code for the rest of the studio.
If you have properly forked a repository, when you click on the forked repository on your profile, you will see the following:

Once you have properly forked the repository, you can clone the remote repository to your computer. To start, click on the green "Clone" button to get the proper HTTPS url for the command.
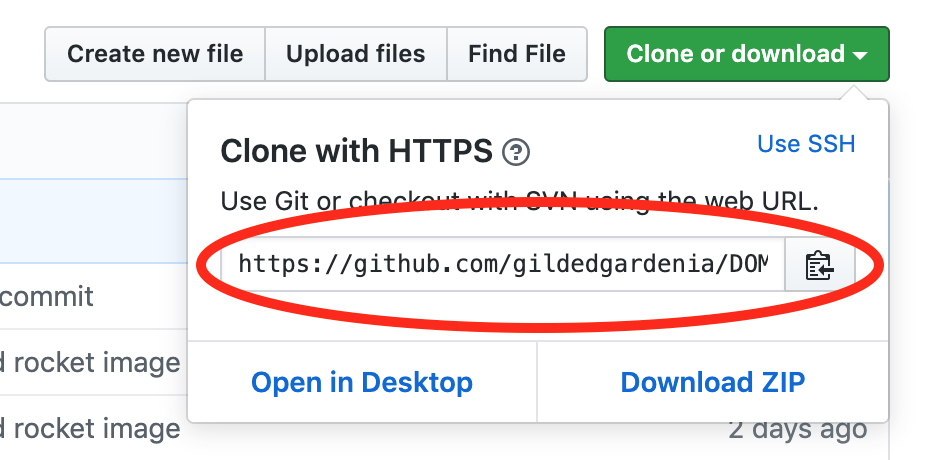
Copy the url either by clicking on the button with a clipboard icon or highlighting the whole url and copying.
In the terminal, navigate to the directory where you want to put your new project.
Use the command, git clone <url>, with the url you just copied to put the project on your local machine.
Note
git clone will clone a whole directory including the Git repository on your machine, so there is no need to initialize a Git repository in a new directory to get started this way!
Open Visual Studio Code and go to File > Open to find your new project and get started!
Warning
When you push your work up to your Github repository, you may notice the option to create a pull request. Please do NOT do so. This pull request will be linking your work back the shared starter code. If you accidentally do so, you can navigate to the starter code repository page and find your submission under "Pull Requests". Click on your submission and close the pull request at the bottom of the page.
23.8.2. The Requirements
Use the window load event to ensure all elements have loaded before attaching event handlers.
When the "Take off" button is clicked, the following should happen:
A window confirm should let the user know "Confirm that the shuttle is ready for takeoff." If the shuttle is ready for liftoff, then add parts b-d.
The flight status should change to "Shuttle in flight."
The background color of the shuttle flight screen (
id = "shuttleBackground") should change from green to blue.The shuttle height should increase by 10,000 miles.
Note
When you are moving the shuttle, you want to use absolute positioning in CSS. Absolute positioning means positioning the object based on its location in the parent object. In the case of our flight simulator, the parent object is a div with the id,
shuttleBackground. Relative positioning means positioning the object based on its fellow child objects. We might use relative positioning if there were planet objects within ourshuttleBackgrounddiv.When setting the position of an object in CSS, you use a string that ends in "px". So the position of 10 pixels is "10px". To add a number of pixels to the position, you may first have to use
parseIntto convert the current position to a number.When the "Land" button is clicked, the following should happen:
A window alert should let the user know "The shuttle is landing. Landing gear engaged."
The flight status should change to "The shuttle has landed."
The background color of the shuttle flight screen should change from blue to green.
The shuttle height should go down to 0.
When the "Abort Mission" button is clicked, the following should happen:
A window confirm should let the user know "Confirm that you want to abort the mission." If the user wants to abort the mission, then add parts b-d.
The flight status should change to "Mission aborted."
The background color of the shuttle flight screen should change from blue to green.
The shuttle height should go to 0.
When the "Up", "Down", "Right", and "Left" buttons are clicked, the following should happen:
The rocket image should move 10 px in the direction of the button that was clicked.
If the "Up" or "Down" buttons were clicked, then the shuttle height should increase or decrease by 10,000 miles.
23.8.3. Bonus Mission
If you are done with the above and have some time left during class, there are a few problems that you can tackle for a bonus mission.
Keep the rocket from flying off of the background.
Return the rocket to its original position on the background when it has been landed or the mission was aborted.