Setting Up Node
Installing Node on your computer also installs the NPM Command Line Interface (CLI), which allows you to run specialized commands in the terminal.
Follow this link to the Node website, and examine the selection screen:
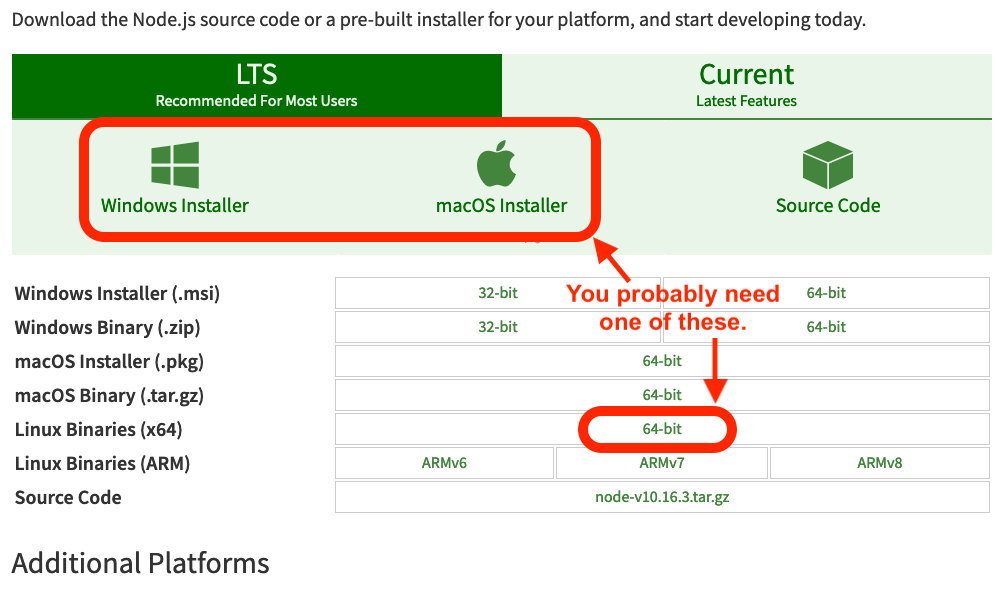
Node download screen.
The LTS version of Node is an older, reliable build that has been tested, debugged, and runs well. The Current version brings in newer features, but it is still being tested. Either option works for this course, but we recommend downloading the LTS version.
Click on the Windows or MacOS icon to download the installer to your computer. If you have a different operating system, select its 64-bit option from the list below the icons.
Run the installation program and follow the on-screen instructions.
Accept to the licence agreement. Hopefully, doing so does not require you to give up your first born child.
When asked for the installation location, etc. use the default options.
Verify that the installation was successful by opening the terminal and running the command
node -v. The output should match the version you downloaded.$ node -v v##.##.#
If the version you downloaded is version 16 or higher, you may need to install an older version when it comes to working with Angular. In order to do so, follow these steps:
Type this command into the terminal
- ::
npm install -g node@14.15.1
If it doesn't install try adding
sudobeforenpmand then run the command again.Once the install is complete, run this command to verify that you have version 14.15.1
- ::
node -v