Installing Jupyter Notebook

Setting up Jupyter Notebook

Jupyter is a non-profit, open-source project that offers various tools and solutions. This course will utilize Jupyter Notebook for documentation and code editing all within your browser.

Note

This course will utilize virtual environments when installing Jupyter Notebook and other external libraries onto your machine. You can read more about virtual environments here: venv - Creation of virtual environments

Creating a Virtual Environment

You can create a new virtual environment inside of any directory of your choice. However, for this class it would be wise to create it inside of the root directory of your data-analysis-projects directory.

  1. Navigate to your data-analysis-projects directory and run the following command:

    # -m (module) 
    # venv (venv module) 
    # venv (directory name - think of this last piece as a variable, you can name it anything, venv is a typical naming convention)
    python -m venv venv
Note

If the above command does not work, you may need to specify python3:

python3 -m venv venv

The above command will create a virtual environment called venv using the venv module.

Activating the Environment

  1. While inside of the directory that you installed your virtual environment you can run the following command to activate it:

    source venv/bin/activate

Source is a built-in shell command that will execute any file provided as an argument. In this particular scenario we are sourcing the activate script located within bin directory that contains executable files.

Once you have activated your virtual enviroment, the following commands will install Jupyter Notebook within it:

pip install notebook
Warning

If the above command produces an error you may need to specify pip3 like so:

pip3 install notebook
Note

pip is a package manager that is included with any Python installation. You can verify the version and installation of pip by typing in the following command:

python3 -m pip --version

Start the App Server

Open Jupyter Notebook with the following command:

jupyter notebook

Verification

The running application will look similar to the image below:

Jupyter notebook running on localhost within the browser Jupyter notebook running on localhost within the browser

Note

If a browser window with a running Jupyter notebook application does not happen automatically, you can copy and paste one of the highlighted links into the browser of your choice.

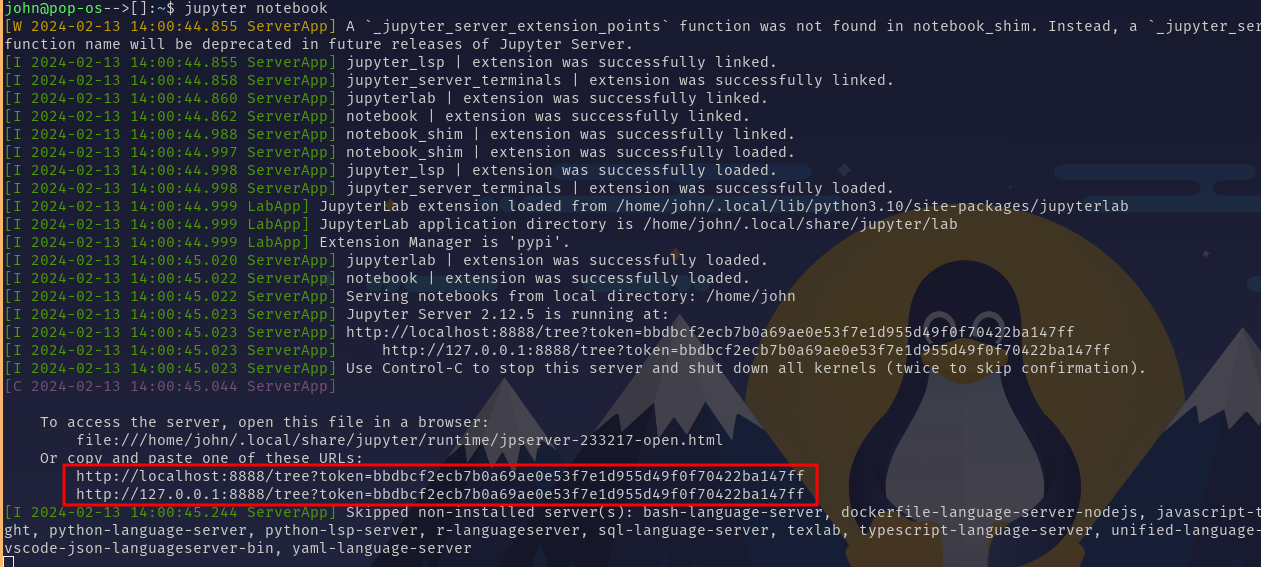
Running jupyter notebook in the terminal to open the application Running jupyter notebook in the terminal to open the application

Warning

In order to stop the Jupyter Notebook server from running, open your terminal window where you started the server and press ctrl + c. You will be asked to confirm the shutdown process, type in y and hit the enter key to confirm.

Shutting down jupyter notebook server within the command line Shutting down jupyter notebook server within the command line