Assignment #6: Remote Repository Setup
In your earlier work, you cloned repositories from GitHub, pushed and pulled content from the site, and collaborated with a partner on a shared repo. However, you often performed each these actions separately from the others.
For this assignment, you will start a project from scratch. Besides making a cool web application, you will also refine all of your version control skills!
The sections below walk you through the setup for your project. After your local and remote repositories are linked and ready to go, return to the main Assignment 6 page.
Create a New Local Repository
Your first step is to create a local project directory. This stores a copy of your code on your personal device.
Launch Visual Studio Code and use the File menu to open your
local_practicefolder.In the file tree, create a new directory for your game project. Be sure to give the folder a descriptive name! Also, make sure the new folder is NOT buried inside of a different project.
From the File menu, open your game folder. In the terminal, run
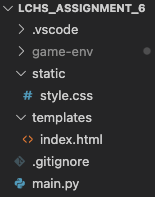
git initto initialize the directory for version control.Use the tools in VS Code to create a file tree that looks like this:

The file tree contains two folders (
staticandtemplates) plus three code files.¶You don’t need any code in
main.py,index.html, orstyle.cssyet.Use the terminal to create a new virtual environment for your project, then install Flask. If you need a reminder for how to do this, review the guidelines in the Cookies & Sessions chapter.
Add a
.gitignorefile and paste in the usual code. Be sure to put the name of your project’s virtual environment in line 1.Properly done, your file tree should now look something like this:
Your local file tree after installing Flask and adding
.gitignore.¶Run through the usual
git status/add/commitprocess to save your progress.Finally, use
git branchto check the name of your default branch.$ git branch * main
If the default branch is NOT called
main, change it with the command$ git branch -m old_branch_name main
Link to a Remote Repository
The next step is to open an empty repository on GitHub. This will eventually hold the remote copy of your project code.
Open your web browser and login to your GitHub account.
On your home screen, click the New Repository button.

It’s friendly and green. Click the button!
This opens a page where you must make a few choices. First, fill in
Repository Namewith the SAME NAME as your local game directory. Also, give a short description of your project.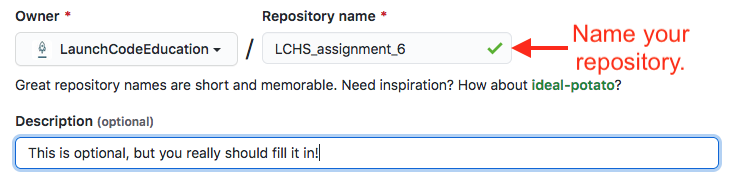
If your repo name is already taken, you’ll have to think of another!
Next, select the Public option for your repo, and leave the three checkboxes empty. Click Create repository.

The next screen seems very detailed, but it’s almost automatic. Copy the commands to push an existing repository and paste them into the terminal panel in VS Code. This will save a copy of the local repo you created earlier to your GitHub account.
You may be asked to enter your GitHub username and/or password to complete the action.

When successful, you’ll see a lot of text appear in the console. It will end with something like this:
To https://github.com/username/project_name.git
* [new branch]      main -> main
Branch 'main' set up to track remote branch 'main' from 'origin'.
usernameandproject_namewill match your GitHub username and what you called your repository. The last line confirms the link between your localmainbranch and the remote version.
Good! Now click on your project name in GitHub. You should see the same files and folders in both GitHub and VS Code. The exception to this is the directory for your virtual environment, which won’t appear online.
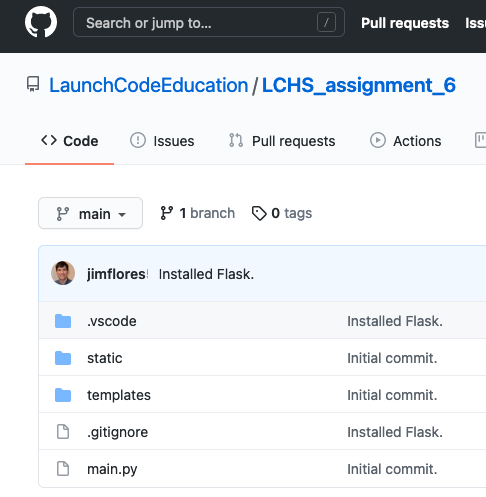
Congratulations! Your project code now exists online.
Add Teammate(s) to Project
Finally, you need to grant your partner(s) permission to make changes to the remote repository.
On the GitHub repository page, click the Settings button. Select the Manage Access option and click the green Invite teams or people button.
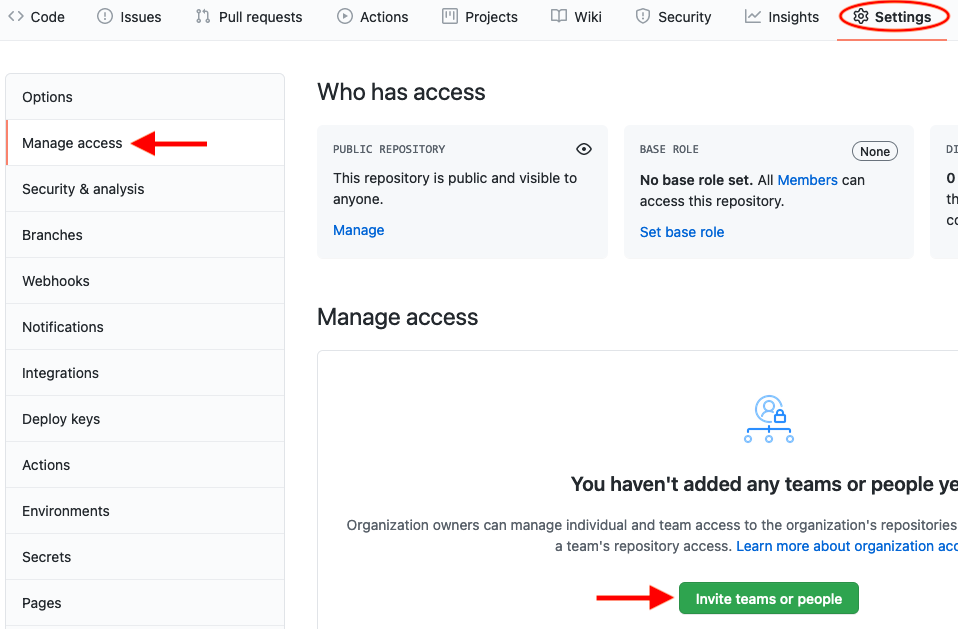
Give your team access to your repo.
Next, enter the GitHub username for your partner. Be sure to grant them the proper level of access.
Admingives them the ability to delete the repo from your account at any time. TheWriteandMaintainroles allow them to edit the repo but not delete it.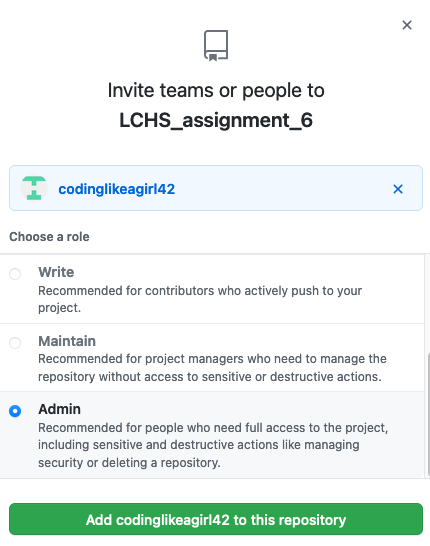
Decide how much control you want to give your partner.
When your partner logs into GitHub and visits the project URL, they will see an invitation to join the repository.
Repeat steps 1 - 3 for each member of your team.
Partners: Clone the Project
Each partner on the project should clone a copy of the repository to their own device.
You and your team can now push changes up to GitHub and pull updates down to your machines. If you need a reminder how to do this, check out the Communication Log assignment.
Ready to Go!
Whew! This process gets easier with practice, and you now have a little more experience under your belt.
Now it’s time to git back to building your game!